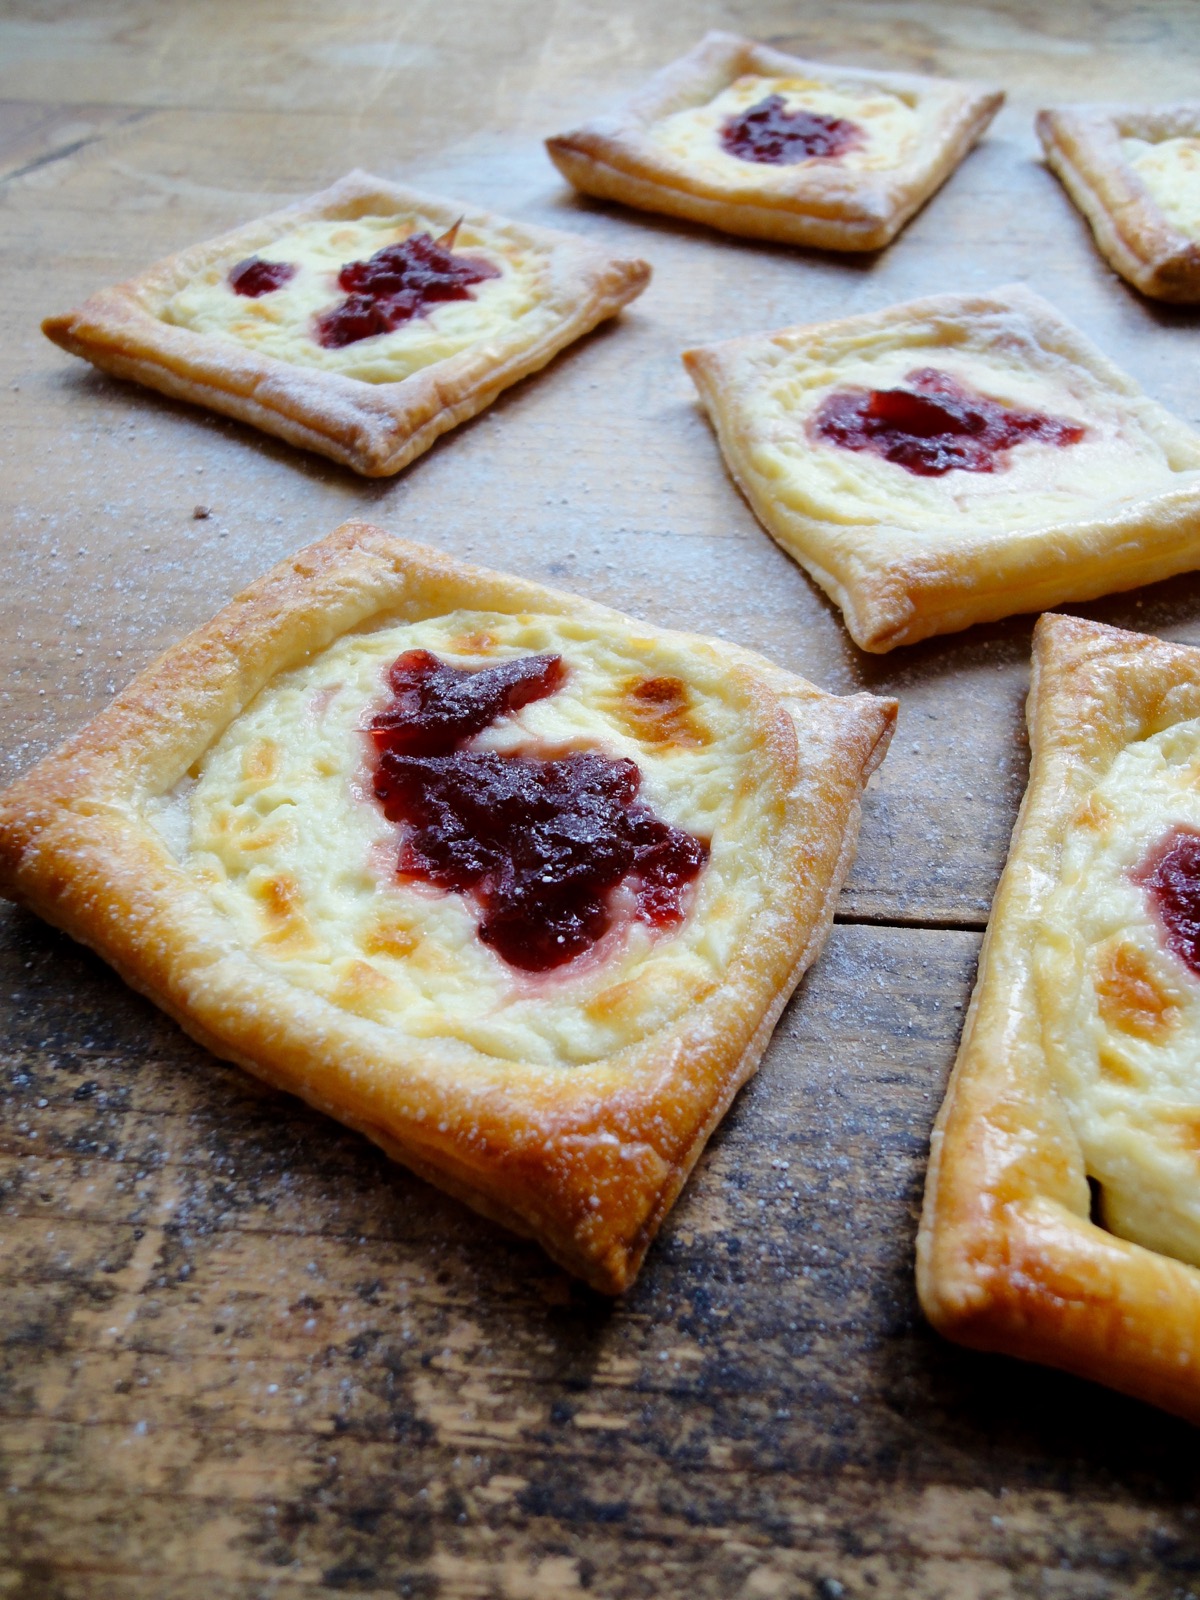
Cream Cheese & Cranberry Danish

Back when I worked at Starbucks, they sold cream cheese danish’s. It sold quite well and a lot of it landed in my belly too, resulting in high quality padding for my bones and organs 😛 Their’s were of course made with real danish dough, while I just use puff pastry. One day when I have the patiences, I will try my hand at danish dough. Anyways, the past few weeks I have been craving that cream cheese danish. But I was thinking too much about it that I got scared of the thought of making it. The one sold at Starbucks was fully covered, like McDonald’s apple pie. That would require me to use more puff pastry so I decided to make an open-faced one.
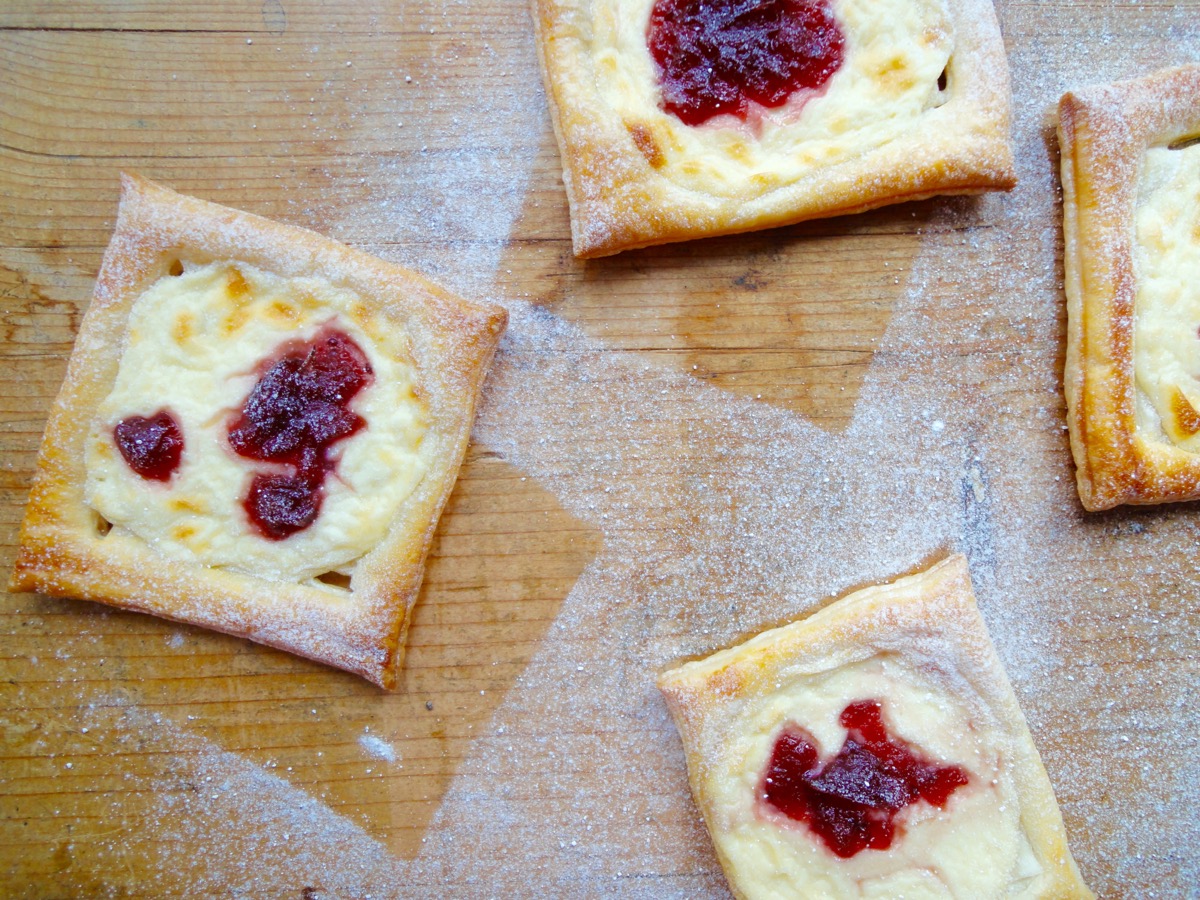
I was also feeling a little left behind seeing that many other bloggers were churning out pumpkin recipes (it’s the season) and I’ve got no pumpkin recipe to give. Mainly because cutting a whole pumpkin is scary and buying it sliced is expensive. Canned pumpkin is not much of an option because it’s also expensive and why should I buy canned pumpkin puree when I could ‘easily’ make my own. So, instead of joining the crowd of pumpkin recipe churners, I decided to go with Cranberries. It’s cranberry season too and my local grocery store sells cranberries! Last year, I made 4 – 500 ml jars of cranberry jam and I still have one more jar left in my pantry. The jam that I use here is from last years batch and I am going to make a new batch of jam soon. Only thing is, I used too little jam on it in the pictures here. If you want more jam, do add more than just a teaspoon. 🙂

Potato Quality Step 4
Ingredients
- 1 rectangle or square (320g) Puff Pastry
- 1 Egg
- 1 Tablespoon Water
- For dusting Powdered Sugar
Cream Cheese Filling
- ½ - ¾ cup Cream Cheese
- 2 Tablespoons Powdered Sugar
- 1 teaspoon Vanilla Extract
- 1 - 1½ teaspoon per Danish Cranberry Jam
Directions:
- Pre-heat oven to 190°C (375°F). Line a baking tray with parchment paper.
- Roll out puff pastry and cut into even squares or rectangles. (I got around 15)
- Transfer to baking tray.
- With a sharp knife, score an inner rectangle or square but do not cut all the way through. (See picture above. Helps puff pastry puff up without spilling the filling)
- With a fork, prick the centre of the puff pastry rectangle.
- In a small bowl, mix cream cheese, powdered sugar and vanilla extract.
- Place about 2 teaspoons (or as you see fit) in the centre of the puff pastry.
- Top cream cheese with 1 – 1½ teaspoon of cranberry jam (or any jam of your choice).
- In another small bowl, beat an egg with 1 Tablespoon of water.
- Brush the edges of the puff pastry .
- Bake for 15-18 minutes or till the pastry is golden brown and puffed up.
- Cool on a wire wrack and dust with powdered sugar once completely cooled.
Tips:
- Always work with cold puff pastry.
- Not a fan of sweet stuff? To make it savoury, simply omit the sugar, vanilla and jam. Instead add some salt, herbs, garlic granules to the cream cheese and top with gravlax after it’s baked.
- Conversion Table
Enjoy and happy baking!

P.S: Don’t know why, but my hubby actually ate 4-5 pieces of these Danishes. He ain’t a fan of sweet stuff. 😮

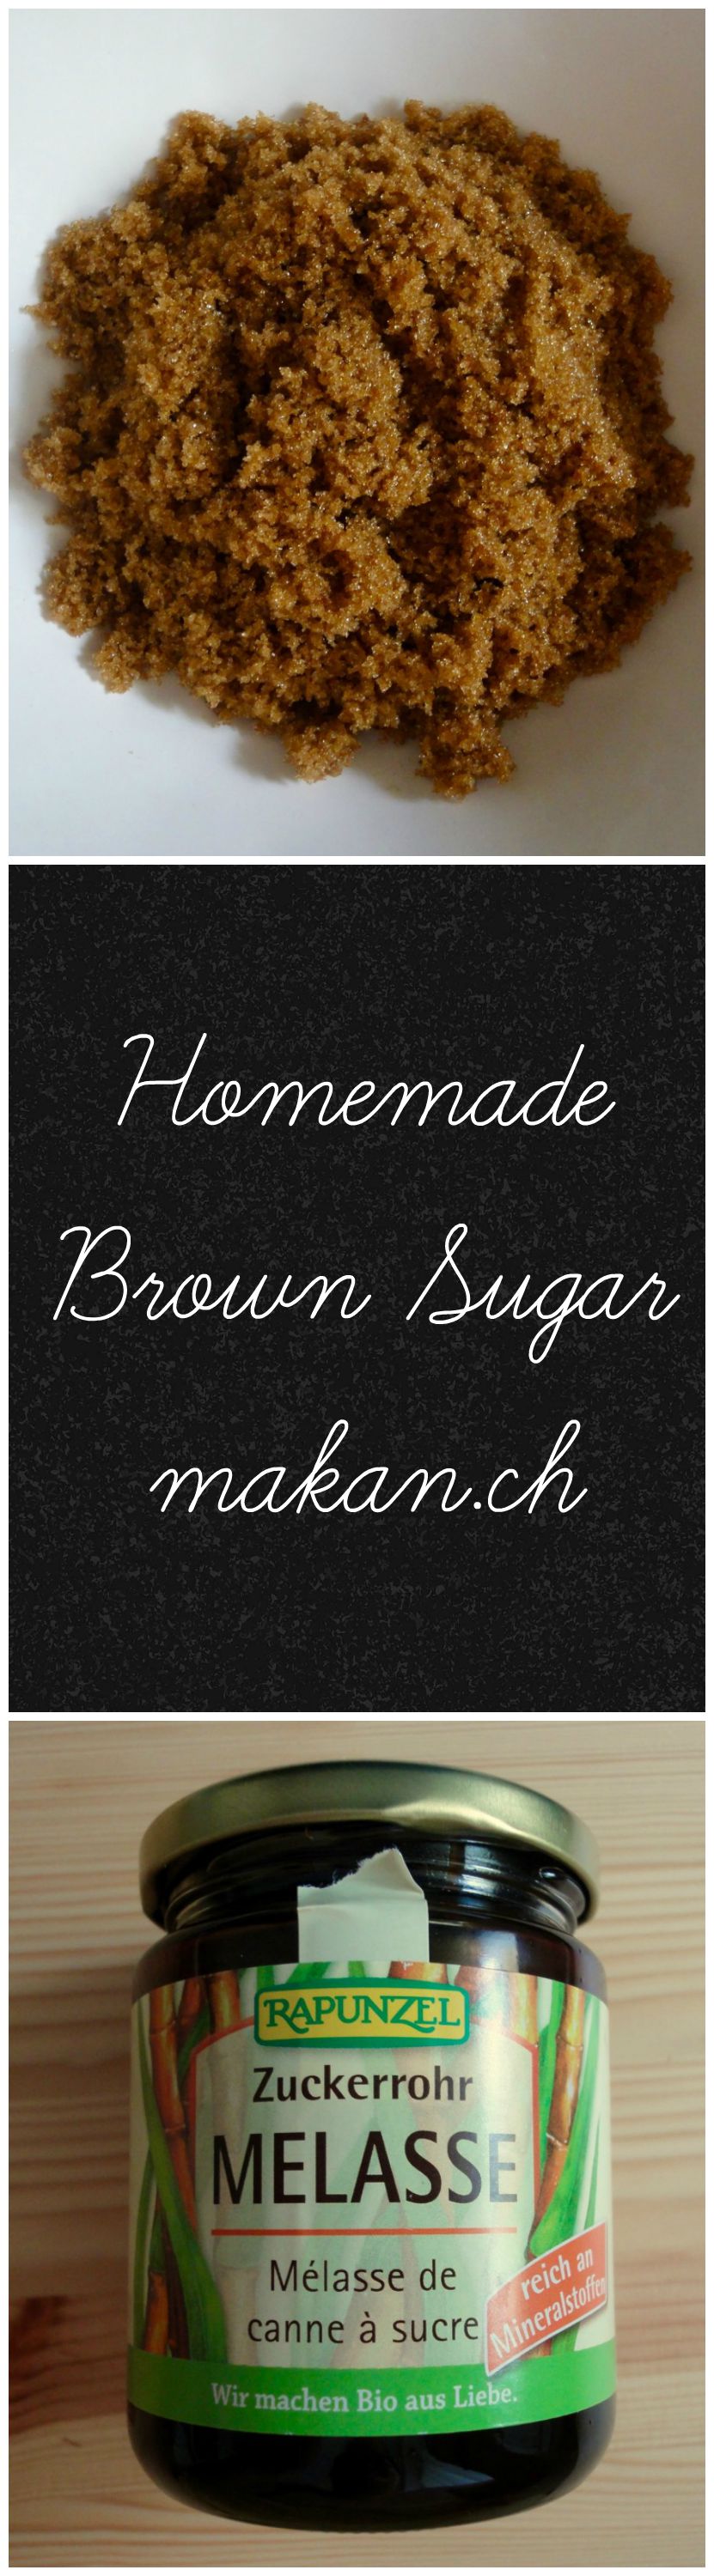
Homemade Dark Brown Sugar
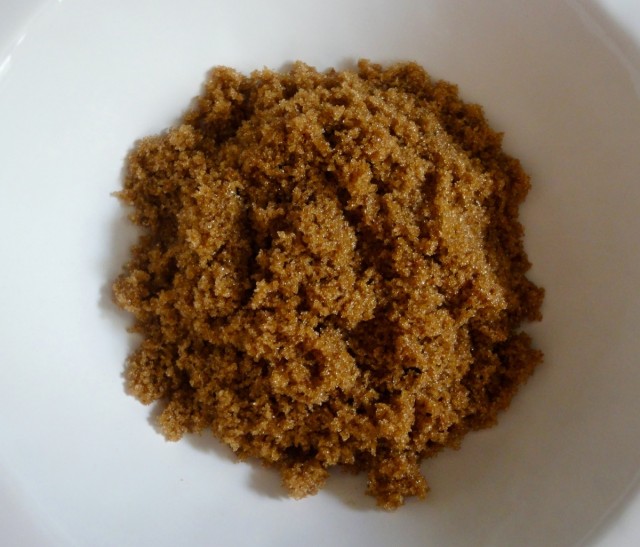
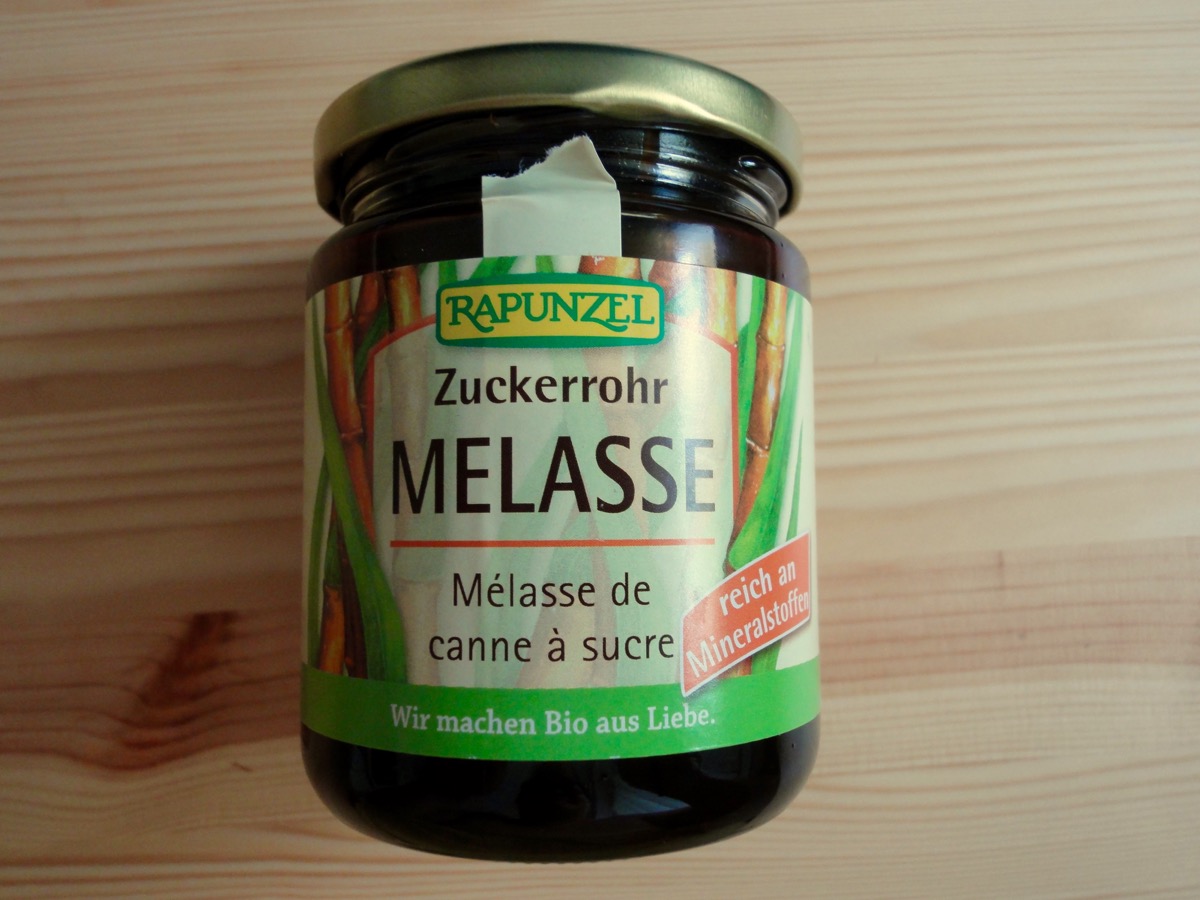
Many recipes call for brown sugar, especially cookies. But in Switzerland, you can’t easily get soft packed brown sugar in grocery stores…and even if they have it, it’s pricy. Since brown sugar is just regular white sugar with molasses, why not make it at home? The other part was finding molasses! In the regular stores, the only have Tafelmelasse which is a molasses spread for bread. It’s very thick and syrupy, almost like a different grade of maple syrup. I tried that one out but the robust taste of molasses was greatly missing. So I went to Alnatura which is a Bio Shop (Organic) near me and found Zuckerrohr Melasse (Blackstrap Molasses). So all you need is plain white sugar and molasses, blitz it up in a food processor and you are all set!
Ingredients
- 1 cup Sugar
- 1 tablespoon Molasses
Directions :
- Add ingredients to food processor.
- Blend until combine.
- Store in an air tight container.
Tips:
- For light brown sugar, reduce blackstrap molasses to half.
- Blackstrap molasses is also known as treacle.
- Cups to Grams conversions
Enjoy!

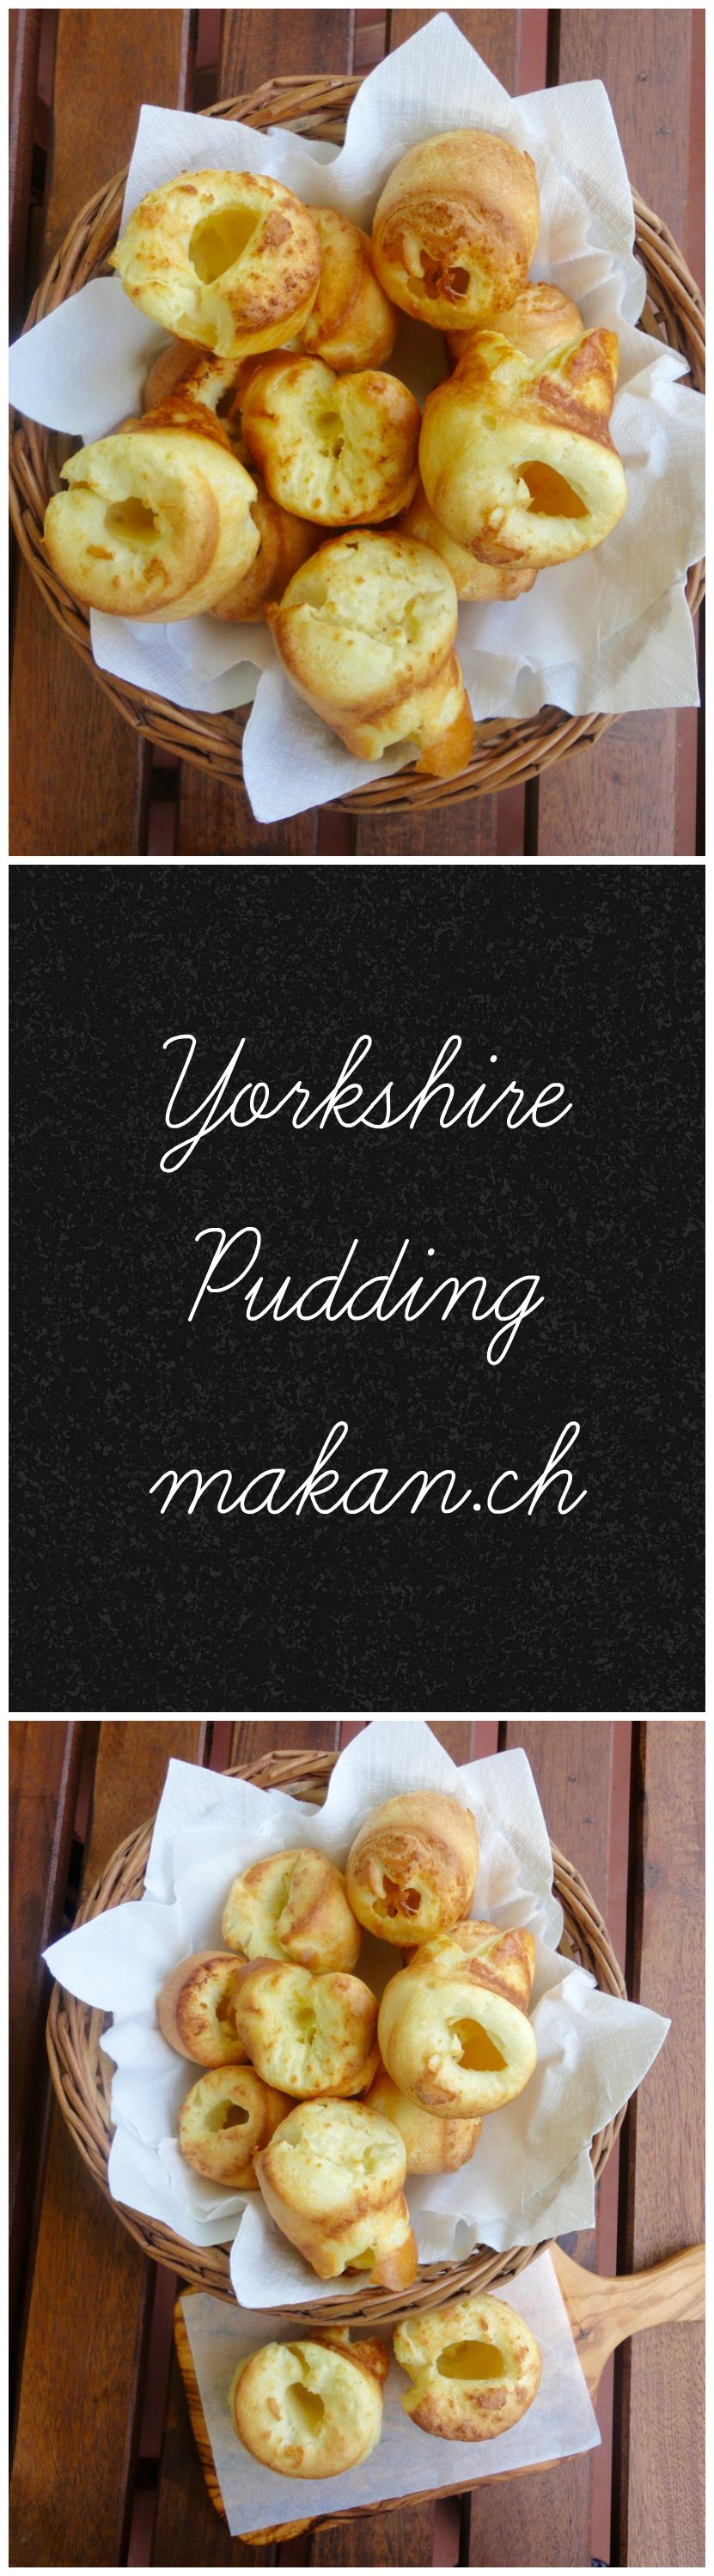
Yorkshire Pudding

Yummy and easy, a traditional Sunday roast companion. But I’m no rich woman to have red meat on a weekly basis. I really wanted to try these out, so I went on Google mode and I was finally happy with one (after 3 times of baking horrible ones). I make these as my ‘quick’ lunch and eat it with some brown gravy.
Adapted from Nanna’s Yorkshire Pudding Recipe. There are only 2 things I have tweaked in this recipe which is using butter instead of shortening because I simply love butter, and instead of using hot water at the end, I use ice cold water. Keep a close eye when using butter as butter burns faster than shortening. I use a 12 hole muffin pan from IKEA (drömmar). You can use a regular muffin pan or of course, a Yorkshire pudding pan.
Ingredients
- ¾ cup Milk, cold
- ¾ cup All-Purpose Flour
- 1 nos Egg
- ½ teaspoon Salt
- 1 tablespoon Cold Water
For Baking
- 1-2 teaspoons per muffin cup Butter or Shortening
Directions:
- Preheat oven to 220°C.
- In a big measuring cup, whisk together egg and milk together till frothy. Add salt and flour slowly while whisking. Try to incorporate as much air as you can. Keep in the fridge till ready to use.
- Add butter to muffin pan and put it in the preheated oven. Keep a close eye on it as butter burns fast.
- While it’s in the oven, take out the batter and add the ice cold water. Whisk vigorously.
- Just as the butter is smoking a little – about 3 minutes, take it out and immediately pour the batter equally (about half full) into the muffin pan.
- Return to oven and bake for 20 minutes or till golden brown.
- Serve immediately.
Tips:
Enjoy!

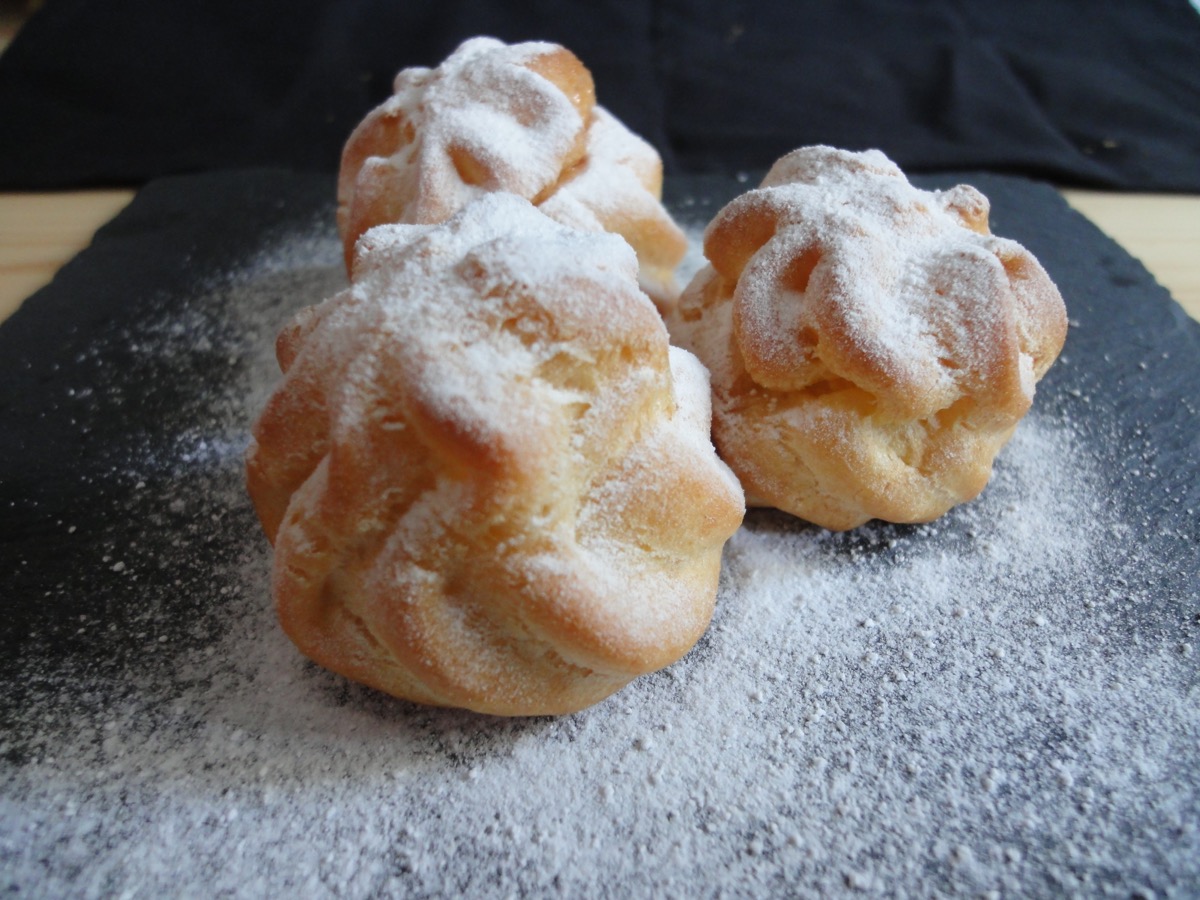
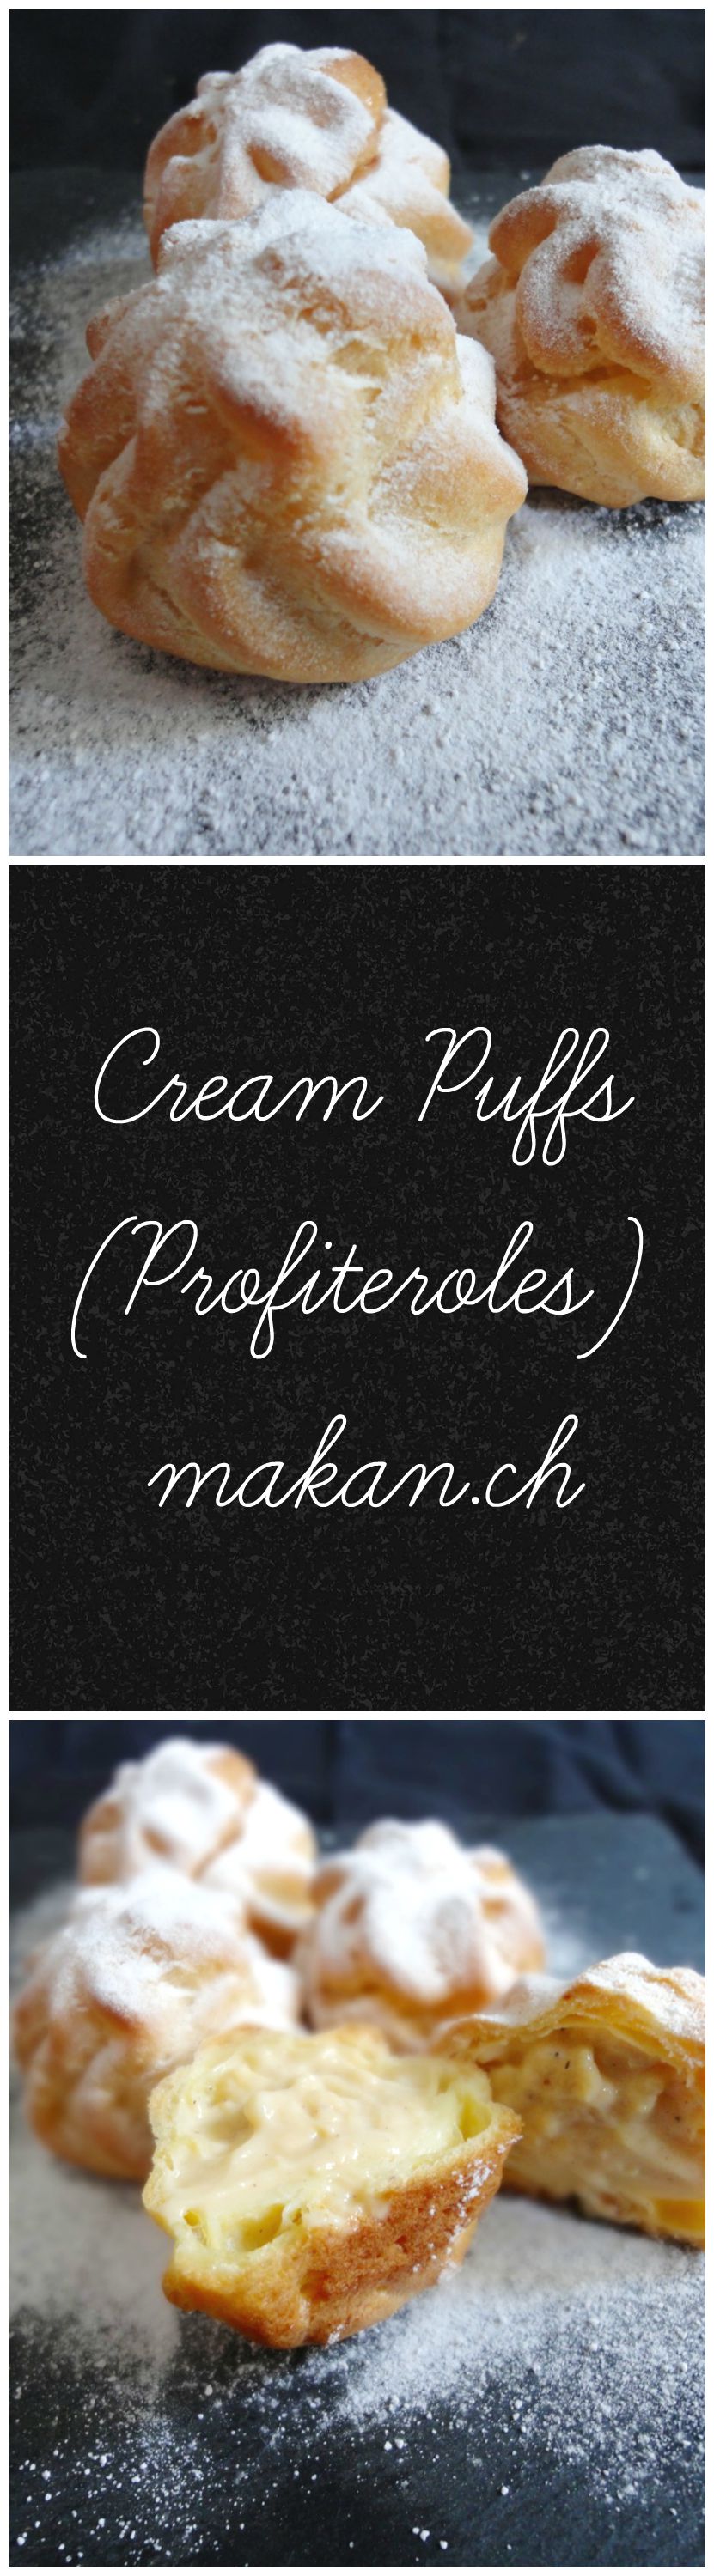
Cream Puffs (Profiteroles)
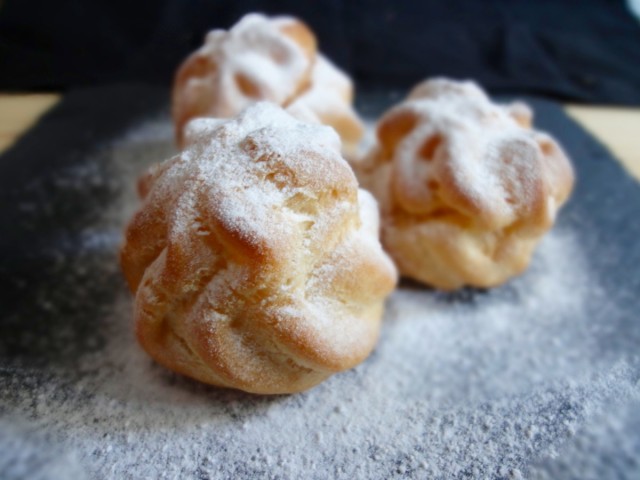

Cream puffs are also known as profiteroles. The pastry shell or bun is known as choux pastry or pâte à choux (pata shoe). These little pastries drove me crazy back in May. I was obsessed trying to get the perfect choux pastry. One day I even made five different choux pastries from three different recipes using various methods and baking temperatures. It all tasted good, but I could not achieve a puffy pastry that didn’t taste bland, held it’s shape and didn’t go all soft the next day.
All in all, I’ve tried at least 10 times before I found the perfect combination. It might not work for all, but it has certainly worked for me…though not all the time. The eggs in this recipe are very very important. Not all eggs weigh the same, unless you use boxed eggs (as I call it). I’ve not tried using boxed eggs because it’s not available in grocery stores here. The only time I used it was when I worked in a restaurant. I normally use two medium sized eggs that weigh approximately 53g. But what I do is, I whisk the two eggs into a measuring cup and use as I need. Most of the time I use the whole mixture, but when the eggs are slightly bigger then I do not use all of it. The paste can’t have too much liquid, otherwise the shape would not hold. That, for me is the best way to go about with this.
The temperature is also very very important, as you want nice and puffy choux pastries and not ones that are flat, undercooked or overcooked. I learnt from Baker Bettie’s classic cream puff recipe where she preheated the oven to 220°C (425°F) but increased it to 230°C (450°F) when she put the pastries in the oven and baked it for 10 minutes then reduced the heat to 170°C (350°F) for 15 minutes. This worked perfectly for me and the results were perfect. The only thing I did a little different was, after the pastries were baked, I poked a hole at the bottom of it to release the steam in it. Then I returned it to the oven 100°C (210°F) for another 15 minutes to ‘dry’ it out. This step is totally optional as I just wanted my pastries a little drier.
Getting the recipe together was another thing. In some recipes, like this one…I use both imperial and metric system.
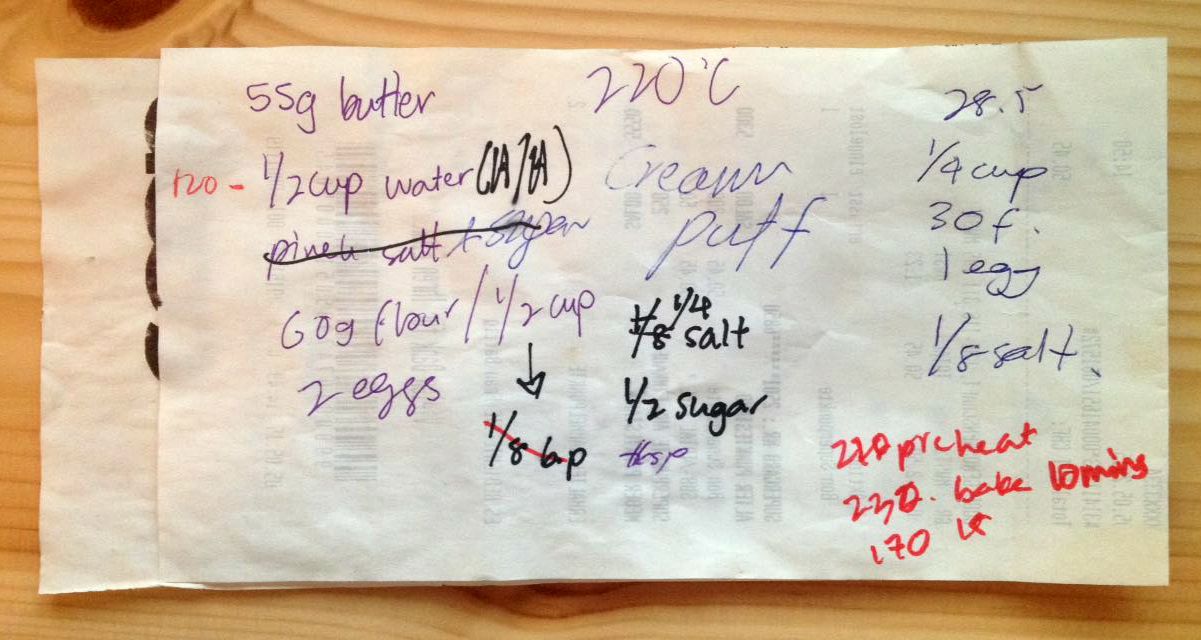
My horrible writing on a grocery receipt. This was my recipe that I have been using for 3 months.
Most recipes either call for water or milk. I find that using water keeps the pastry hard while milk makes it soft after a few hours, but water makes the pastry taste super bland while milk give it a very nice taste. So, I use both! Half milk, half water. The milk I use is pasteurised full fat (3.5 %) milk. Sometimes I do use pasteurised skimmed milk (2.5 %) and got the same results.
The pastry cream or crème pâtissière is adapted from Martha Steward. Sometimes when I’m lazy I just use Bird’s custard and add some vanilla beans to it.
Choux Pastry
- ½ cup (55g) Butter
- ¼ cup (60ml) Water
- ¼ cup (60ml) Milk
- ½ cup (60g) All Purpose Flour
- 1 teaspoon Sugar
- ¼ teaspoon Salt
- 2 nos Eggs
Crème Pâtissière
- 1 cup Milk
- 3 nos Egg Yolks
- 3 tablespoons Sugar
- 3 tablespoons All Purpose Flour
- 1 pod Vanilla Pod
Directions:
- Choux Pastry
- Pre-heat oven to 220°C (425°F). Prepare a baking try and line with parchment paper.
- In a medium sized pot, add butter, milk, water, sugar and salt and boil over medium high until butter has melted.
- Reduce heat to medium and quickly stir in the flour. Keep on stirring and cook off the moisture in the dough until it starts to pull away from sides and forms into a ball. Should take around a minute or two.
- Take the dough off heat and let it cool down for 5 minutes.
- Whisk eggs.
- Once dough has cooled off, slowly pour in the eggs into the pot and stir continuously. The batter should look smooth, glossy and thick. (You can also use a hand mixer to stir in the eggs, it does take a little longer and requires more energy if you mix it by hand.)
- Place batter into a piping bag with star tip or round nozzle and pipe onto prepared baking tray. Around 1.5-inch diameter. Starting in the middle, going once around, then up 3/4 around.
- Wet finger to flatten the tip of the pipped batter. This is to prevent the tip from burning.
- Place the tray into oven (middle rack) and increase the heat to 230°C (450°F) and bake for 10 minutes.
- After 10 minutes, reduce the heat to 170°C (350°F) and bake for another 15 minutes.
- Take the pastries out and let it cool for a minute or two. Then using a small pairing knife, make a hole at the bottom of the pastry.
- In the meantime, reduce the heat to 100°C (210°F).
- Put the pastries back into the oven on the wire rack. Bake for another 15 minutes to dry it out.
- Take out dried pastries and let it cool on a wire rack.
- Pipe cooled pastries with crème pâtissière or chantilly cream.
- Dust with icing sugar or coat with melted chocolate.
- Crème Pâtissière
- Split vanilla pod into half and scrape out the seeds.
- In a saucepan, bring the milk to a boil over medium heat.
- In a small bowl, whisk egg yolks, vanilla seeds and sugar.
- Add flour and mix until smooth and free of lumps.
- Take 1/4 cup of the warm milk and pour slowly while mixing into the egg mixture.
- When the remaining milk begins to boil, add it slowly into the egg mixture. Mix well.
- Pour egg and milk mixture back into the saucepan and cook over high heat and whisk continuously until pastry cream thickens and boils, about 1 minute.
- Reduce heat to medium and cook while whisking continuously until cream becomes shiny and easier to stir, about 4 minutes.
- Once done, remove from heat and pour into a bowl. Wrap with plastic wrap and leave to cool.
- Once cooled, refrigerate until it has set (3 hours or overnight).
Tips:
- You can make the crème pâtissière a night before intended use.
- Do not use aluminium foil in place of parchment paper. This will cause the choux pastry to burn at the bottom.
- For humid countries, the choux pastry maybe a little “runnier” resulting in difficulty of holding shape while being pipped. What might help is if you chill the choux pastry for 10 minutes before piping.
- It’s best to fill the pastries before being served, otherwise the pastry will get soggy. I once filled it 5 hours prior to serving and it was not too soggy.
- Store pastry in an uncovered or loosely covered container.
- Read the text above for more tips
- Cups to Grams conversions
All the best and enjoy baking!


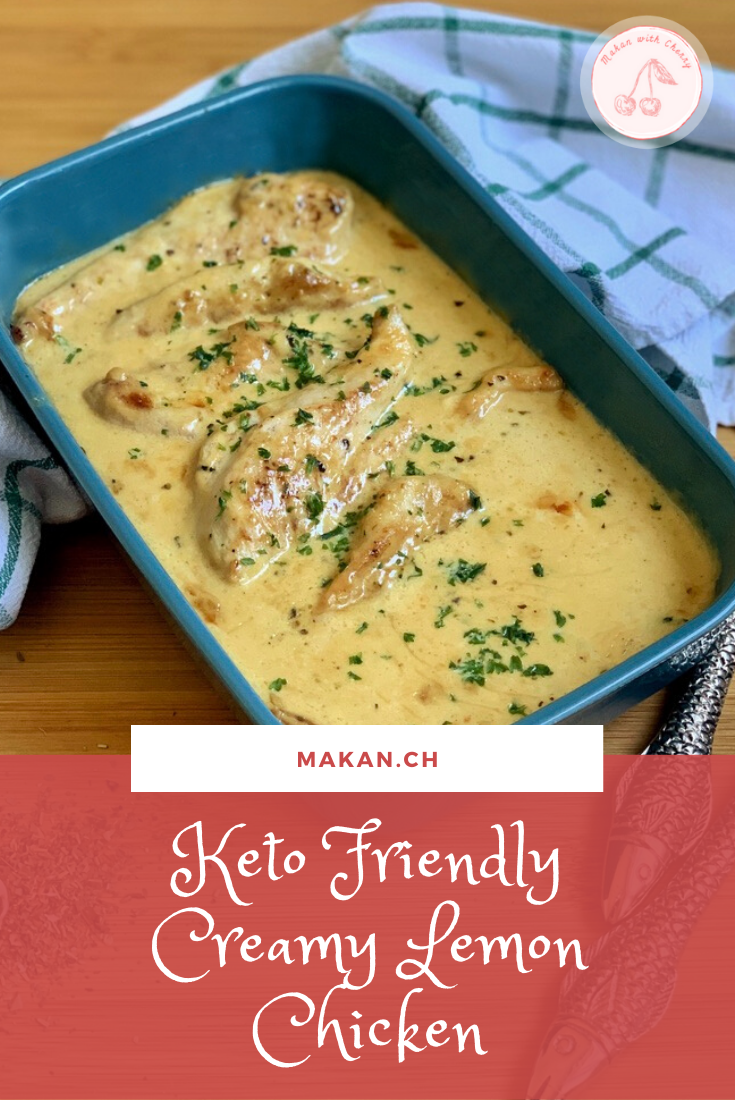
Creamy Lemon Chicken (Keto Friendly)

I’ve known about the ketogenic diet for about 4 years now. I can’t remember if I’ve shared this before, but I only came to know about it after I was diagnosed with PCOS. Thanks to many ladies with PCOS who have shared their journey, I decided to try eating the ketogenic way. It was difficult! As a carb loving person, taking away carbs from my meals willingly required a lot of will power. But I had two goals in mind, one was to lose weight, as I’ve been overweight since I hit puberty. The second was to increase my chances of getting pregnant as I read that the keto diet helps PCOS-ers.

Luck was on my side, and I achieved both! I had a keto baby, and as soon as I stopped expressing breastmilk, the weight started to pile on. I was not eating well at all. I had lots and lots of carbs, as it was the easiest to shove into my mouth while looking after a baby at home. But now, I’ve come back to it since baby has turned into a threenager, it has become way much more manageable to plan meals and give up carbs. Plus, one of my best friends is getting married in March and I’m part of the wedding party…and I told them to get me 2 sizes down of my bridesmaid dress!
So without realising, I’ve always cooked my Creamy Lemon Chicken this way – without any added carbs and I thought I’d share my version with you. There’s also a video below to show how it’s cooked. If you like what you see, please give it a thumbs up and subscribe to my channel. I promise to make more crappy videos and voice-overs for you 🙂
The dish is perfectly customisable to suit your own needs. I’m going to list a few things which you can substitute:
Chicken breast: Chicken thigh, chicken meatballs, or even fish!
Butter: olive oil, coconut oil, avocado oil, lard, clarified butter, etc.
Heavy cream: coconut cream – do expect a coconut-y taste
Thickening agent: you can use parmesan cheese, egg yolks, or xanthan gum.
Ingredients
- 2 pieces, cut into half Chicken Breast
- 1-2 Tablespoons Butter (or any oil for pan frying)
- 250ml / 1 cup Cream
- 1 Tbsp Lemon Juice
- 120ml / ½ cup Chicken Stock
- ¼ tsp Italian Herbs
- To taste Freshly ground black pepper
- To taste Salt
- 3 Tbsp Grated Parmigiano-Reggiano
Directions:
- Add some butter to a frying pan. Add chicken pieces and some garlic, fry till golden brown both sides of the chicken.
- Pour in heavy cream, cook till slightly thickened. Add in lemon juice.
- Sprinkle herbs and freshly ground black pepper. Then add chicken stock. Cook till slightly reduced.
- Add parmesan and mix thoroughly. Add more parmesan or any thickening agent to make the sauce thicker. If you do not wish to add any thickening agent, you can also continue cooking the sauce till it reduces even further. I like to finish it off in the oven at 180°C /360°F for about 10 minutes to free up space on my stove for other dishes.
- Serve with a side of vegetables.
Notes:
- Conversion Chart
- If you are using MyFitnessPal app to track your macros, first copy the recipe link/URL, then go to the MyFitnessPal app to Recipes, select Create a New Recipe, then Add from the Web. Paste the URL, match ingredients and that’s it!
- Always match ingredients to the ones you use. Ingredient nutritional facts differ depending on brand.
- Nutrition Facts (based on my ingredients) : Servings: 2
Amount per serving
519 kcal | Total Fat – 41 g | Protein – 33 g | Total Carbs – 5 g | Fiber – 2 g = NET Carbs – 3 g
Enjoy!
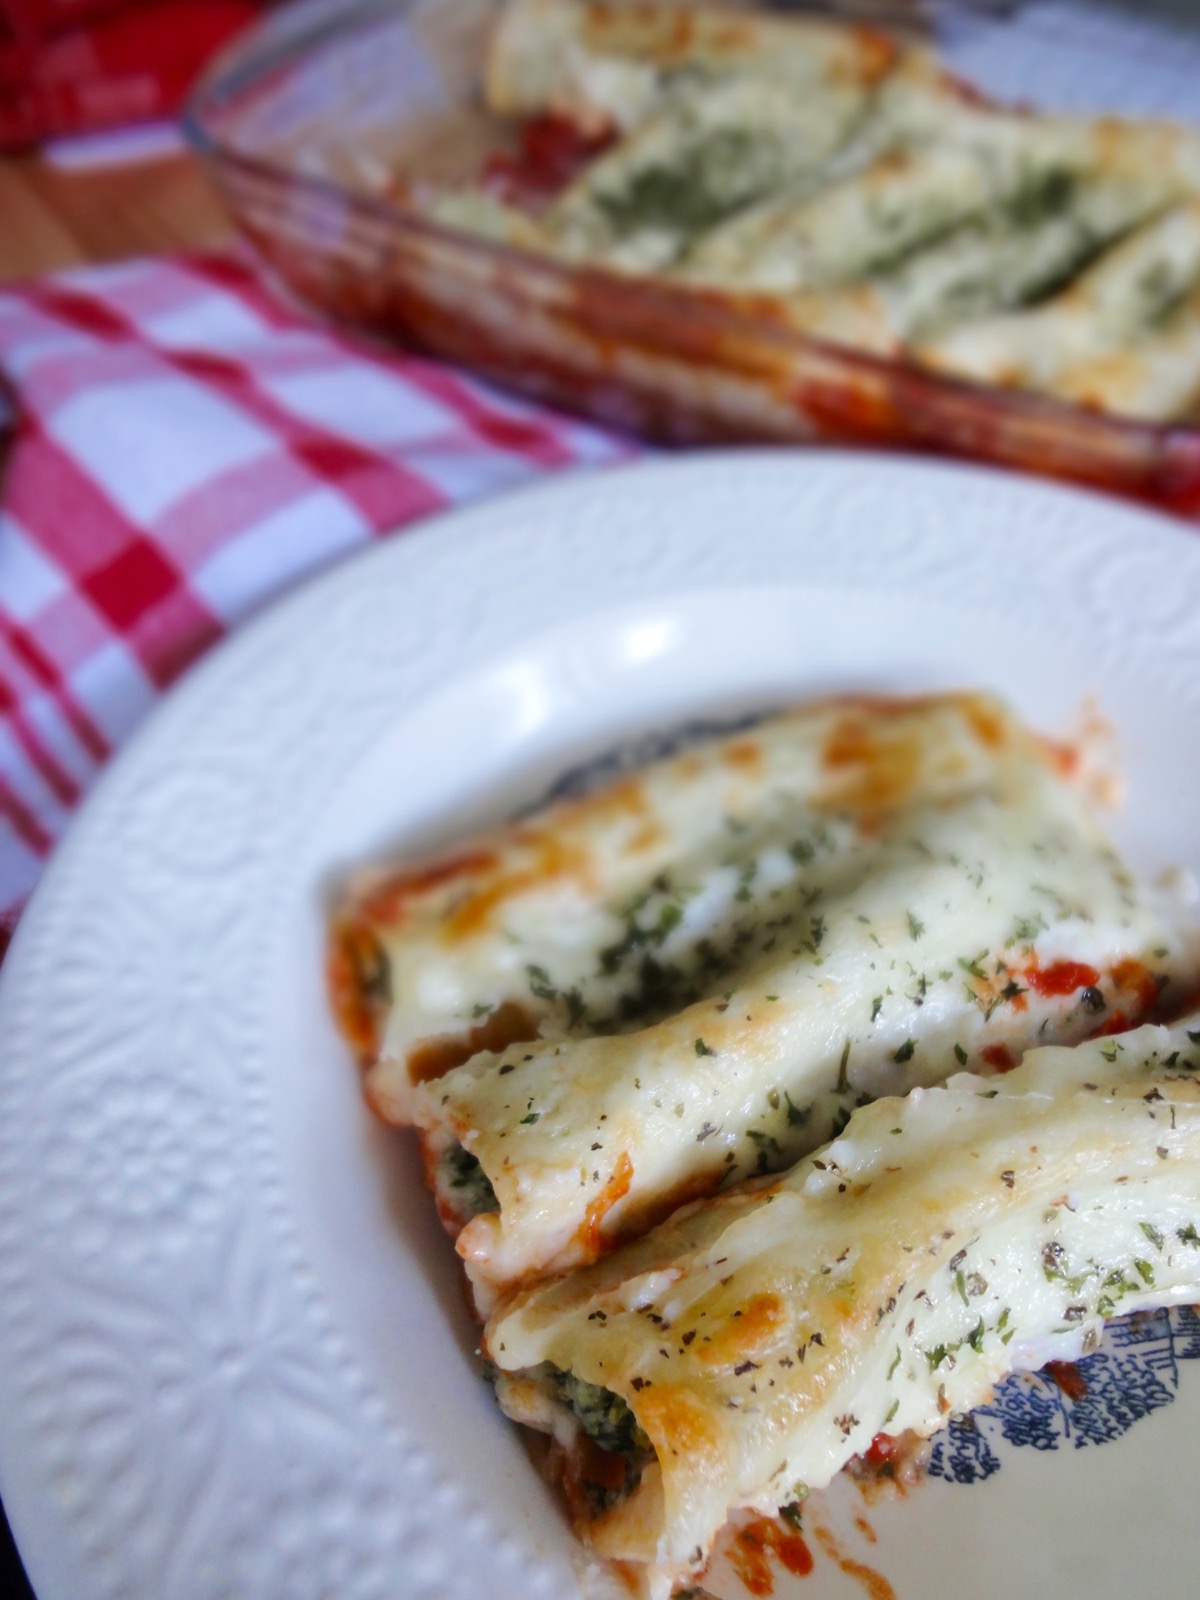
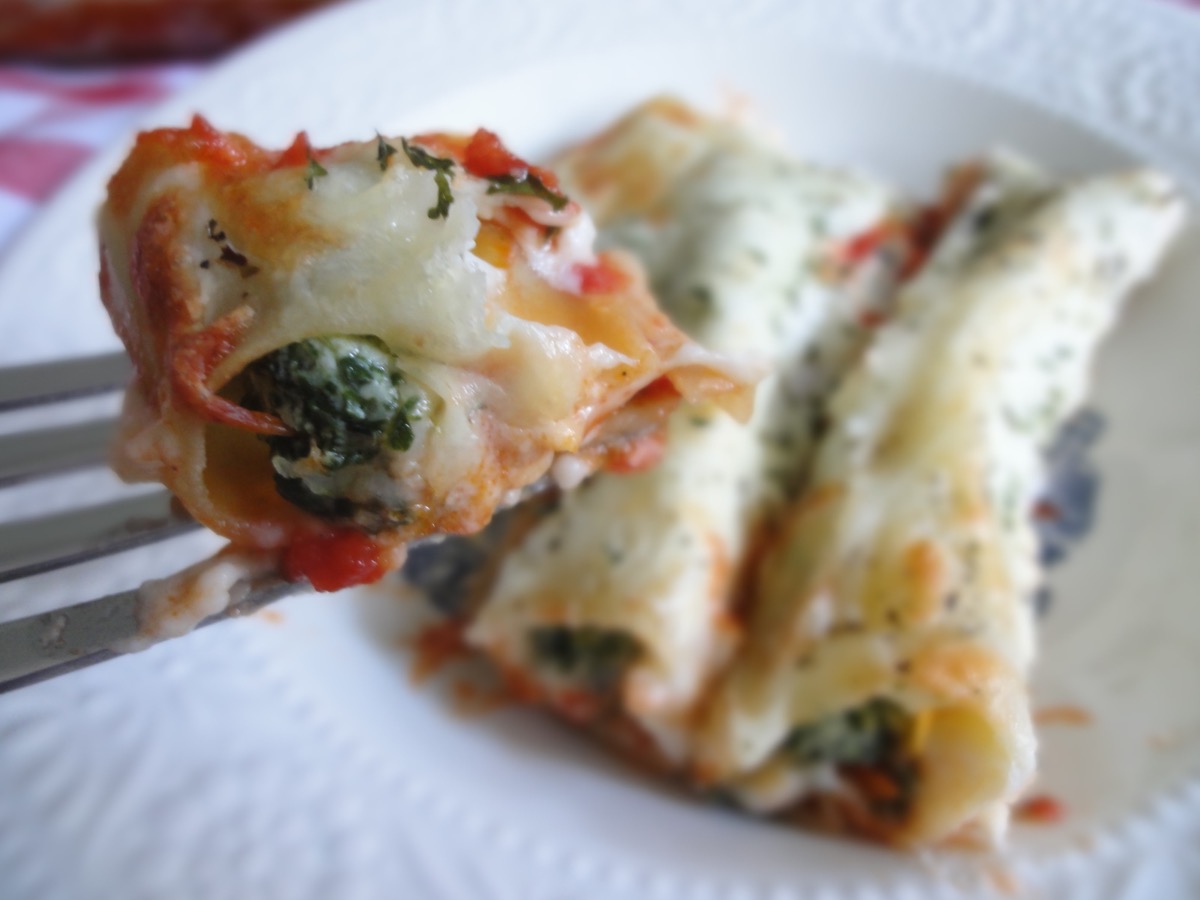
Spinach & Ricotta Cannelloni

Don’t mix this one up with Canolli (the Italian dessert).
I’ve always been intimidated by Cannelloni. Firstly, it took me numerous times to finally remember the name. I kept on saying Callenoni. Just like when I was younger, I just could not pronounce yellow…I kept on saying lellow. My mother probably found it cute though! Lucky for me I had a neighbour, who was probably a teenager or in her early 20’s that taught me the correct pronunciation. I remember her sitting me down on her bed and kept on repeating yellow. Finally, one day I managed to say yellow. Great accomplishment. 🙂
Secondly, it looked difficult and a whole lot of work. It ISN’T! I did cheat a little, but it’s super easy.
Cannelloni is a cylinder pasta that has been stuffed with either minced meat (ragù), spinach and ricotta or fish, laid on tomato sauce (marinara/sugo) then topped with béchamel (besciamella) sauce and baked. It’s similar to American-Italian, Manicotti.
In this recipe, I used Barilla’s Arrabbiata (spicy marinara) sauce.
Spinach & Ricotta Cannelloni
Ingredients
- 12 tubes Cannelloni
- ½ jar (200 grams) Marinara Sauce
- ½ cup Mozzarella, grated
- For garnish Parsley
Spinach & Ricotta Filling
- 2 Tablespoons Olive Oil
- 250 grams Ricotta
- 240 grams Spinach, thawed
- 1 medium Onion, chopped
- 70 grams Parmesan, grated
- To taste Salt
- To taste Pepper
Béchamel
- 25 grams All Purpose Flour
- 25 grams Butter
- 300 ml Milk
- A pinch Nutmeg
- 2 pieces Cloves
- 1 piece Bay Leaf
- To taste Salt
Directions:
- Spinach & Ricotta Filling
- Thaw spinach.
- Sauté onions. Add spinach and continue sautéing for 2-3 minutes.
- Add ricotta, parmesan and seasoning. Mix well.
- Set aside.
- Béchamel
- Pierce the halved onion with cloves and bay leaf (oignon pique).
- Lightly toast flour in a medium sized pot. Do not brown the flour.
- Once it starts smelling like toasted nuts, add butter. Stir well. (This is now called roux)
- Cook roux till it smells like again, toasted nuts.Whisk milk 300ml at a time into the roux, till combined.
- Continue mixing in the rest of the milk, bring to the boil.
- Add oignon pique.
- Season with nutmeg and salt.
- Set aside for at least 15 minutes. Discard oignon pique before using.
- Assembling Cannelloni
- Pre-heat oven to 190°C (375°F) – or go according to instructions on box of the Cannelloni’s.
- Grease a glass dish (13 x 9-inch).
- Spread marinara sauce onto dish.
- Add spinach and ricotta mixture into a piping bag or a small bag (snip off one side of the edge) and fill the Cannelloni’s.
- Arrange filled Cannelloni’s on marinara sauce.
- Once done, pour béchamel over Cannelloni’s.
- Sprinkle some mozzarella on top (optional) and bake for 30 minutes.
- Remove and allow to rest for 10 minutes before serving.
Enjoy!
Spinach & Ricotta Cannelloni

Spinach & Ricotta Cannelloni

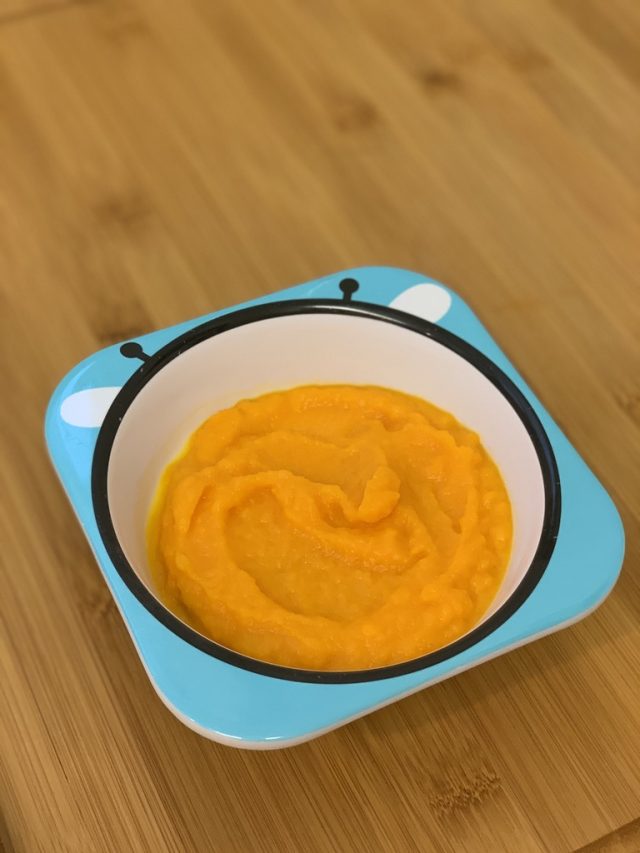
The Baby Edition: Homemade Carrot Purée
Hey everyone! It has been a long time since I’ve posted new recipes. The past few years have been a crazy but joyful roller coaster, as my husband and I welcomed our first child into this world. So after a year and a half of broken sleep, I decided to take some more time off to catch up on all the shows and movies I missed and to just take a step back from my hobby. I never thought a Carrot Purée entry would ever be my comeback to posting! I’m also dabbling into creating YouTube video/tutorials for my recipes and this Carrot Purée recipe is gonna be the first (video below), cause you know, you gotta roll with the trend (though I might be too late since apparently Tik Tok is now a new place for stuff like these, and I’m too old for Tik Tok!).
So like most first time mums, I was one of those that wanted to make homemade baby food for my baby. As soon as my son’s paediatrician gave the green light to start solids, I immediately went online shopping (who has time and the energy to leave the house), got myself a Phillips Avent 4-in-1 baby food maker, baby food storage pots, some cute tableware and cutlery, bibs and of course, the fruits and vegetables itself.
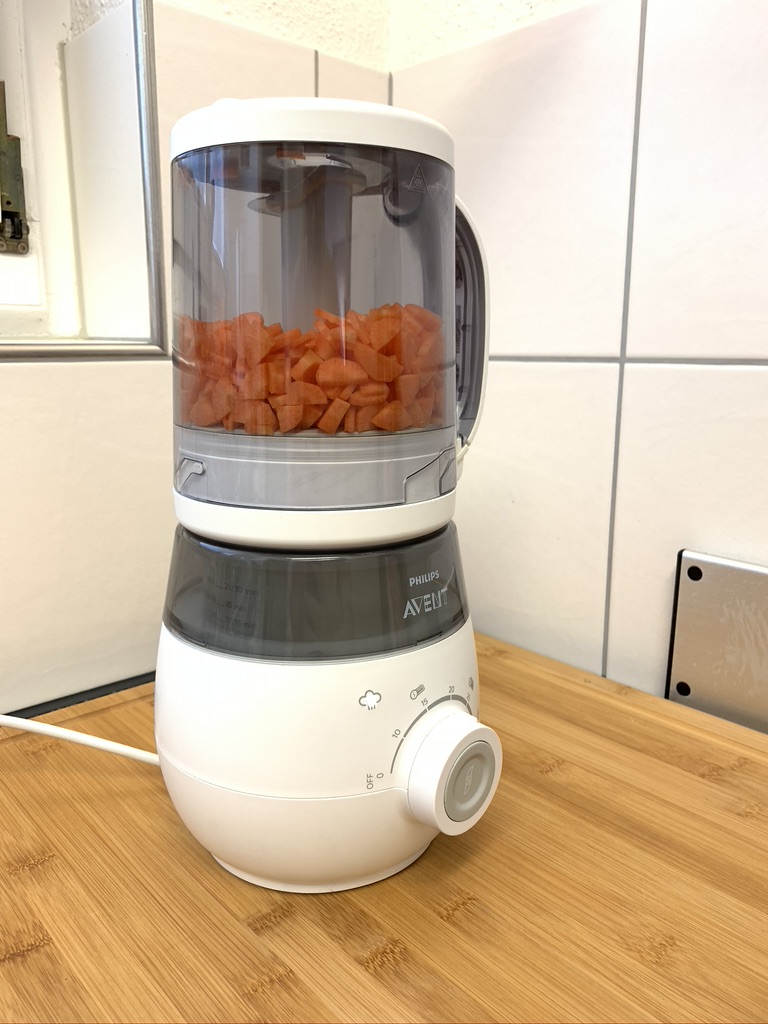
Philips Avent 4 in 1 Baby Food Maker
When the baby food maker arrived, I was SO excited that I immediately washed it and started cooking. I was a nervous wreck while preparing his first purée! Making sure that everything was perfect, from the produce to the consistency, and the taste. That afternoon, my husband and I gathered to feed our son his first solids. TOTAL FAIL.
Turns out, kiddo REALLY hates carrots, even till now at 3 years old – probably from the trauma of his first solids experience. He also was that baby who preferred store-bought baby food. I gave in, and accepted that he likes store-bought baby food and I kept the baby food maker away. After a bit, I tried again. Still nope. So when he started having stage 2 (basically over-boiled consistency) of baby food, I’d prepare it in the baby food maker. It’s still in use now as I still make carrot purée for him as he will tolerate it now.
If you are a new parent, I’d suggest you to read up about feeding/cooking for your baby. The Pediatrician’s Guide to Feeding Babies and Toddlers : Practical Answers To Your Questions on Nutrition, Starting Solids, Allergies, Picky Eating, and More (For Parents, By Parents) book helped me a lot.
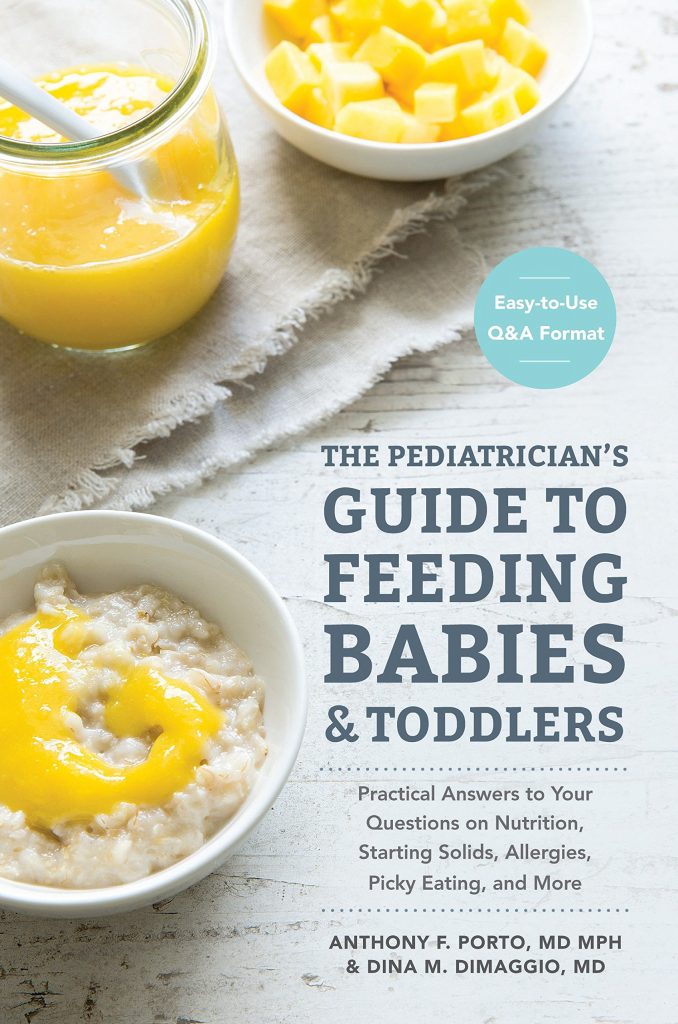
The Pediatrician’s Guide to Feeding Babies and Toddlers : Practical Answers To Your Questions on Nutrition, Starting Solids, Allergies, Picky Eating, and More (For Parents, By Parents)
Check out my first full recipe video here!
Ingredients
- Carrots
- Butter*
Directions:
I am using the Philips Avent 4 in 1 Baby Food Maker in this recipe. The directions in this recipe is per manual. If you are using a different steamer, please follow the instructions on the manual.
As you may have noticed, there’s no amount given with the list of ingredients. This is because I simply go according to the max line on the blending jar. I cook in bulk and freeze the rest for another day.
- Peel, rinse and cut carrots into small cubes. (according to the manufacturers manual, food should be cut into cubes no bigger than 1cm)
- Fill 200ml of filtered water* – or till it reaches the 20 minute mark
- Turn the dial to 20
- Once the steamer beeps, turn it to the blending function.
- Open carefully, discard some water for thicker purées, add butter**
- Blend in intervals till desired consistency.
- Serve
Tips:
- * Filtered water : Using filtered water will help reduce the chalk build up in your appliances where water is needed. Regular tap water is fine to use too.
- ** Butter : Add any healthy fats such as butter, olive oil (taste might be too overpowering), or avocado oil. This was the recommendation from my son’s paediatrician and can be omitted. Actually, the recommendation was to use rapeseed oil, but since learning and eating the keto way, I only use these 3 oils for my son.
- Make purées in bulk and freeze them. You can also add it to sauces and soups for an additional veggie boost.
Enjoy!
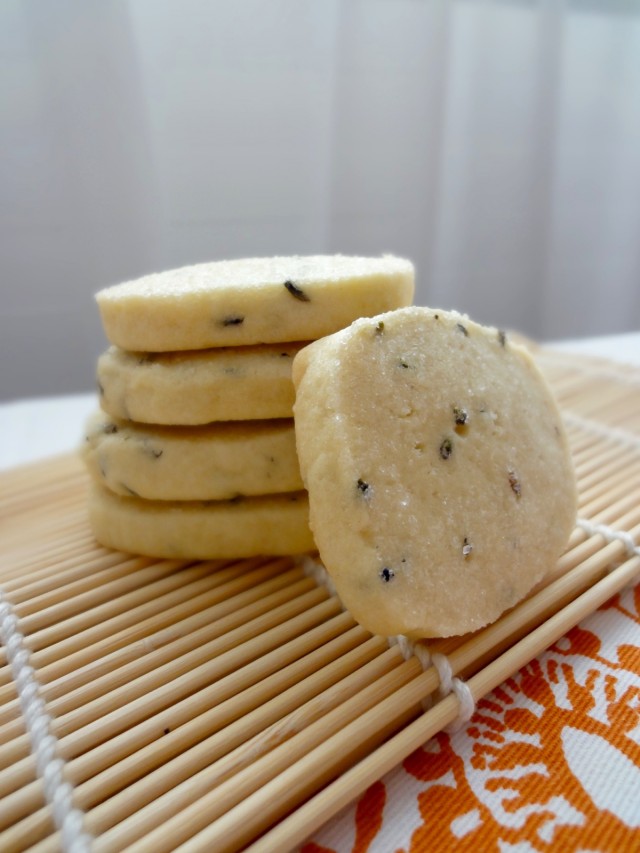
Lavender Biscuits

Never have I thought that lavender could be eaten. All the while I thought it was just for potpourri, decoration, essential oils, room deodoriser, car freshener and stuff like that. However, not all lavender can be consumed. It’s best to get ones that are guaranteed pesticide free which can be found in tea shops. In Switzerland, I get my lavender buds from a tea shop called The Queen Camellia Tea House which is in Lucerne. Though, few weeks ago I went again to find some but they did not have stock of it because of some crop problems. They import theirs from France. A lady there suggested we look at a nearby Reformhaus (a health food shop) as they would have it there.
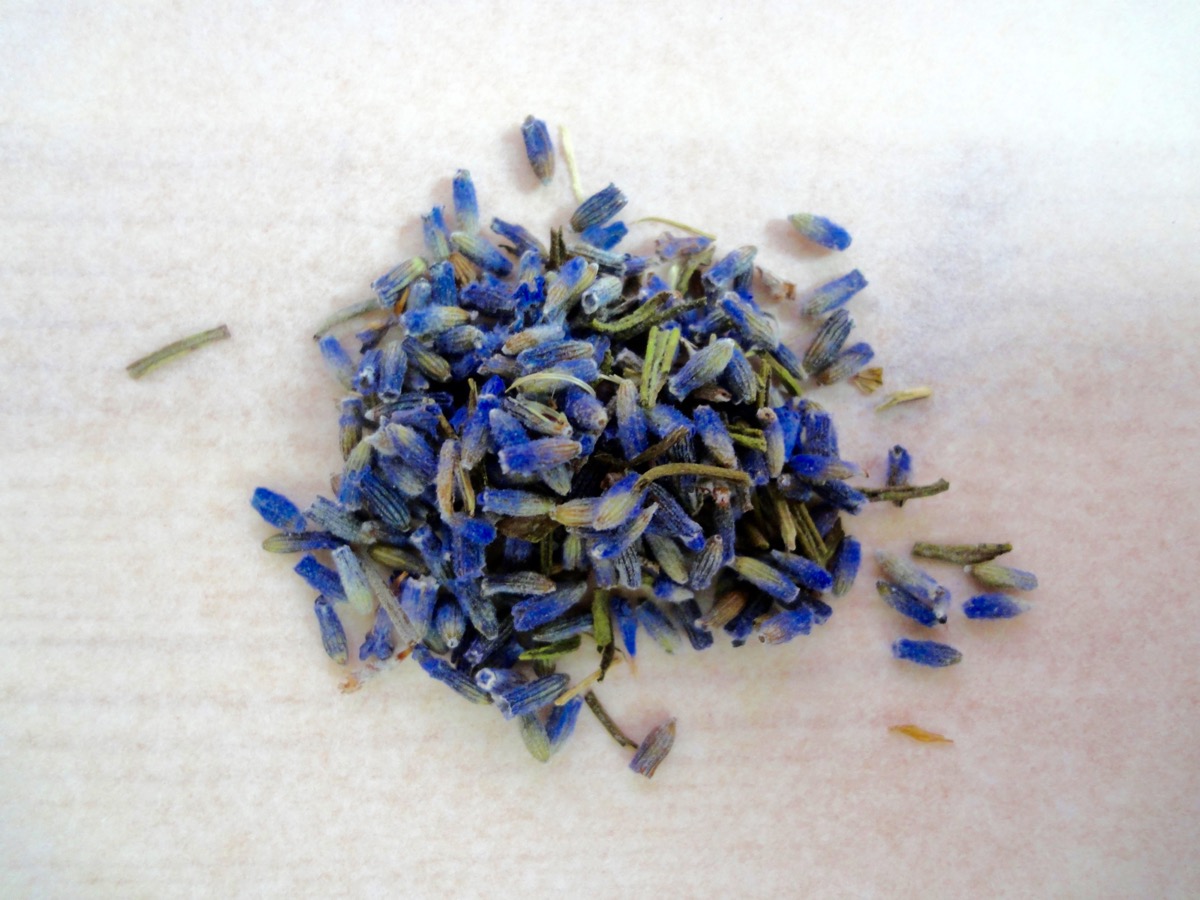
Dried Lavender
I first heard about lavender biscuits during Kate Middleton’s first pregnancy. There was a tabloid article that mentioned she was munching on lavender biscuits as it helps with morning sickness. Don’t know how true that was but I cared more about those lavender biscuits. After nearly 3 years, I finally decided to give it a go. It was really lovely. Since I did not have prior experience cooking with lavender, I thought I might expect some overly pungent lavender smelling biscuits. But no! With the right amount, it’s really really good. The smell is heavenly when baking and it taste’s very special.
Recipe adapted from Bakingdom’s Tea Time Shortbread Cookies
Ingredients
- 1 cup Butter, softened
- ¾ cup Powdered Sugar
- 1 nos Egg
- ½ teaspoon Vanilla Extract
- 2 ¼ cups All Purpose Flour
- 2 tablespoons Dried Lavender Buds
- ½ teaspoon Salt
- ¼ cup Sugar, for dipping
Directions:
- In a large bowl, cream softened butter together with sugar and salt till light and fluffy.
- Add in vanilla extract and egg. Beat till incorporated.
- Add in flour and lavender buds. Mix till combined.
- Divide dough into two and form into logs. Wrap dough in plastic wrap or parchment paper. Dough will be a little sticky and soft (like it needs more flour, but do not), once chilled it will become solid.
- Chill for an hour in the fridge.
- Pre-heat oven to 150°C (300°F). Line two baking pans with parchment paper.
- Remove chilled dough, unwrap and cut into slices about 1/2 – inch thick.
- Dip one side of the dough in sugar.
- Place biscuits (sugar side up) on prepared baking pans, about 2 inches apart.
- Bake for 20 minutes. Biscuits will look pale, so resist baking them longer otherwise it would be too hard.
- Place on wire rack to cool before serving and storing.
Tips:
- Try and stick to 1/2 – inch thickness, otherwise baking time has to be adjusted accordingly.
- If the dough gets too soft while slicing, refrigerate for 10-15 minutes.
- The biscuit itself is not that sweet, so I would not decrease the sugar.
- Store in an airtight container up to a week.
- Dough can be frozen up to 3 months.
- Cups to Grams conversion
Enjoy!


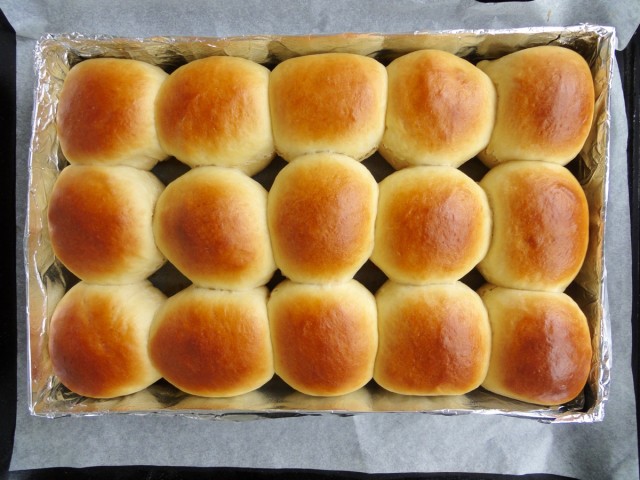
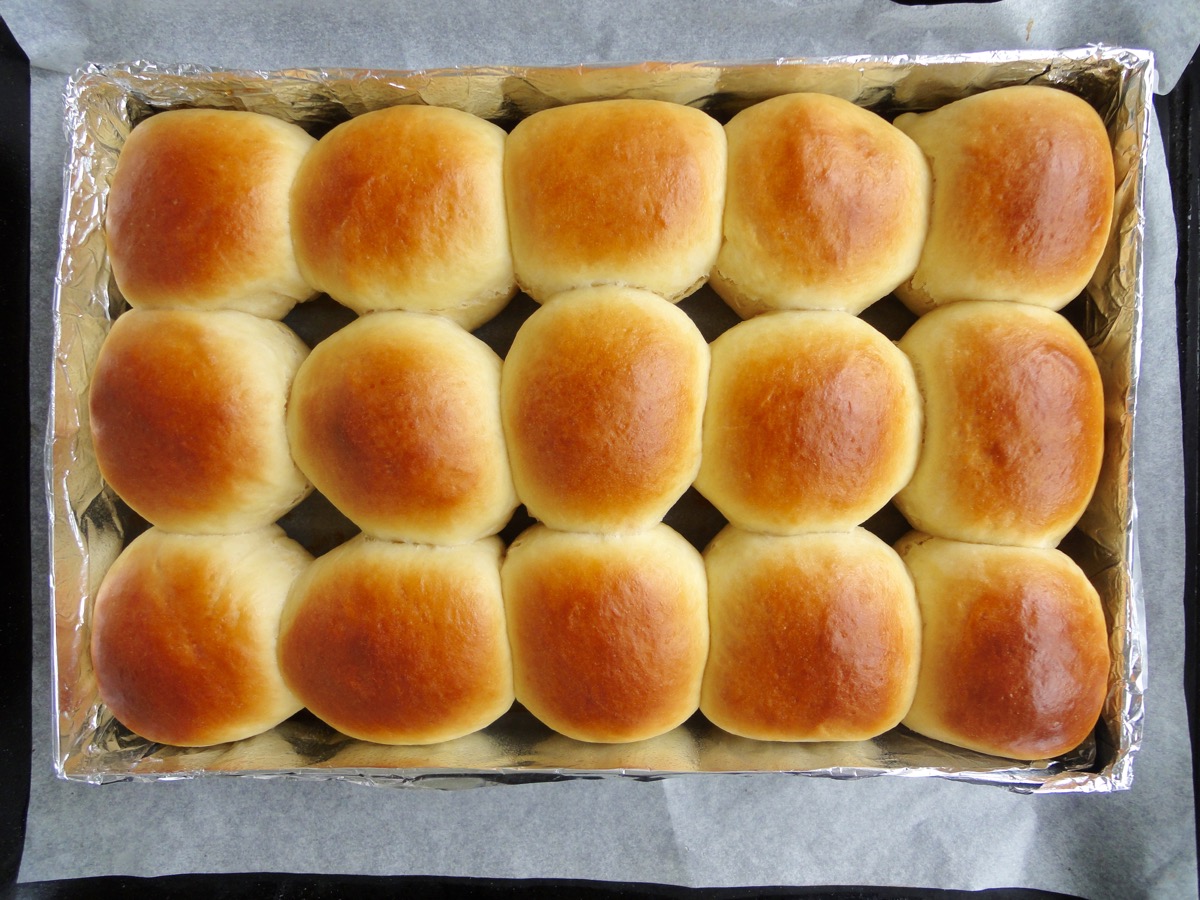
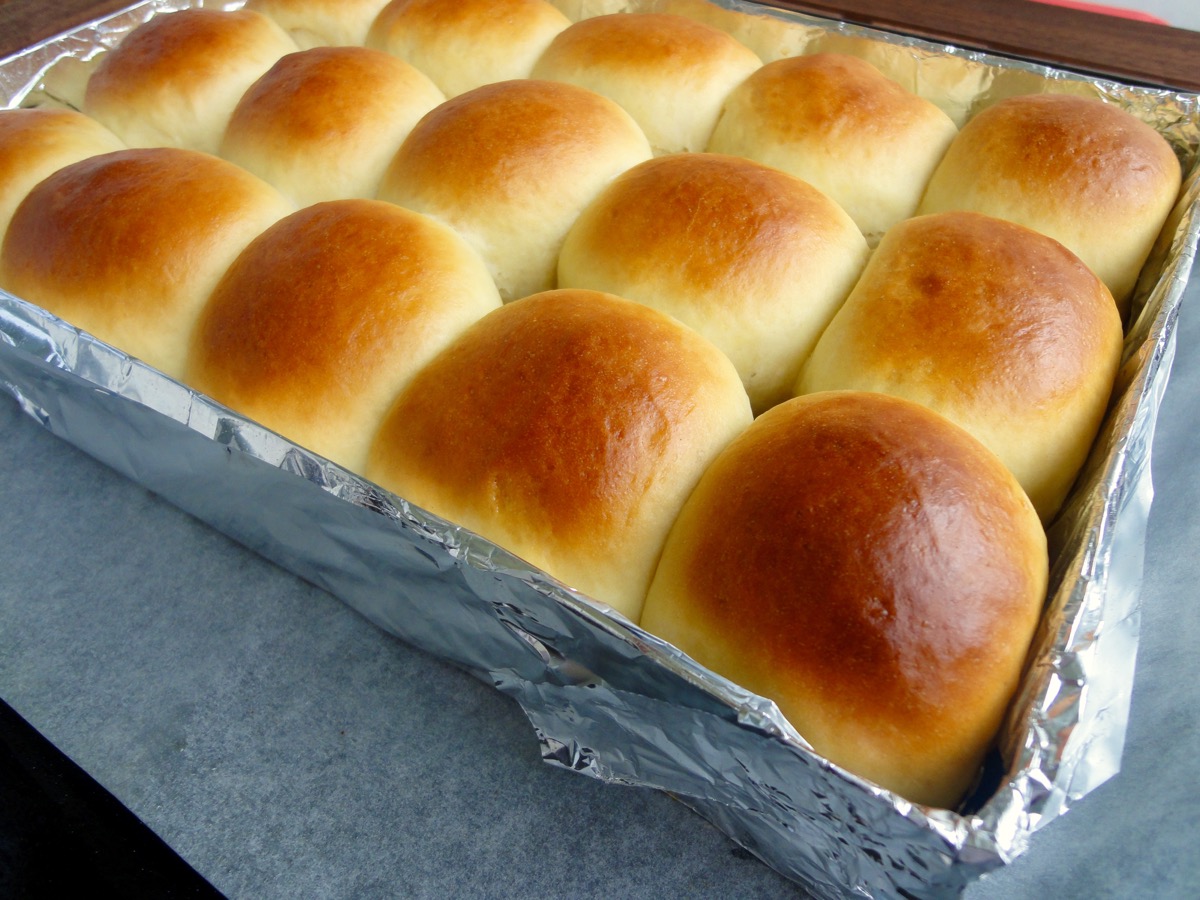
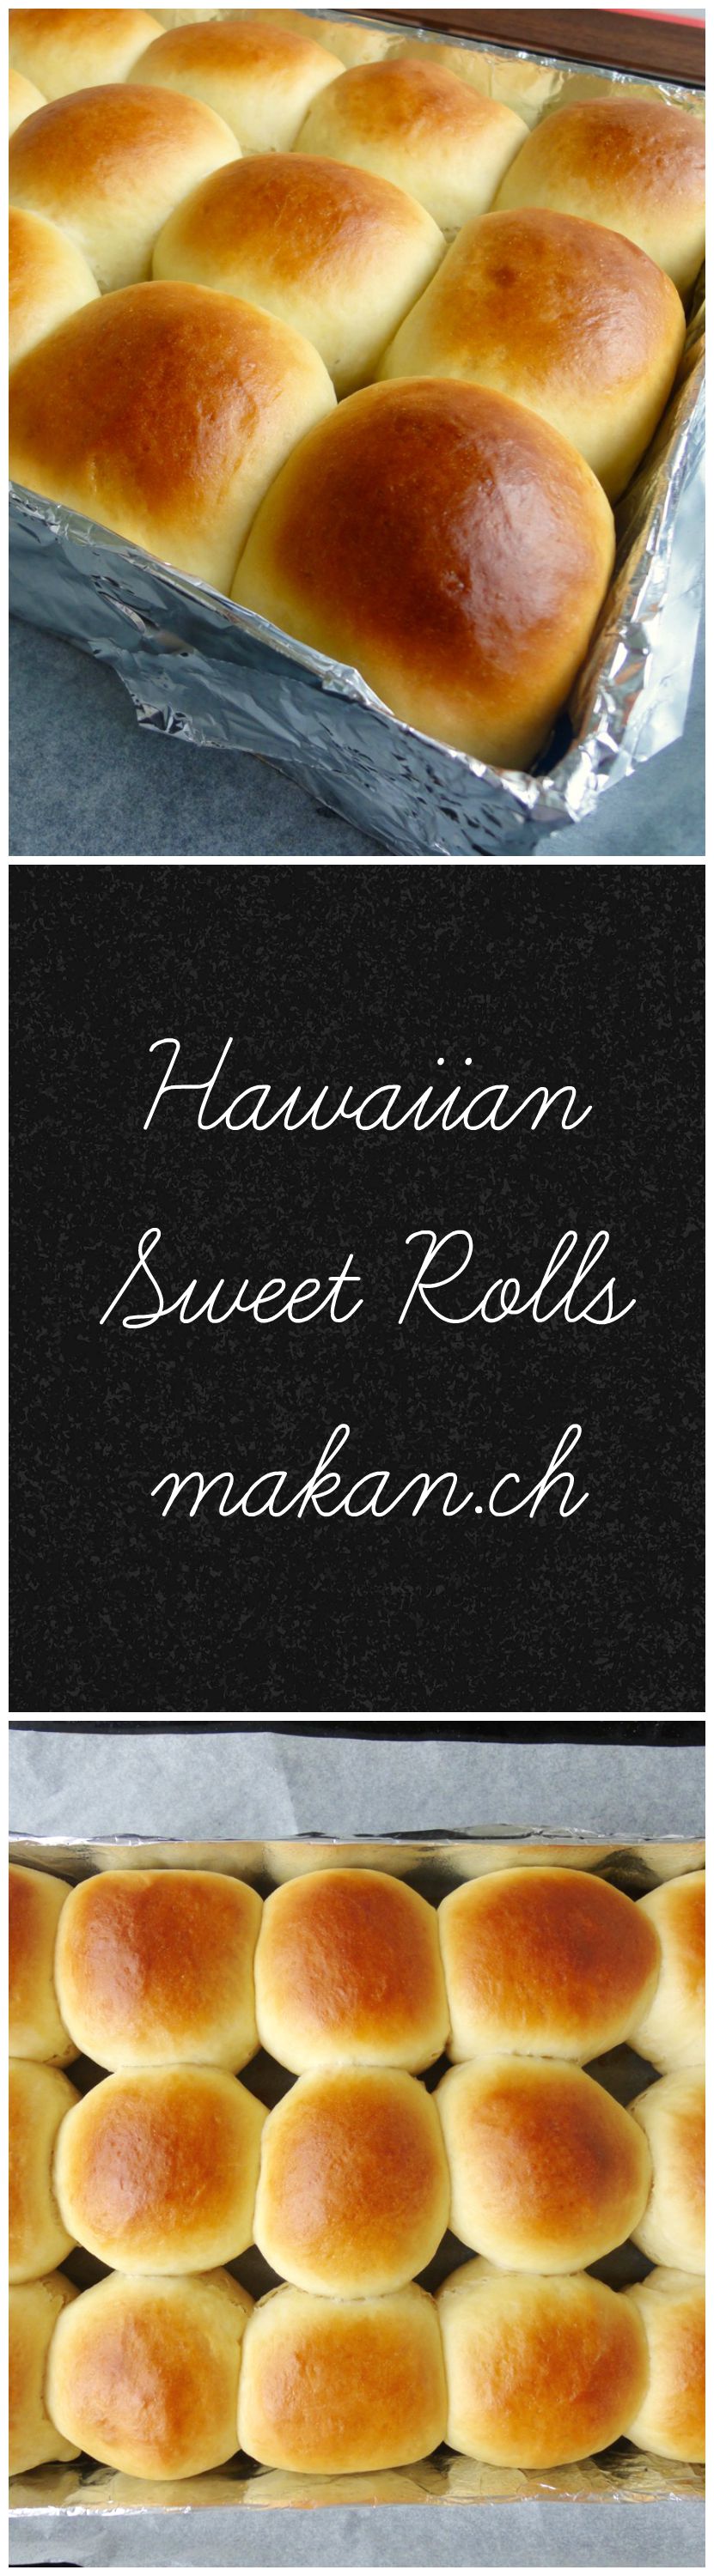
Hawaiian Sweet Rolls
No, I’m not from Hawaii and have never been to Hawaii but I am from a large island in a tropical country surrounded by sweet pineapples, tasty coconuts and palm trees.
Anyways, I kept seeing Hawaiian sweet rolls being repinned on Pinterest, so I looked it up and found this recipe from Handle The Heat and tried it out. Amazing rolls! The taste is so similar to rolls (or buns) made from where I am from. I had to lower the sugar amount from the original recipe so my hubby would eat it too. Recipe adapted from Handle The Heat.
Ingredients
- ½ cup Pineapple Juice (room temp.)
- ½ cup Milk, warmed (45°C)
- 4 tablespoons Butter, melted and cooled
- 2 Eggs, lightly beaten
- 4 tablespoons Sugar
- 1½ teaspoons Salt
- 2¼ teaspoons Dry Yeast
- 4½ cups All Purpose Flour
Egg Wash
- 1 Egg
- 2 tablespoons Water
Directions:
- In small sauce pan, heat up milk, sugar and butter.
- Transfer to mixing bowl, add yeast and 2 cups of flour. Attach the dough hook to mixer and mix on medium low speed for a minute.
- Add salt, pineapple juice, eggs and remaining flour.
- Knead on medium high speed for 5 minutes, until a soft and smooth dough forms.
- Place dough in a lightly greased bowl, cover with a damp kitchen towel and let rise for an hour or till it has doubled in size.
- Spray a 13 x 9-inch (33 x 22 cm) baking pan with cooking spray.
- Place dough on counter top. You do not need to flour it as the dough is not sticky.
- Divide dough into 15 pieces. Roll pieces into balls and place in prepared pan.
- Cover with damp towel and let it rise for another 30 minutes or till double in size.
- In the time being, preheat oven to 190°C.
- Prepare egg wash. Whisk to combine.
- Brush rolls with egg wash and bake for 20 minutes or until golden brown.
Tips:
Happy baking, enjoy!
Blueberry Muffins
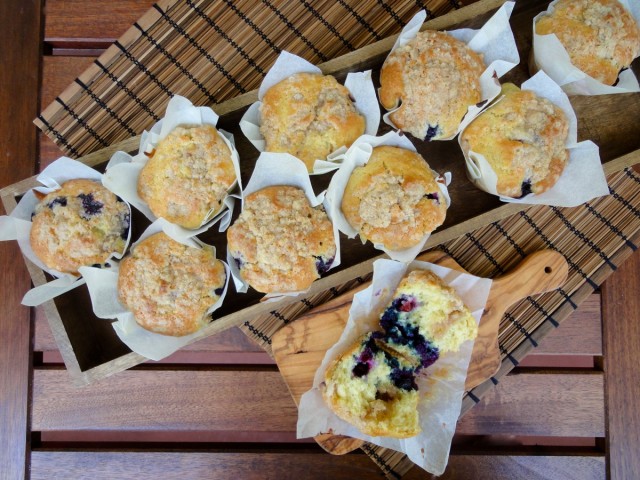
Blueberries are in season! What better way to use it than making homemade muffins? Well, there’s cheesecake but it’s summer and muffins are lighter than cheesecake. These are absolutely great for a hearty breakfast and for tea time.
Muffins to me aren’t supposed to look pretty. They are meant to look big and chunky, with an adorable top. These muffins are moist, buttery, not too sweet and has a little crunch on the top.
This post is dedicated to my sisters baby, whom she and her husband call, blueberry as a pet name. I’m really glad to get a niece and I can’t wait to get some super adorable dresses for her. I’ve already got 4 rascal nephews whom I love to bits and miss a lot! It’s sad that I am not able to see my nephews and niece growing up, but thanks to our modern technology, I’m not all that left out.
So little Blueberry, I’m sorry Aunty Cherry can’t be there to see you during the first year of your life. I do hope you grow up to be a kind, loving and respectful girl. Always remember your Aunty Cherry who is half way around the world from you. Don’t let the boy cousins bully you! Love, Aunty Cherry.
This recipe is adapted from Little Sweet Baker .

Fresh Blueberries from Italy!
Ingredients
- 2 ½ cups Flour
- 1 tablespoon Baking Powder
- 1 teaspoon Baking Soda
- ½ teaspoon Salt
- ½ cup Butter, melted
- 1 cup Sugar
- 2 nos Eggs
- 1 cup Buttermilk
- 1 tablespoon Vanilla Extract
- 1 ½ cups Fresh Blueberries or Frozen
Topping
- ¼ cup Brown Sugar
- 2 tablespoons Flour
- 3 teaspoons Butter, melted
- ¼ teaspoon Cinnamon, powder
- To taste Salt
Directions:
- Preheat oven to 220°C and line a muffin tray.
- Mix ingredients for topping in a small bowl and leave to chill in fridge.
- Set aside about 2 tbsp of flour to coat blueberries. This will keep the blueberries from sinking to the bottom while baking.
- In a large bowl, sift flour, baking powder, baking soda and salt.
- In another bowl, mix the melted butter with sugar.
- Add eggs one by one then the vanilla extract and buttermilk.
- Add wet ingredients to the flour mixture using a spatula until moist.
- Gently fold in coated blueberries into the mixture.
- Scoop muffin mixture into muffin pan.
- If only making 10 muffins, pour some water into the 2 remaining holes. This will keep the muffins moist while baking. If making 12, then put some water in a small heatproof bowl in the oven.
- Bake for 5 minutes at 220°C, then reduce the heat to 190°C for another 15-25 minutes or until a thin skewer inserted into the centre of the muffin comes out clean. I like my muffins a bit more brown on top, so I left it in for 25 minutes.
Tips:
Enjoy!

