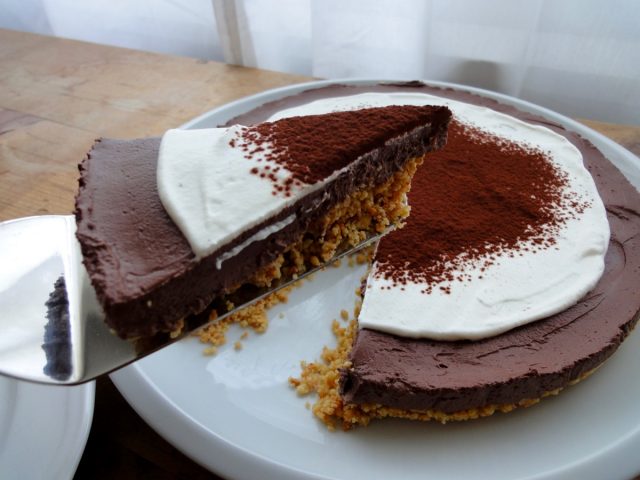
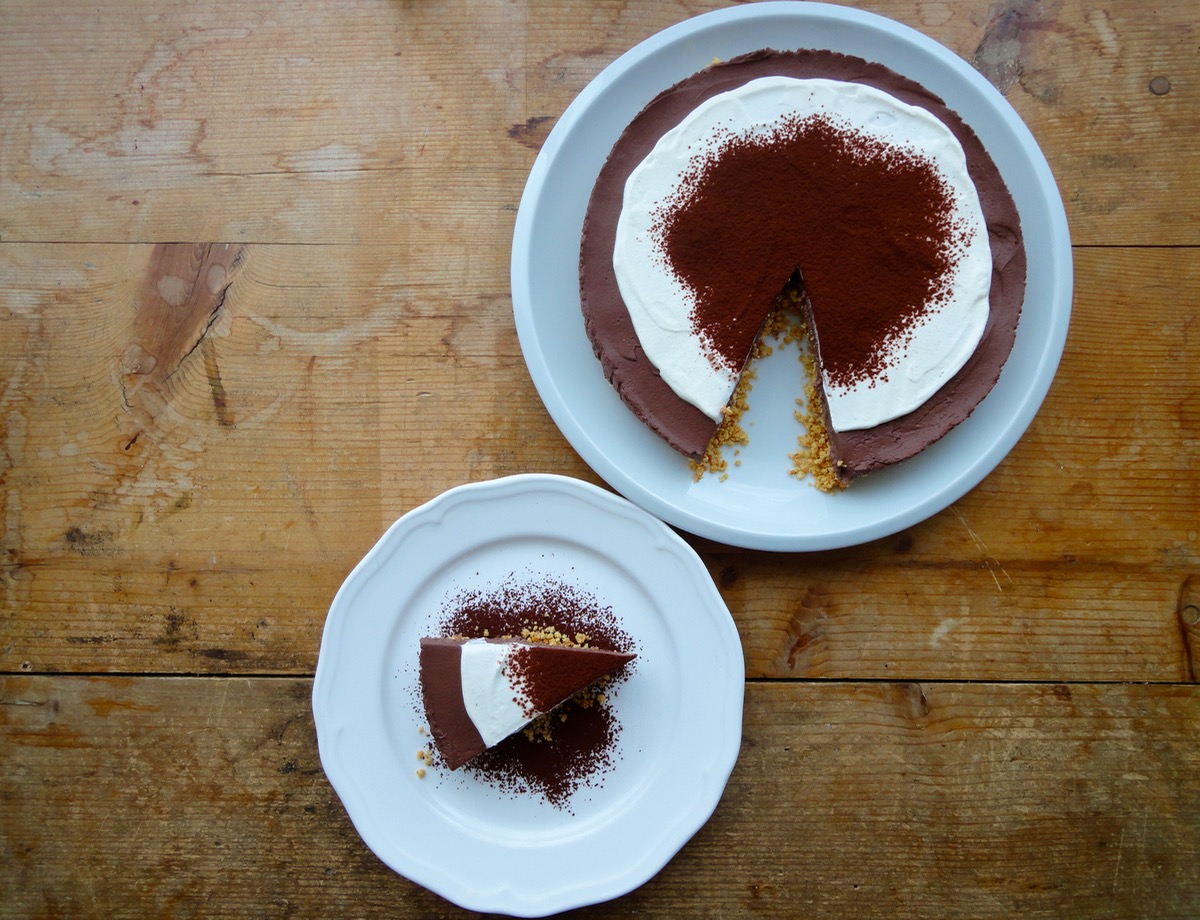
Keto Chocolate Cheesecake Slice
I like cheesecake. I just suck at making them. I’ve tried regular cheesecakes, keto cheesecakes, vegan cheesecakes…I’ve baked it, steamed it, waited hours and hours just for a meh cheesecake. Finally, I decided to make a no-bake cheesecake. Cus, I hate waiting long.
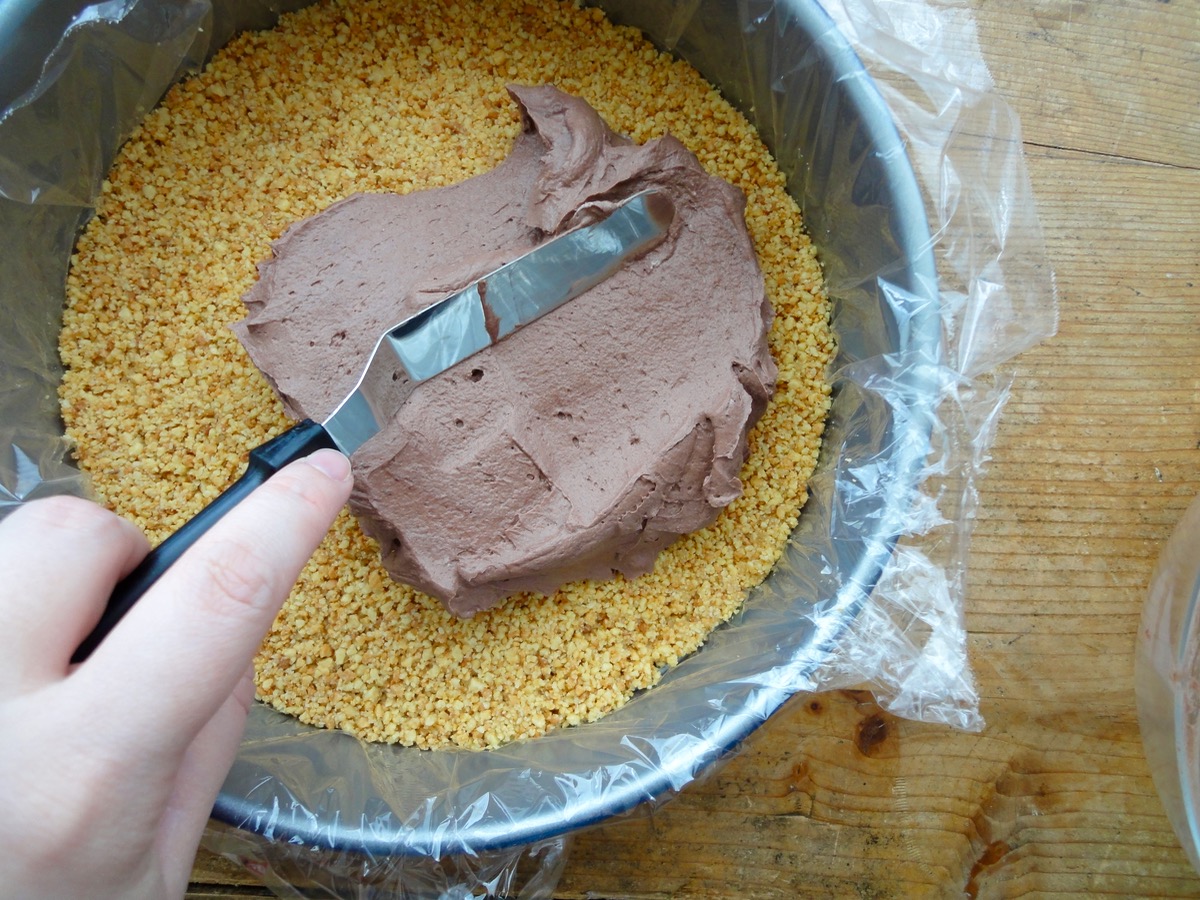
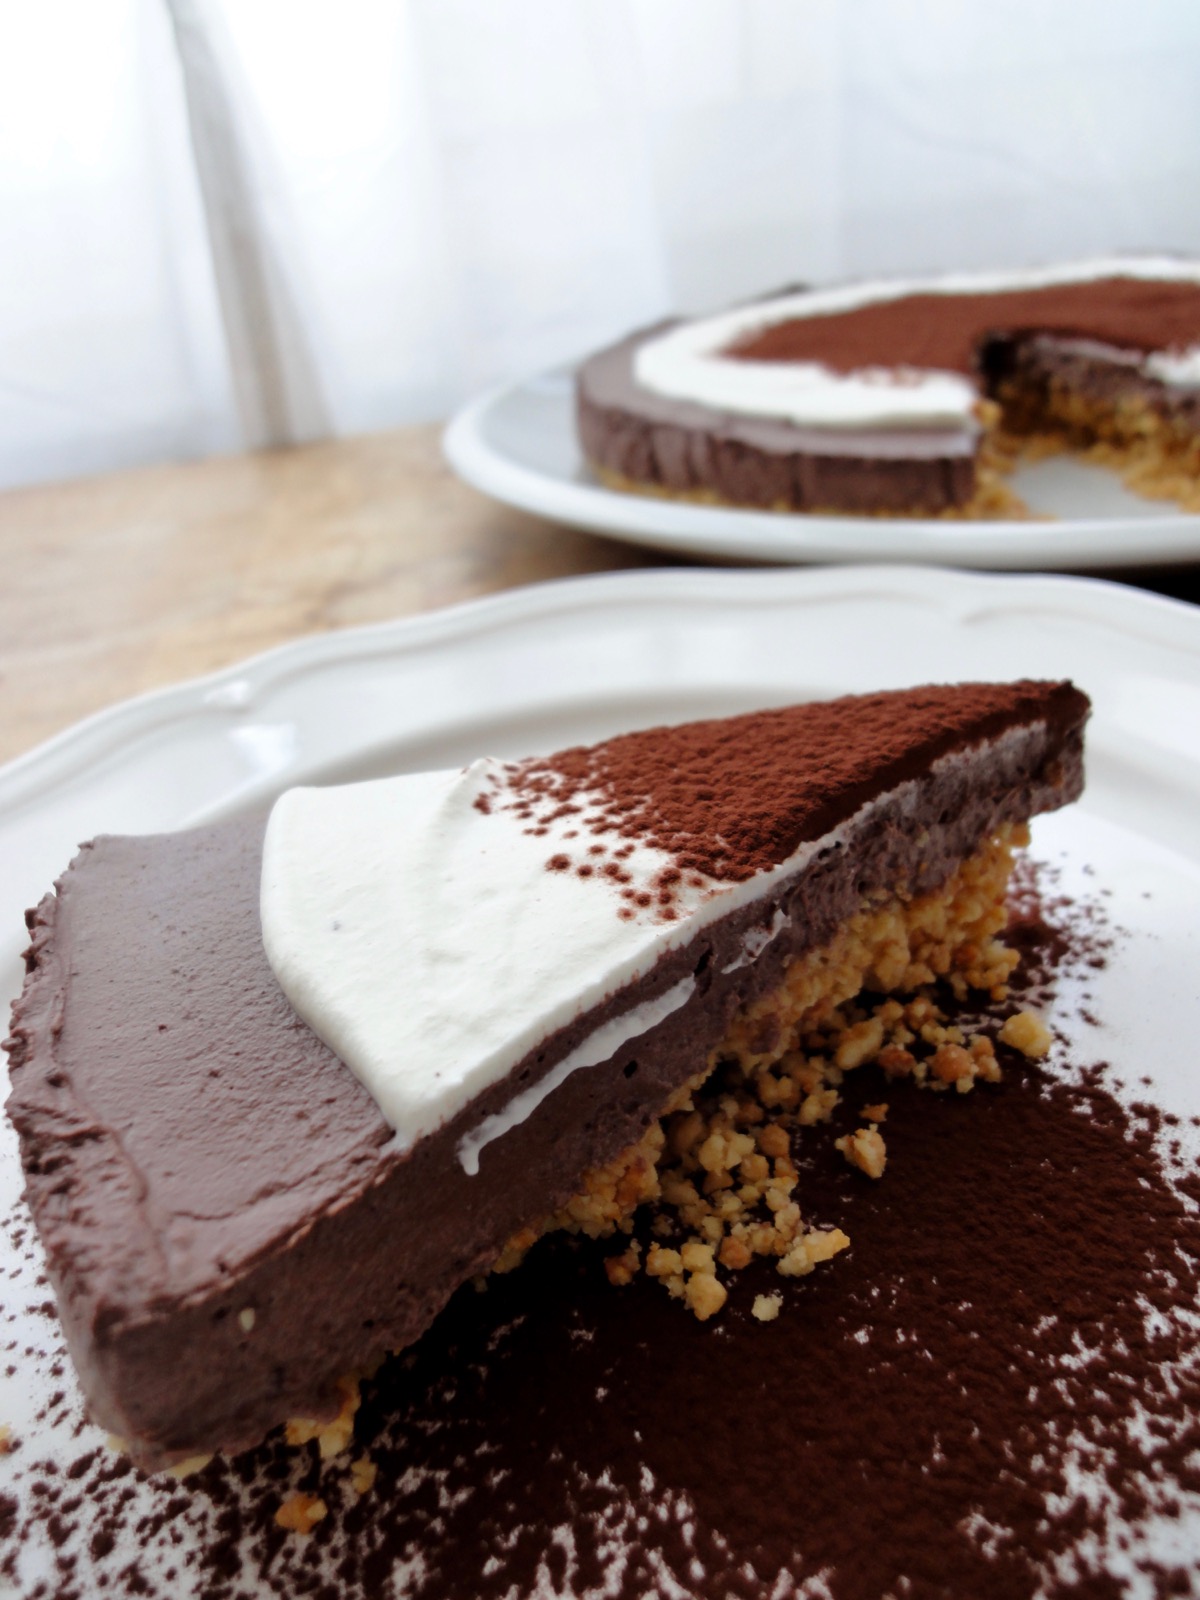
It started with searching for the base. I can’t use graham crackers or petit beurre – which I love as a base, so I found a keto friendly sweet crust pastry from the KetoDietApp. I had lots of almond flour/meal that needed to be used up by the end of May, score! The crust tasted perfect! But being me, I decided to crush the crust up after it was baked to make the cheesecake base. What I should have done was just to leave it in it’s pie base form and top it with the cheesecake filling. The crushed crust did not stick even after adding 5 tablespoons of melted butter. It still turned out fine, just that the base does not hold much. So it’s not completely a no-bake cheesecake since I did bake a crust for it. If you have some keto cookies around, grind it up and use it.
This cheesecake started out as just a regular no bake cheesecake. What I wanted was a 2 layer cheesecake, cocoa and vanilla.Then I took half the filling out to mix it with unsweetened cocoa powder and it tasted better and got thicker which held better compared to the one without. So I mixed both with cocoa powder. All in all, I spent 2 1/2 hours before I was ready to cut myself a slice. AWESOME! But honestly, it does taste better after 12 hours of chilling. ?
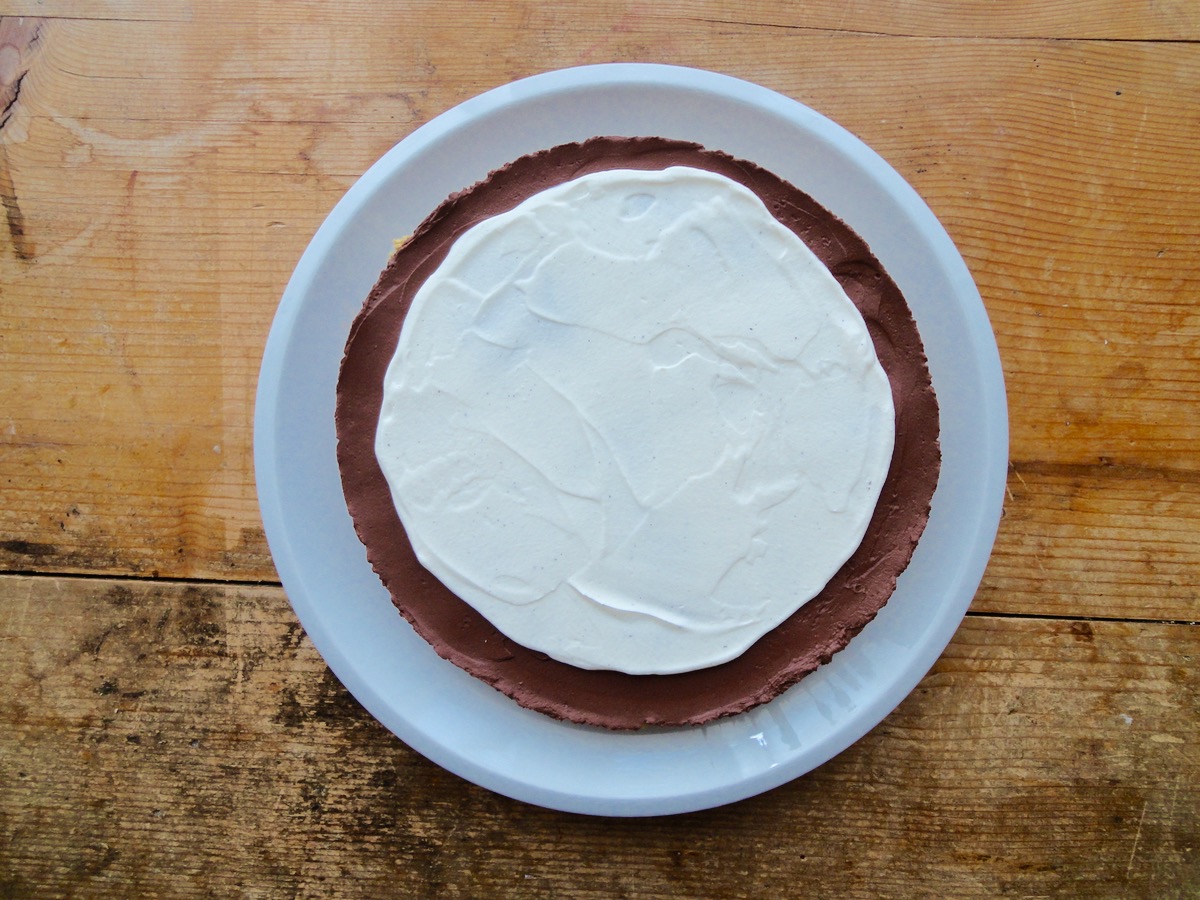
Before cocoa dusting.
Almond Crust
- 1¾ cup Almond Flour/Meal
- ¼ cup Whey Protein (Vanilla/Unflavoured)
- 4 Tablespoons Keto Friendly Sweetener (Erythritol, Stevia...)
- ¼ teaspoon Salt
- 1 Egg
- 2 Tablespoons Butter, melted or Coconut Oil
Chocolate Cheesecake Filling
- 1 cup Heavy Whipping Cream
- 250 grams (one 8 ounce package) Cream Cheese
- 1 teaspoon Lemon Juice
- 4 Tablespoons Unsweetened Cocoa Powder
- 30 grams / 1 scoop Whey Protein (Vanilla/Unflavoured) *optional
- 2-3 Tablespoons Keto Friendly Sweetener (Erythritol, Stevia...)
- 1 Tablespoon Vanilla Extract
Topping
- ¼ cup Heavy Whipping Cream
- 1 pod Vanilla Beans
- 2 teaspoons Keto Friendly Sweetener (Erythritol, Stevia...) * optional
Directions:
- Almond Crust
- Preheat oven to 175°C (350°F). Grease a nonstick round (I used a 9-inch) cake pan or place parchment paper in a round cake pan. Set aside.
- Mix all the almond crust ingredients in a food processor or by hand till it forms a dough.
- Place dough into prepared cake pan. Evenly flatten the dough. Alternatively, roll the dough out between 2 parchment papers before placing it in cake pan.
- Prick some holes in the dough. Bake for 13-15 minutes or till golden brown and cooked through.
- Remove from oven and allow to cool completely.
- If you want to crumble the crust up like what I did, just add 5-6 Tablespoons of melted butter to the crumble and press into cake pan. Chill for 10 minutes before use. I would not recommend this method though.
- Chocolate Cheesecake Filling
While your crust is cooling, you can make the filling for the chocolate cheesecake. I like to use cream cheese out of the fridge to quicken the chilling process.
- In a large bowl, whip heavy whipping cream and sweetener till stiff.
- Add cream cheese, lemon juice, cocoa powder, whey protein*optional and vanilla extract. Mix till well combined.
- Refrigerate till crust is completely cool
- Topping
- In a medium bowl, whip heavy whipping cream, sweetener *optional and vanilla beans till stiff.
- Chill in fridge until needed.
- Assembling cheesecake
- Once the almond crust is completely cool, loosen the crust from the pan.
- Spread chocolate cheesecake filling with a spatula onto almond crust.
- Allow the chocolate cheesecake to set in the fridge for an hour.
- Once set, thinly spread the whipped cream for topping.
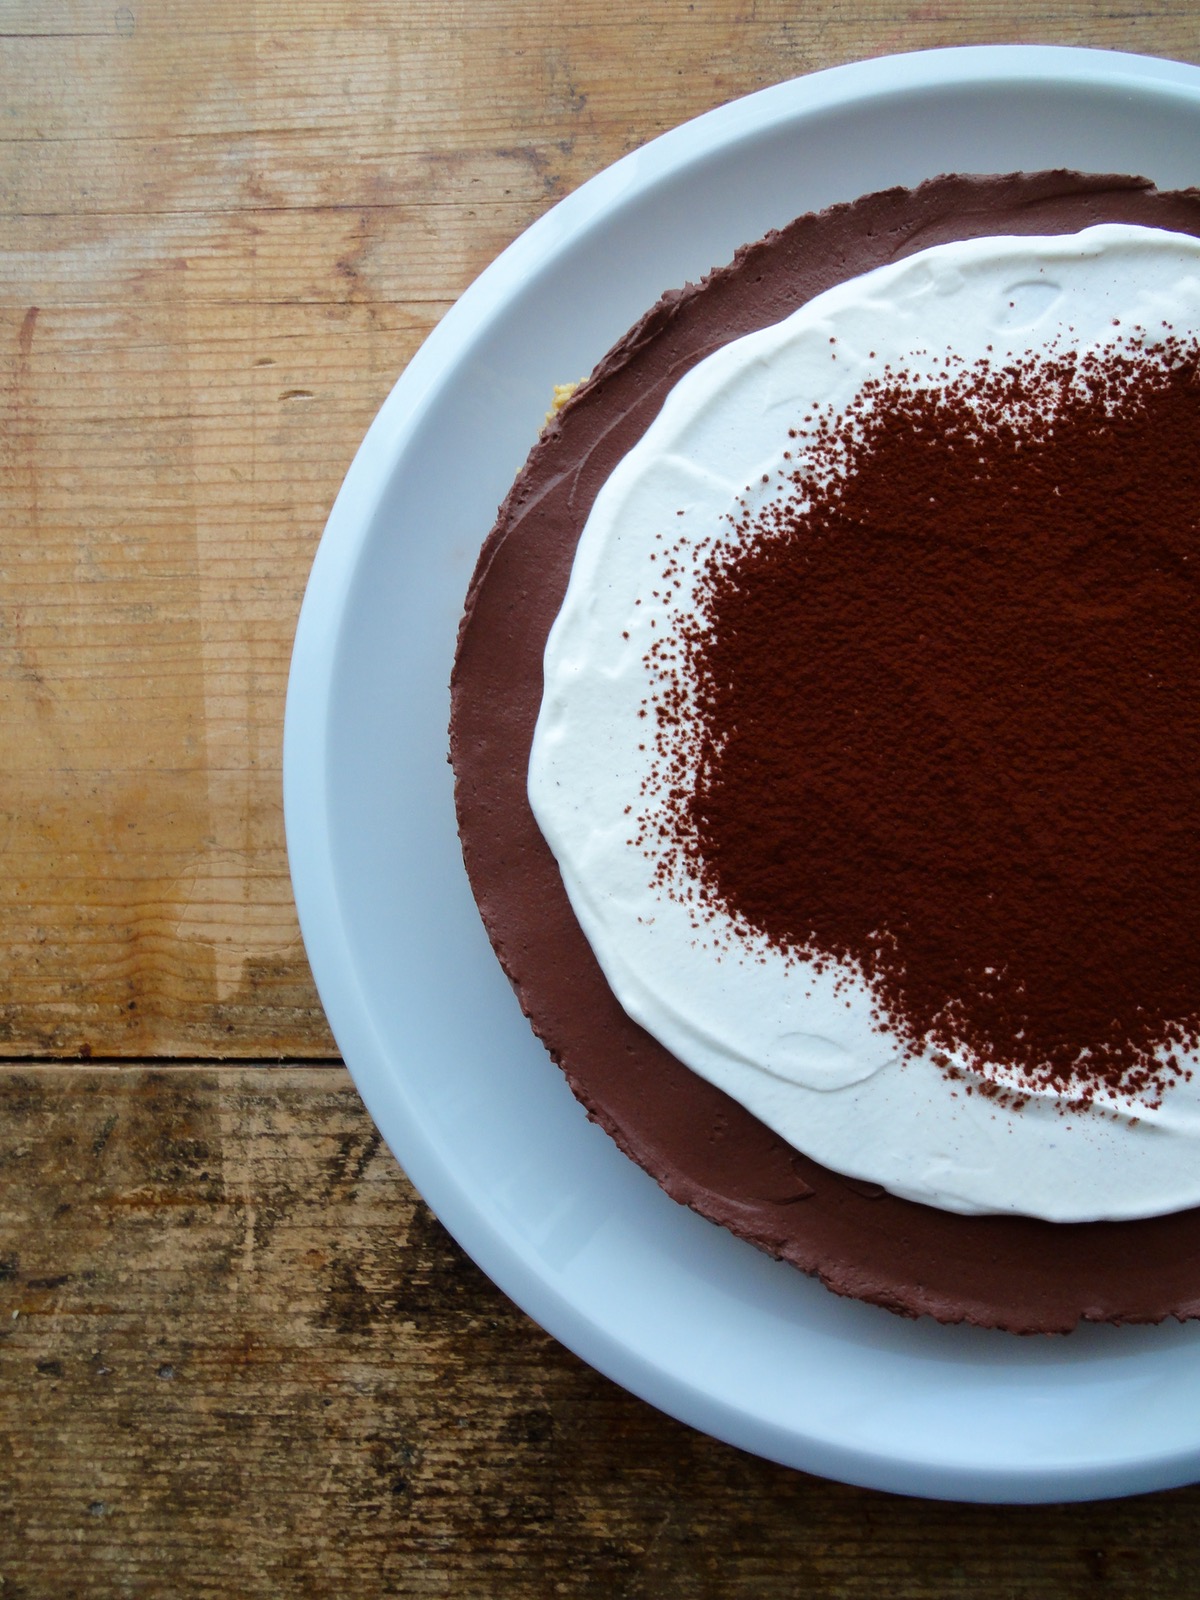
- Dust with cocoa powder and serve!
Tips:
- Conversion Chart
- If you have some keto cookies around, grind it up and use it as the base.
- If you want a thinner crust, simply half the almond crust recipe.
- I added a scoop of whey protein into my cheesecake filling just to give it a protein bump. This is completely optional.
- Honestly, it tastes better after 12 hours of chilling. ?
- If you are using MyFitnessPal app to count calories, first copy the recipe URL then go to MyFitnessPal app to Recipes, select Create a New Recipe, then Add from the Web. Paste the URL, match ingredients and that’s it!Always match ingredients to the ones you use. Ingredient nutritional facts differ depending on brand.
- Nutrition Facts (based on my ingredients) : Per serving (1/12) 231 kcal, Total Fat – 17 g, Total Carbs – 3 g, Protein – 9 g.
Enjoy!

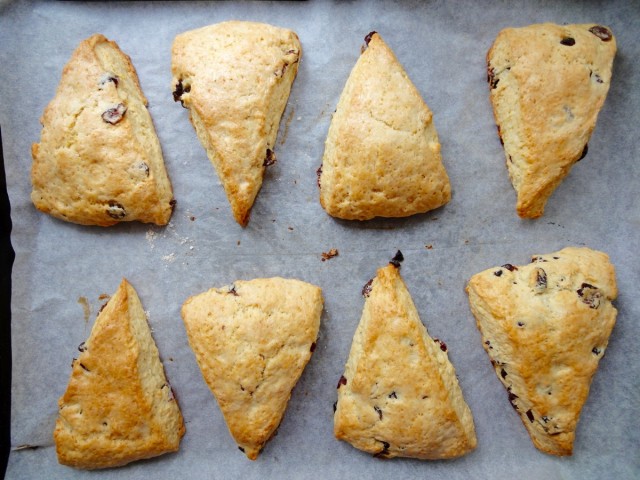
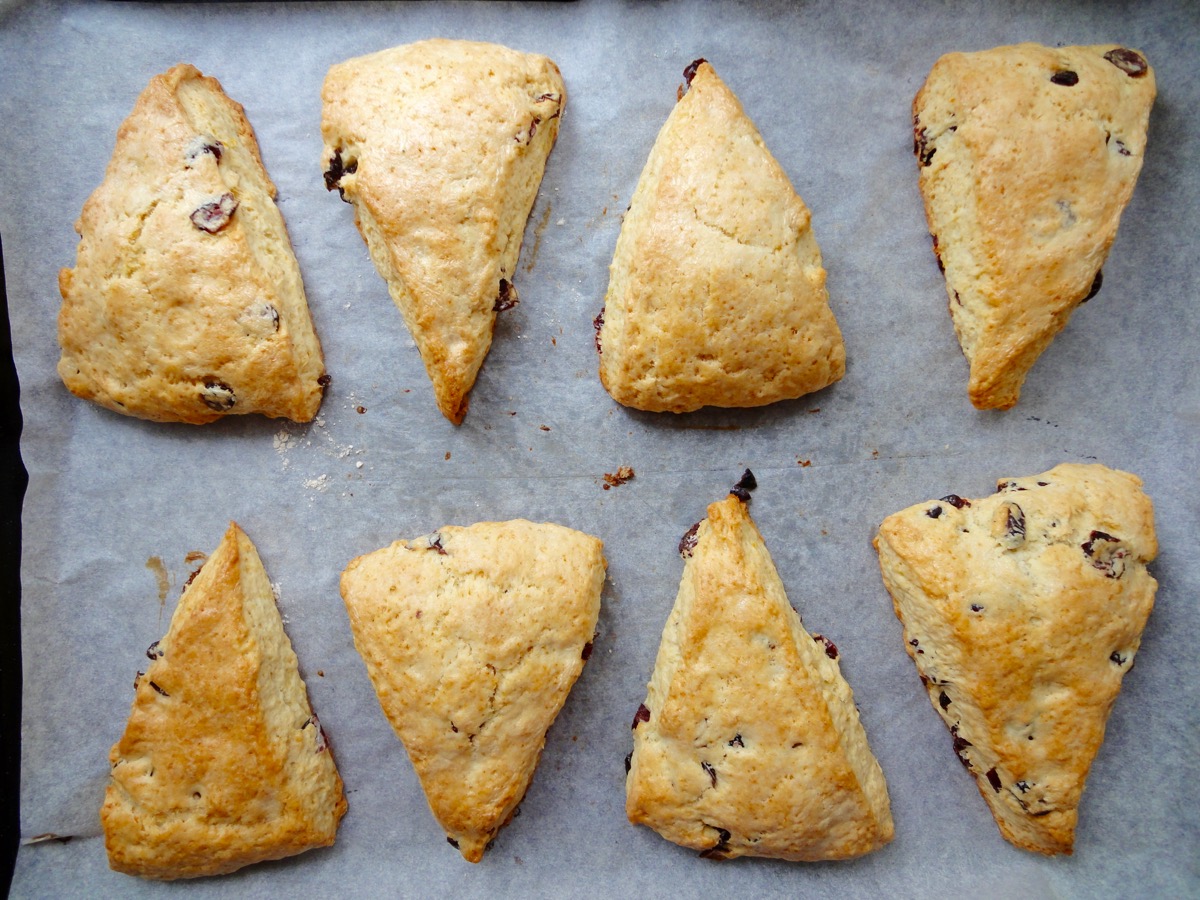
Cranberry Lemon Scones
I fell in love with scones at 18. My co-worker at that time warmed up a scone, slathered cold butter on it and gave it to me. He made one for himself too and literally stuffed his mouth with the scone while dancing with a broom. It was a raisin scone. Since then, I’ve tried many scones from bakeries, grocery stores and of course those that I’ve baked myself and the guy with the broom always comes to my mind.
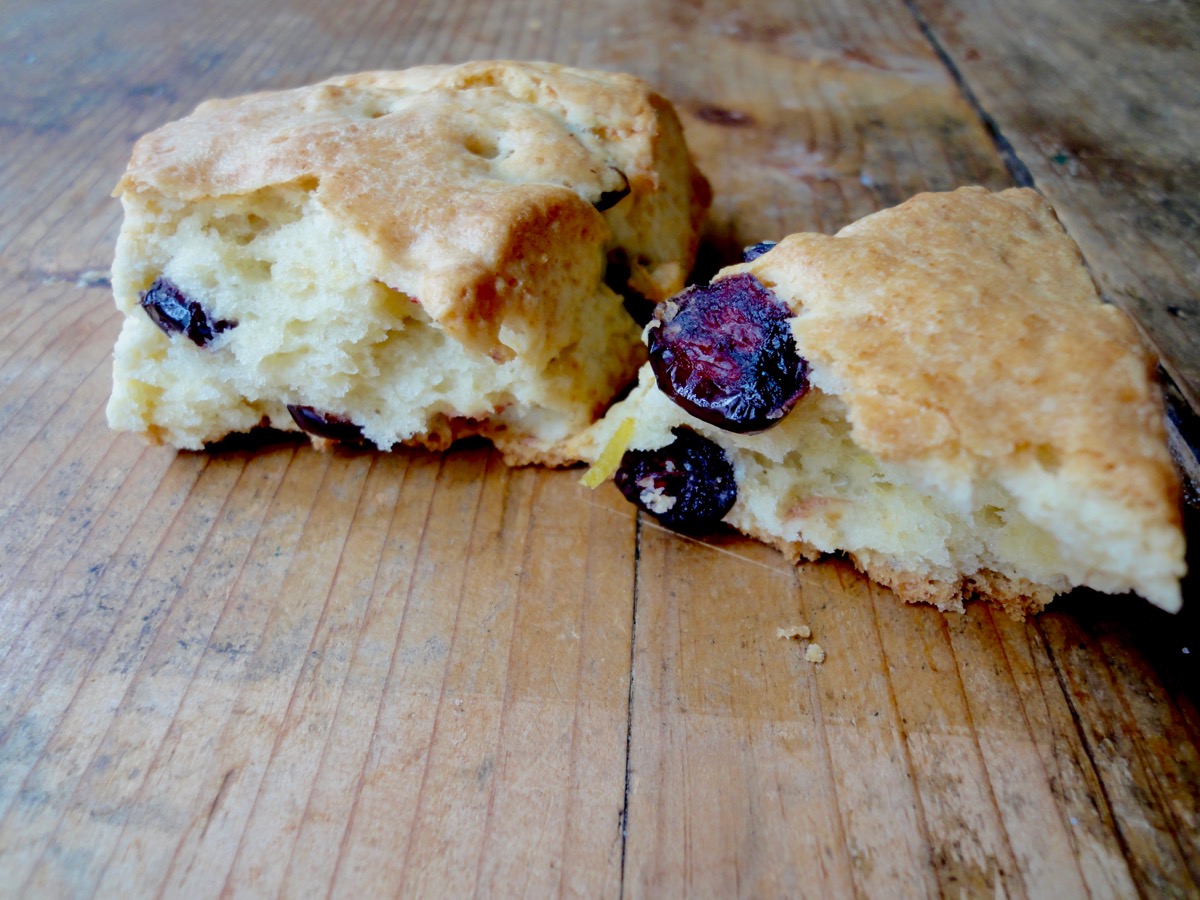
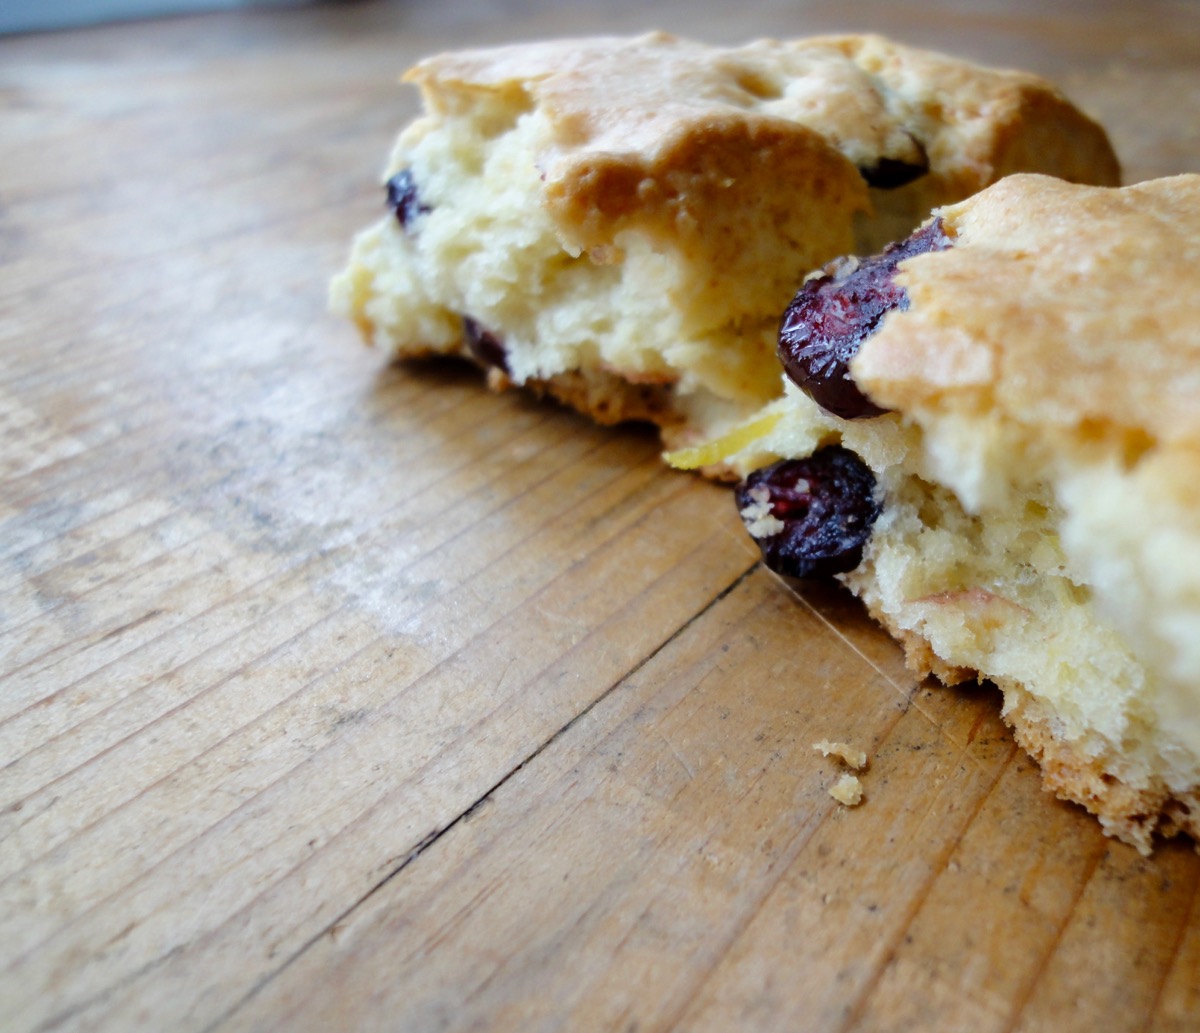
Scones are usually eaten with clotted cream but I like to have it on it’s own or with cold butter of course. It’s also one of the few sweet products my husband eats since it’s not that sweet. These flaky treats are so easy to make if you have a food processor or a pastry cutter. You can of course go old school and rub in the butter and flour with your fingers, but that would have to be done as fast as you can and not advisable on a hot humid day. Unless you have fingers that are always cold or you freeze them 😛 please do not. I would advice to not complete the whole recipe in the food processor.
Anyways, why cranberry scones? Because I do not want to jump on the wagon of pumpkins this season and cranberries are always just ignored. So, I’m on the cranberry team. These scones are not sweet but can be sweetened by either adding more sugar or drizzle some icing after it has cooled down. I opted out this time.
Scones
- 2 cups All Purpose Flour
- 2-3 Tablespoons Sugar
- 1 Tablespoon Baking Powder
- ¼ teaspoon Salt
- 1 Tablespoon (from 2 lemons) Lemon Zest
- 5 Tablespoons (70 grams) Butter, cold
- ¾ cup + 2 Tablespoons for brushing Heavy Cream, cold
- 1 Egg
Icing *optional
- 1 cup Powdered Sugar
- 2-3 Tablespoons Lemon or Cranberry Juice
Directions:
- Scones
- Pre heat oven to 200°C (400°F) and line a baking try with parchment paper.
- In a food processor, add in flour and baking powder.
- Cut very cold butter into cubes and add into food processor (if butter starts melting pop it in the freezer for 10 minutes)
- Pulse butter and flour till it resembles fine crumbs.
- Transfer into a medium sized bowl.
- Whisk egg and cream and pour it into the bowl. Add lemon zest and sugar. Mix with a spoon till it is about to combine.
- Add dried cranberries and gently knead till combined.
- Transfer scone dough onto a lightly floured surface or directly onto baking tray.
- Pat or roll dough into a disk about 1-inch tall.
- Cut into 8 pieces (like pizza)
- Arrange onto baking tray about 2-3 inches apart from each other.
- Brush scones with some cream.
- Bake for 20-22 minutes or light golden brown.
- Let scones cool completely before icing it.
- Icing
- Mix powdered sugar and lemon or cranberry juice in a bowl.
- Add more juice to reach desired consistency.
Tips:
- Butter, egg and cream must always be cold.
- Do not overwork the dough
- Conversion Table
Enjoy and happy baking!

Kuih Seri Muka
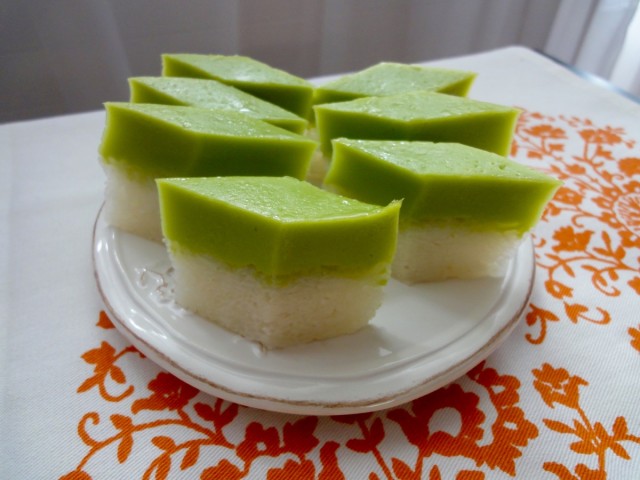

Seri muka is a Malaysian steamed layer cake (kuih) which consist of a glutinous rice (thai sweet rice – sticky rice) layer steamed with coconut milk and a sweet pandan custard layer to finish off. It’s green layer comes from the pandan leaf, but some do add green colouring. I prefer to stick with the natural green the pandan leaf gives out once blended.
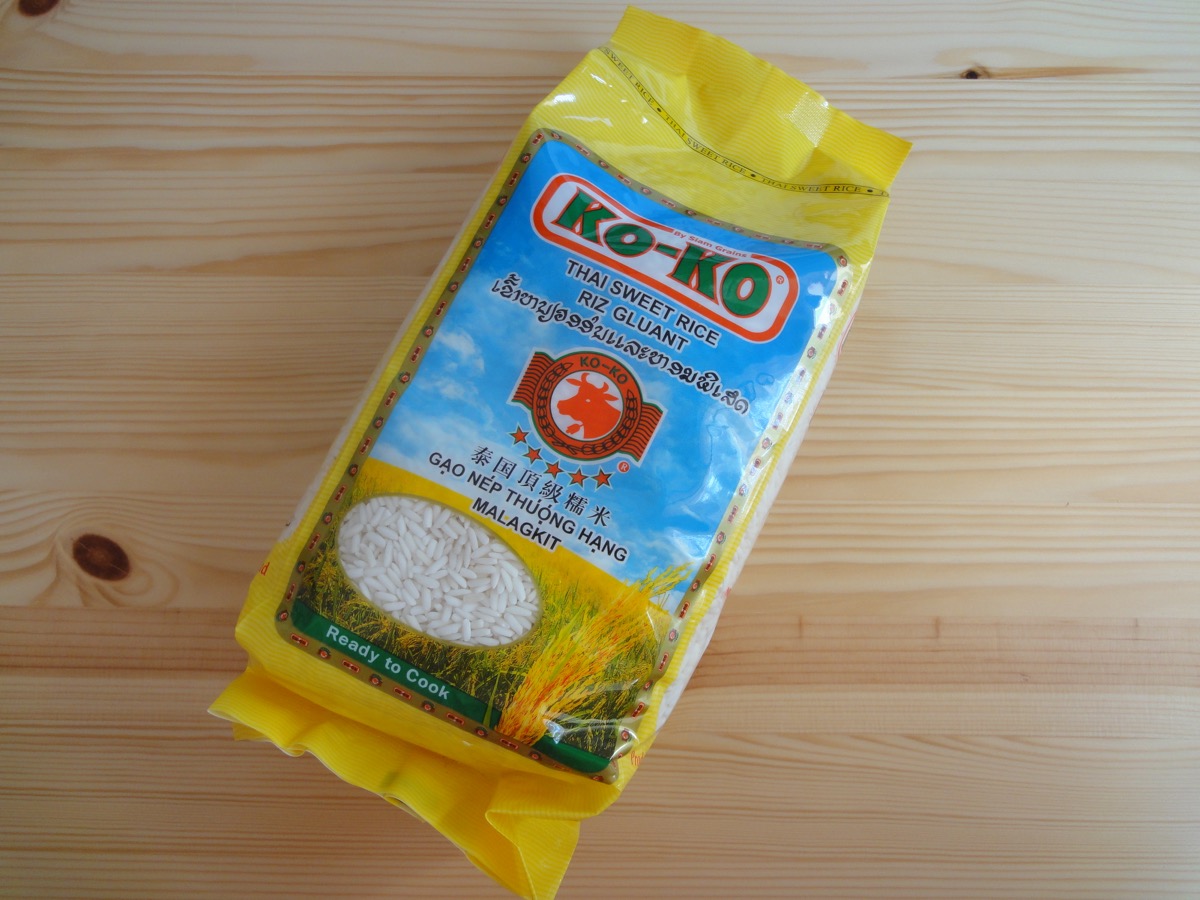
Glutinous Rice/Nasi Pulut/Thai Sweet Rice that is available in an Asian shop near me
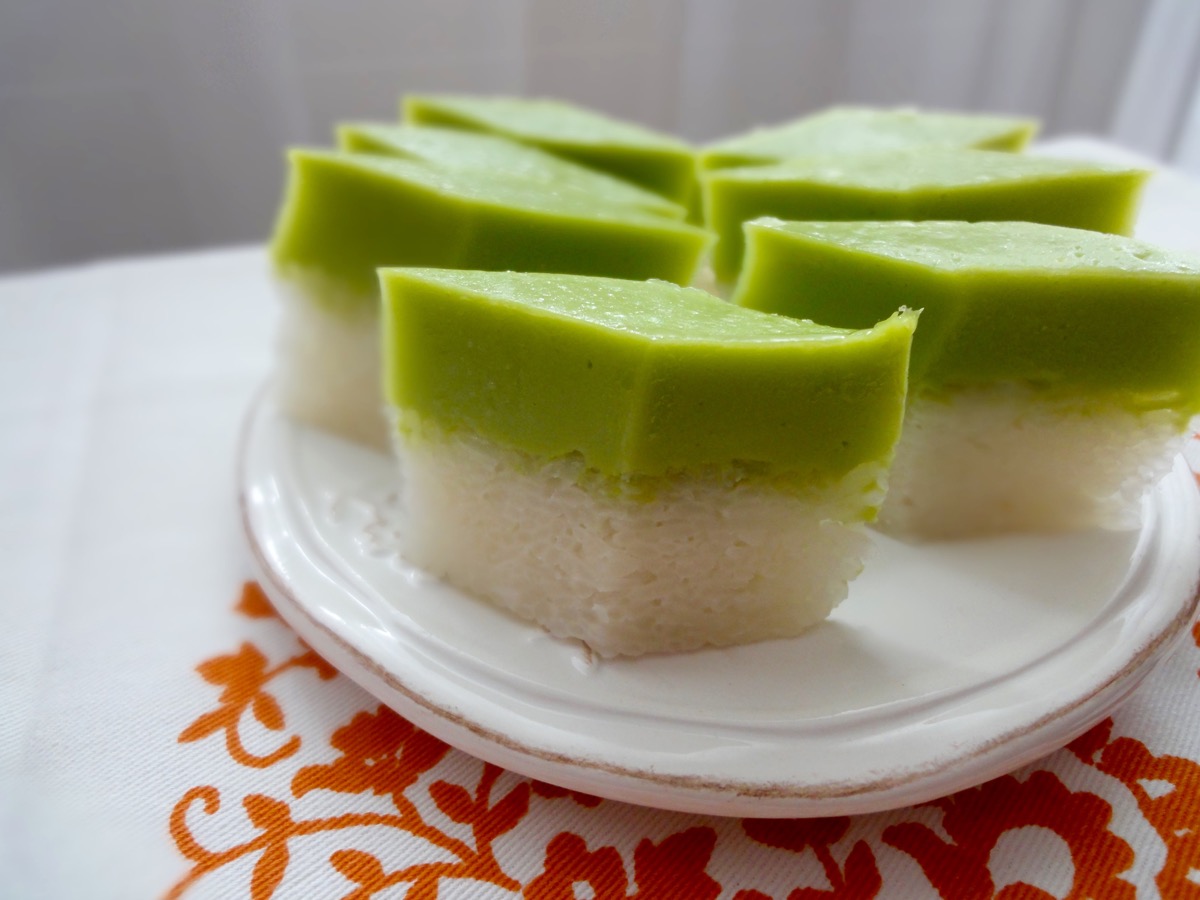
Kuih means cakes in Malay. Seri Muka translates to radiant face or pretty face. So this is a pretty face cake. 🙂 I’m guessing what it’s called seri muka is because of the smooth top layer it has after it has been steamed. However, I seem to not be able to get that 100% smooth surface. There always seems to be a large bubble spot on it. Other than that, it actually is quite smooth.
This kuih is found in morning markets, school canteens, cake stands and just about every place that has a person selling kuih’s. It is eaten as a dessert, a snack, or at tea time.
Recipe adapted from Sea Salt with Food’s Kuih Seri Muka. I have tried and read number of recipes and this one has so far been a good replica.
Glutinous Rice Layer
- 400 grams Glutinous Rice
- 150 ml Coconut Milk
- 100 ml Water
- 1 teaspoon Salt
- 3 Pandan Leaves, knotted
Pandan Custard Layer
- 150 ml Pandan Juice, see tips
- 5 Tablespoons Cornflour
- 3 Tablespoons All Purpose Flour
- 3 Eggs, large (53g +/- per egg)
- 200 ml Coconut Milk
- 140 grams Sugar
- A Pinch Salt
Directions:
- Glutinous Rice Layer
- Soak glutinous rice with water for at least 1 ½ hours prior to using. Drain.
- Prepare a 9-inch round or square cake pan and spray with cooking spray or line with plastic wrap.
- Mix coconut milk, water, salt and the rice. Pour it into cake pan, topped with the pandan knots.
- Steam for 30 minutes.
- After 30 minutes, fluff up the rice and remove pandan knots. Then, using a greased spatula, flatten the steamed rice. Make sure there are no holes/air bubbles and gaps in the rice, especially the sides.
- Steam for another 10 minutes.
- Pandan Custard Layer
- Combine pandan juice, coconut milk, all purpose flour, cornflour, and sugar. Mix well.
- Add eggs and whisk well then strain into a medium sized metal bowl or pot.
- Place pandan mixture over simmering water (double boiler or bain-marie)
- Stir continuously and cook till custard starts to thicken. (15 minutes)
- Pour pandan custard into glutinous rice layer, give it a little tap (for air bubbles) and continue to steam for 30 minutes.
- Remove kuih seri muka from the steamer and allow to cool completely before cutting into rectangles or diamond shapes.
Tips:
- Pandan Juice: Take 10 pandan leaves and cut them (to make blending easier). Blend with 200ml water. Strain with cheesecloth.
- Wrap steamer cover with a cloth tightly. This is to prevent water droplets from dropping.
- Glutinous rice layer has to be hot while pouring in the pandan custard layer, otherwise it will not stick to each other.
- Cups to Grams conversions
- 1 cup glutinous rice flour = 104 grams
- If you do not have fresh pandan leaves, you can use pandan extract or flavouring.
- Store kuih seri muka in an airtight container once it has completely cooled down. Consume within 24 hours.
- Do not refrigerate, this will make the glutinous rice layer to become very hard.
Enjoy!

Homemade Vanilla Extract
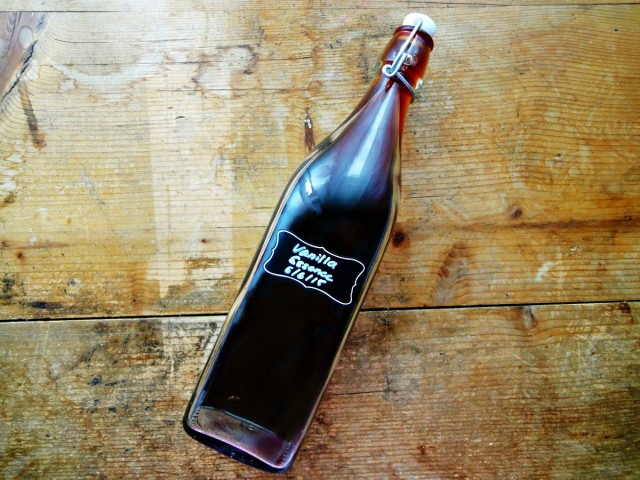
I have been using my own vanilla extract which I made in June and by the 8th week it was ready for using. Yes, the label on it is confusing. That’s because growing up we used vanilla essence as it was widely available in stores. So, for the longest time I’ve called it essence even though for the past 3 years I have been using extract. Making it a habit to start calling it by it’s true name.
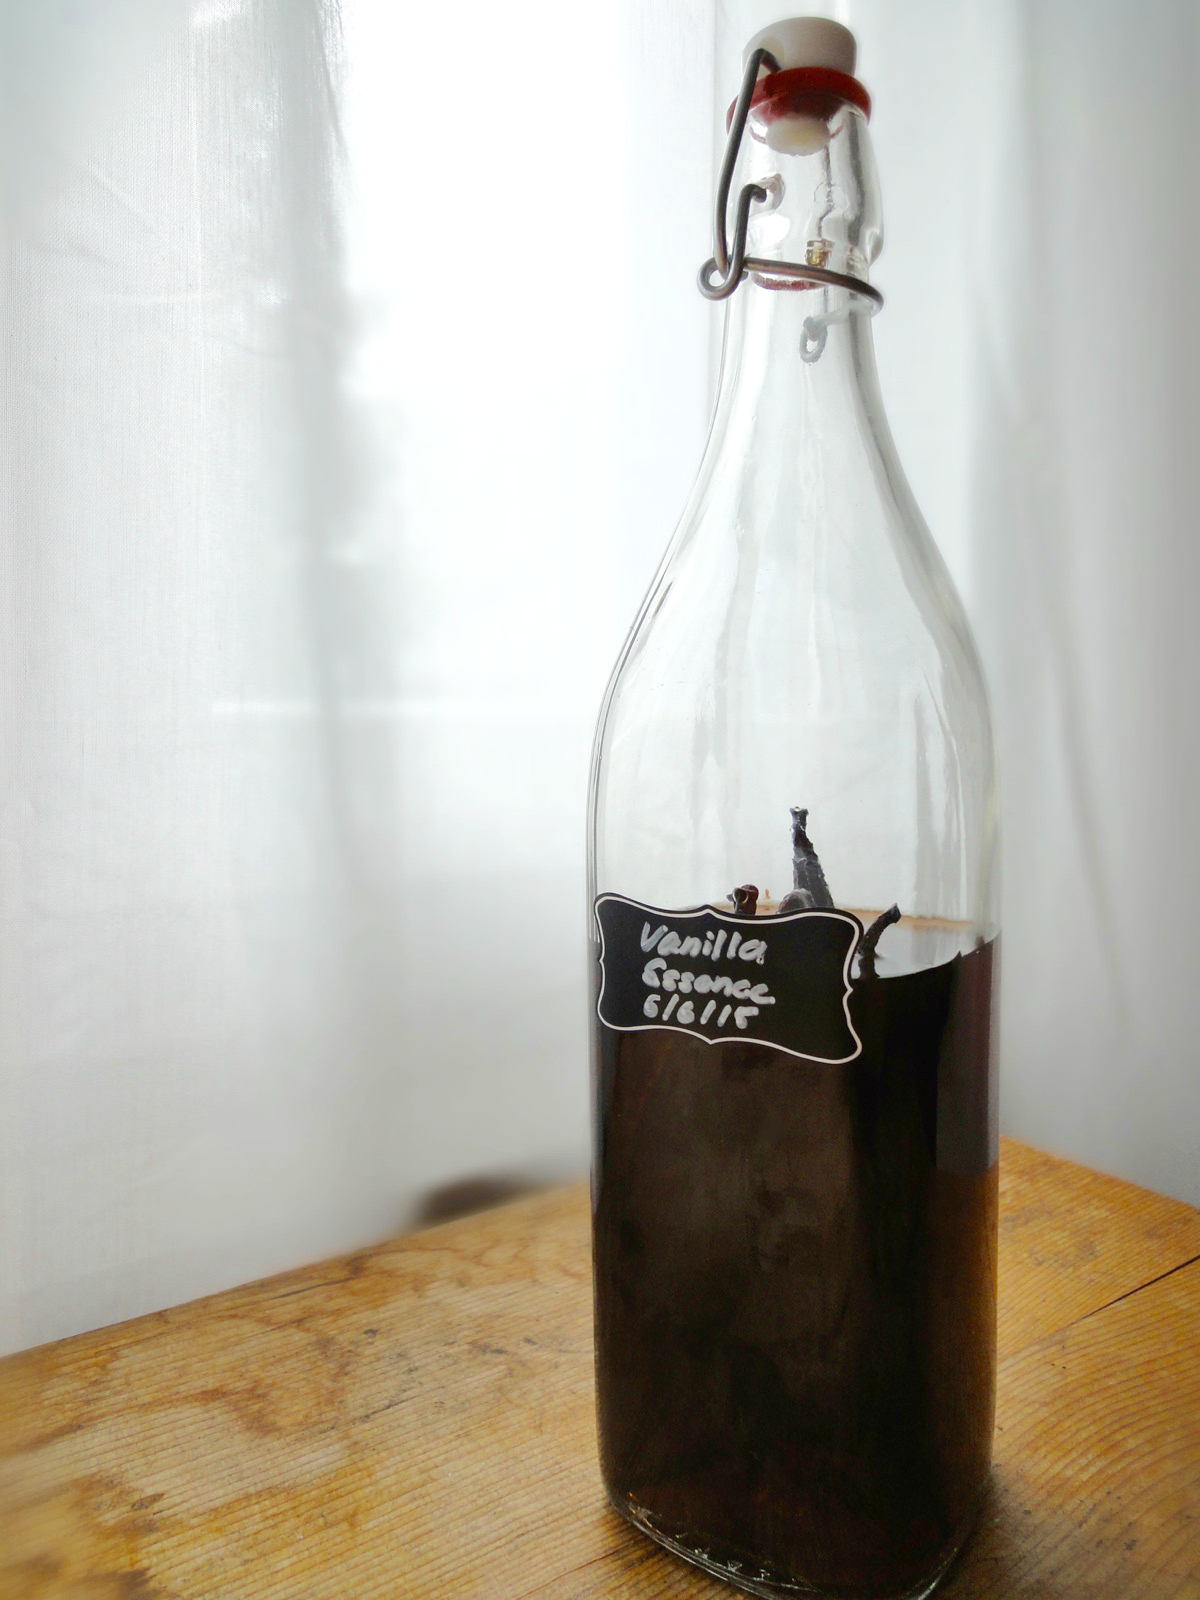
Wrongly labeled by me. :/
What’s the difference between extract and essence?
Extract:
- Made from real vanilla beans and alcohol like vodka. Rum or brandy can be used as well.
- More expensive
- Stronger and fuller vanilla flavour
Essence:
- Synthetic (chemically produced)
- Cheaper
Where I’m at, you can’t easily get vanilla extract in general grocery stores. It’s available at American and British online stores or at a high-end store called Globus. What is common is vanillin zucker (vanilla sugar) which does not give the same taste as using vanilla extract. There is also vanilla-butter flavouring which I find awesome for my soft chocolate chip cookies. Lastly, there’s of course vanilla beans and vanilla bean paste easily available. Except for vanilla sugar, I use all the above for various recipes.
So, after finishing a small bottle of vanilla extract (50ml) that cost me about CHF 16, I decided to use my googling powers and learnt how to make my own vanilla extract. All you need is a clean bottle, vanilla beans and vodka. I used a 750ml bottle of vodka and about 15-18 vanilla beans. According to the kitchn, use 3 to 5 vanilla beans per 8 ounces (240 ml/1 cup) of alcohol and multiply accordingly if making more extract. You can add more vanilla beans of course.
Is it cheaper? Depends. The cost of vanilla beans vary depending on the quality and where it comes from. The one’s I get are CHF 2.30 for 3 beans. A bottle of vodka (750ml) cost’s me CHF 17. So, for me it’s cheaper compared to getting it from the high-end store. Plus, it’s really fun to see it change colour. It also makes a perfect gift for fellow home bakers.
And because I made my homemade vanilla extract before I started this blog, I did not bother to take photo’s of the stages of it and I just have a final product. The next time I make it, I will be sure to update this post.
Ingredients
- 3-5 Vanilla Beans
- 1 cup (240 ml / 8oz) Vodka
Directions:
- Prepare a clean bottle (preferably with a flip-top) by washing it and drying it properly.
- Slit vanilla beans into half lengthwise. You can also chop it up to fit a small bottle.
- Pour in vodka.
- Close the bottle.
- Store in a cool and dark place (your cupboard). Give it a little shake every now and then.
- After 8 weeks, your vanilla extract is ready to use. You can leave the vanilla beans in the bottle or you can strain it out. I left mine in so it get’s stronger with time. Plus, why waste the beans? It does look nicer when you can see the beans in it too.
Tips:
- After scraping vanilla beans for other recipes, throw in the bean into the extract.
- To have clear vanilla extract, simply strain it with a coffee filter.
- You can use brandy or rum instead of vodka. Vodka is commonly used because it does not have a strong taste.
- Conversion Table
- Make your own peppermint extract too at the same time!
Enjoy using your homemade vanilla extract with your homemade goodies!
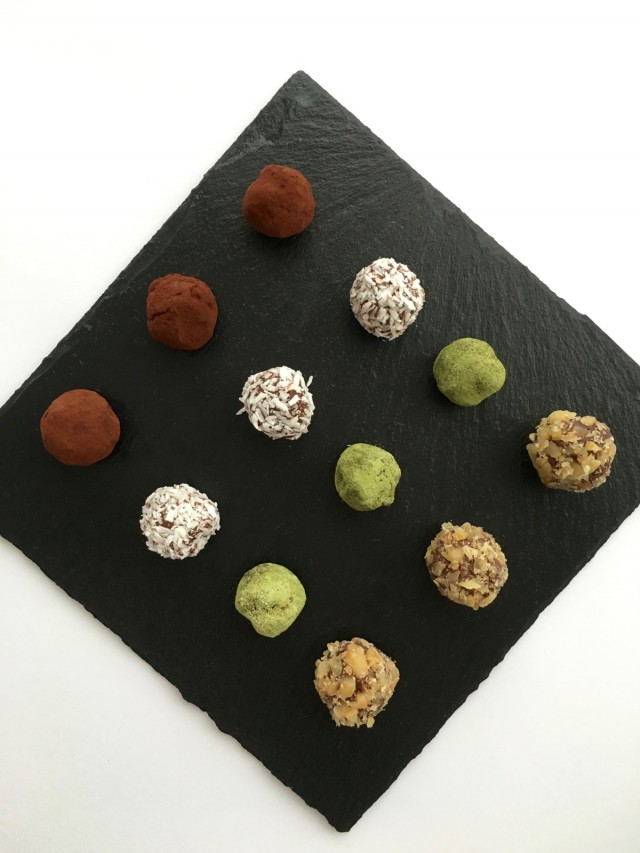
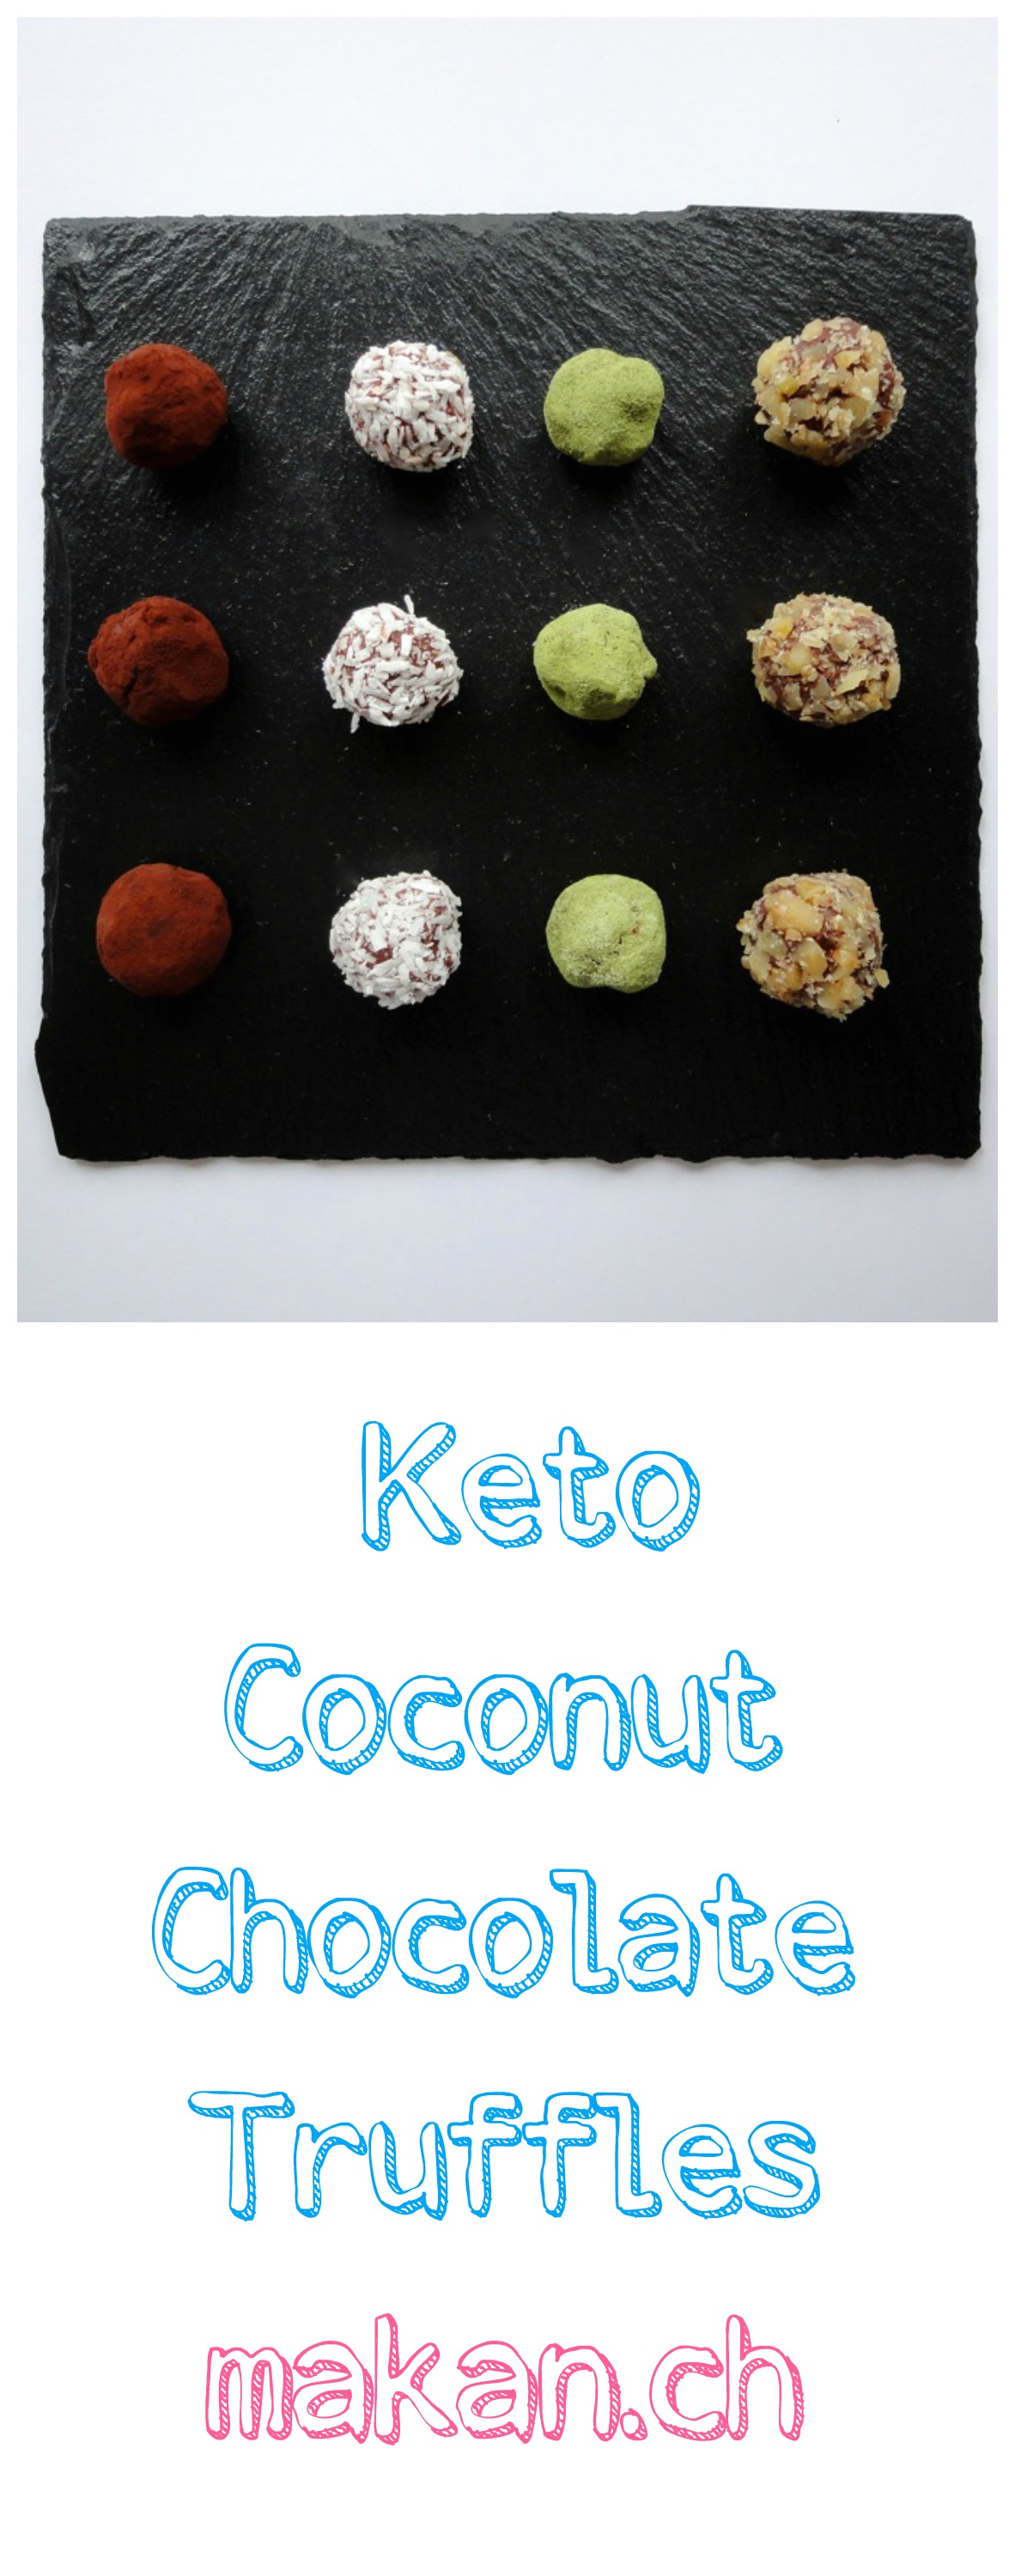
Assorted Keto Coconut Chocolate Truffles
Though living in Switzerland, I don’t eat chocolate every day. But on this way of life, I have at least 1 small chocolate treat a day. As you may already know, there are many types of chocolate. My favourite? None. I will eat all types of chocolate. Yes, I even like compound chocolates which in some countries do not even qualify as chocolate. Heck, I like chocolate so much that I even took a chocolate course and wrote my thesis on chocolate! My thesis was a rush job so there was no proper research or let’s just say, no one will benefit from reading it. 🙂
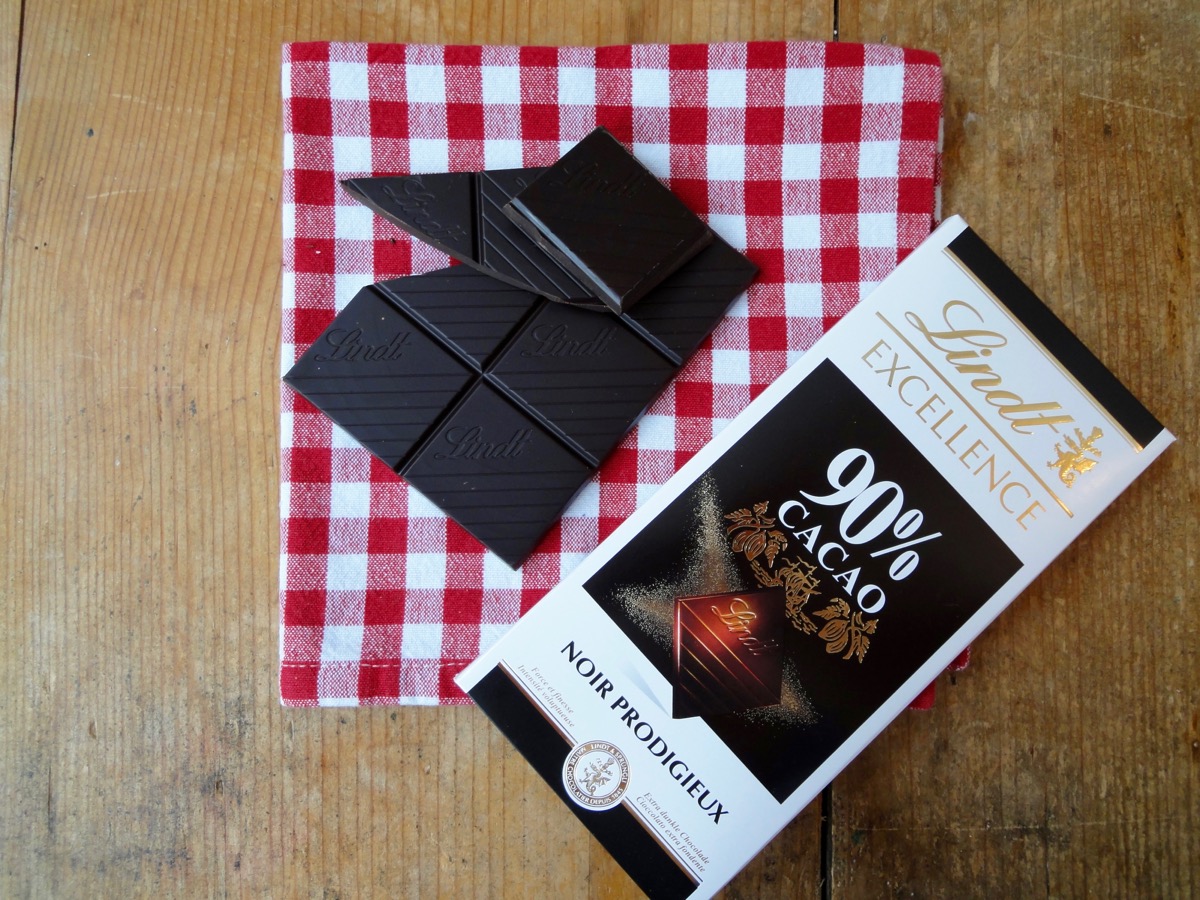
I don’t regularly consume dark chocolate, but on this way of life, dark is about the only way to go. So far I’ve been making treats with 90% cocoa bar. I would say it’s an acquired taste. But you can of course work your way up to it. But 90% is not the highest. There’s a 99% cocoa bar from Lindt that I’ve not tried yet as they don’t sell it at my local grocery store. Have to pay a visit to the Lindt shop one day to get it.
These truffles were made because I was really craving something chocolaty and soft. I was at the grocery store earlier on and there was a full display of easter chocolates as I entered. So I grabbed 2 bars of 90% cocoa bars instead and made these. Cravings satisfied.
Truffles
- 150 grams / 5 oz Dark Chocolate (85% and above)
- 1½ Tablespoons Coconut Oil
- ½ cup Coconut Milk
- 1 teaspoon Vanilla Extract
Topping/Coating
- Walnuts, toasted & chopped
- Matcha Powder
- Coconut Flakes
- Cocoa Powder
Directions:
- In a saucepan, add coconut milk and allow to simmer. Once it starts simmering, remove from heat.
- Add dark chocolate, coconut oil and vanilla extract into the saucepan and stir with a spatula till completely melted and incorporated.
- Transfer coconut chocolate mixture into a container and allow to chill in the fridge for about 4 hours.
- Once completely chilled and hardened, use a melon baller or ½ tablespoon spoon and scoop out chocolate. Shape as desired.
- Coat each truffle in choice of coating.
- Serve!
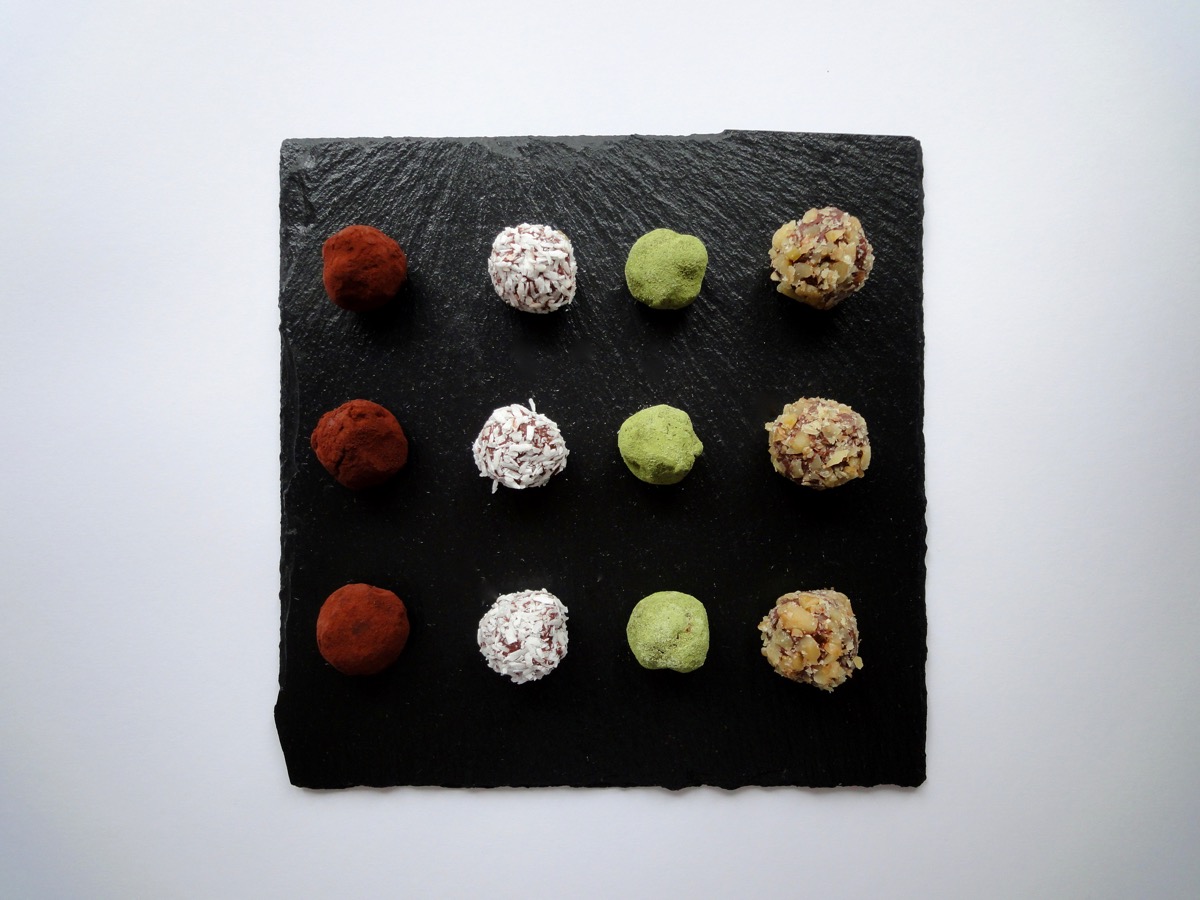
(L-R) Cocoa, Coconut, Matcha, Walnuts
Tips:
- Conversion Chart
- For even less carbs, find the highest content of cocoa bar. I use 90% cocoa bars for this recipe. Soon, I would test it out with 99% cocoa.
- Since this recipe does not have any added sugar or sugar alcohol in it, the sweetness comes from the coconut milk and dark chocolate. However, if you wish to add any sweeteners to it, feel free to do so.
- I got 34 pieces of truffles with 1/2 tablespoon per truffle.
- If you are using MyFitnessPal app to count calories, first copy the recipe URL then go to MyFitnessPal app to Recipes, select Create a New Recipe, then Add from the Web. Paste the URL, match ingredients and that’s it!
- Always match ingredients to the ones you use. Ingredient nutritional facts differ depending on brand.
- Nutrition Facts (based on my ingredients) : Per serving (2 plain truffles) 75 kcal, Total Fat – 7 g, Total Carbs – 3 g, Protein – 1 g.
Enjoy!
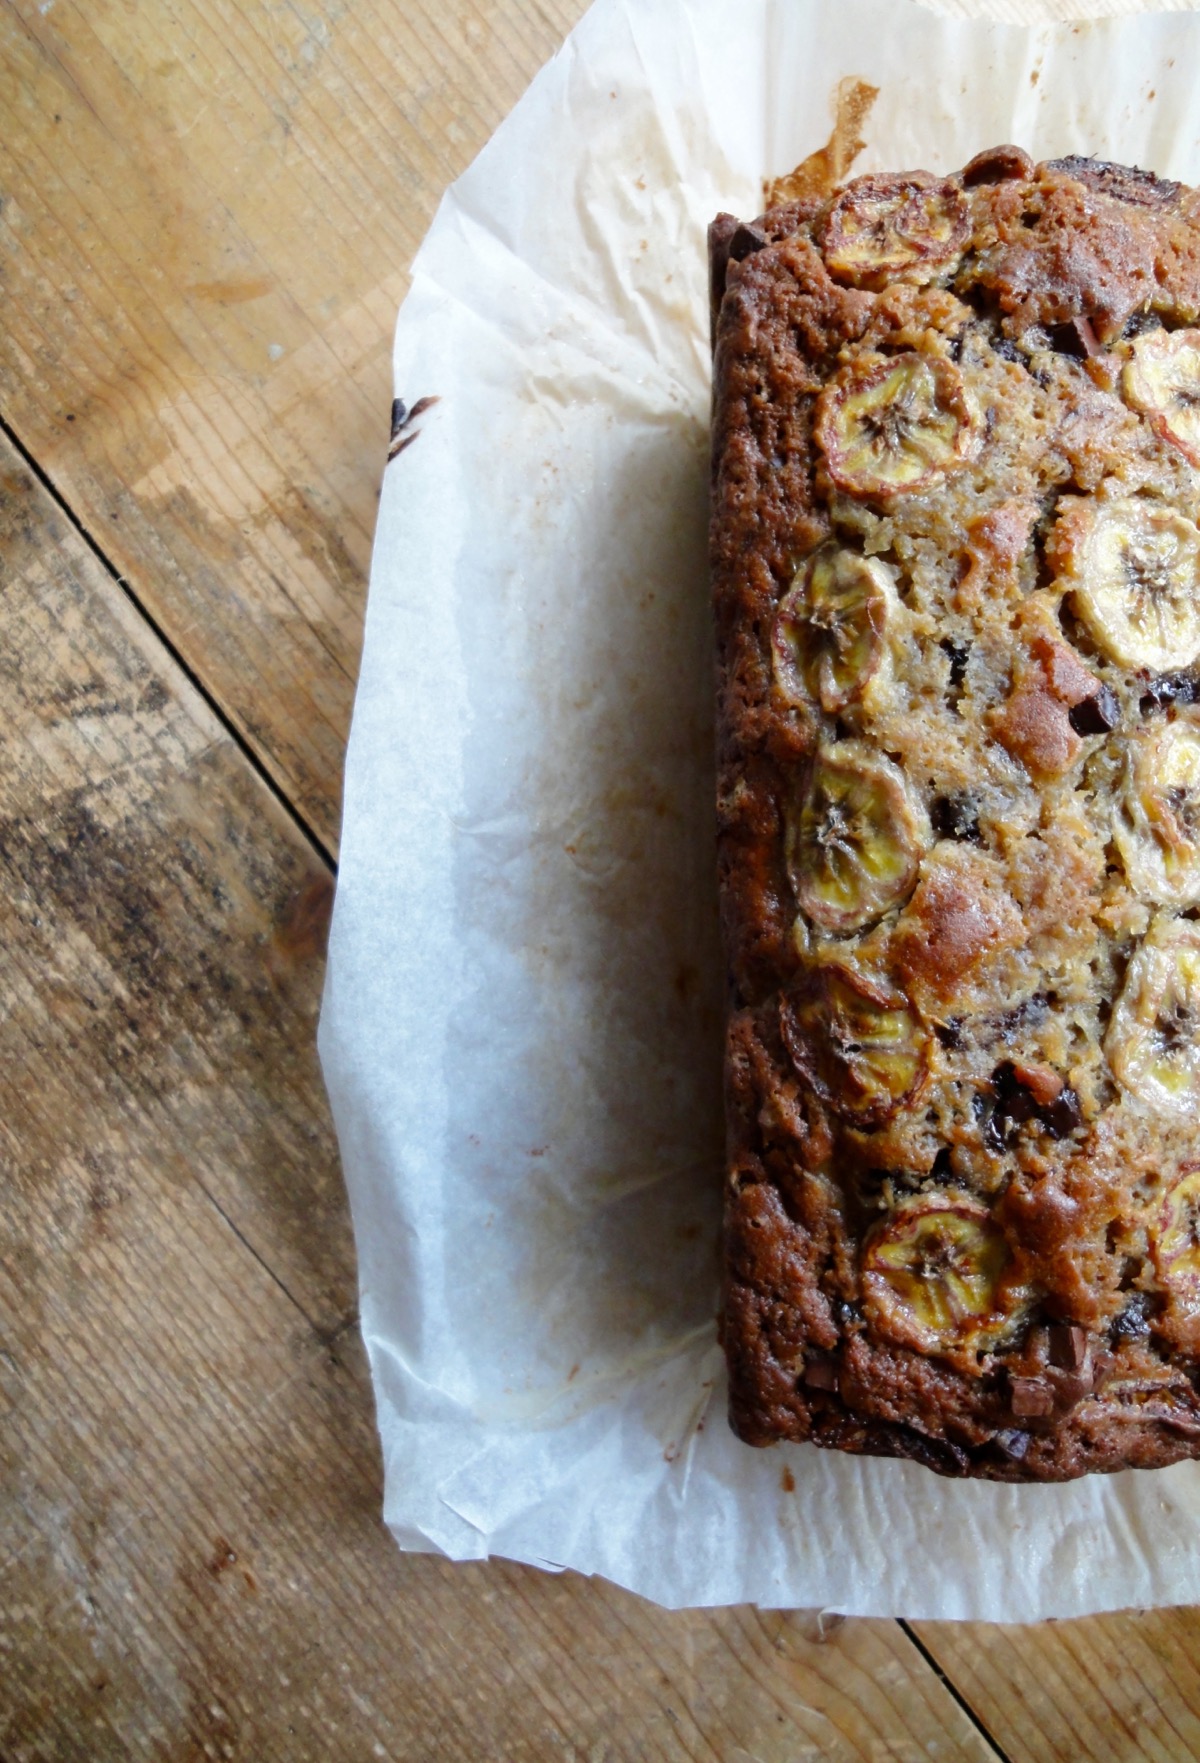
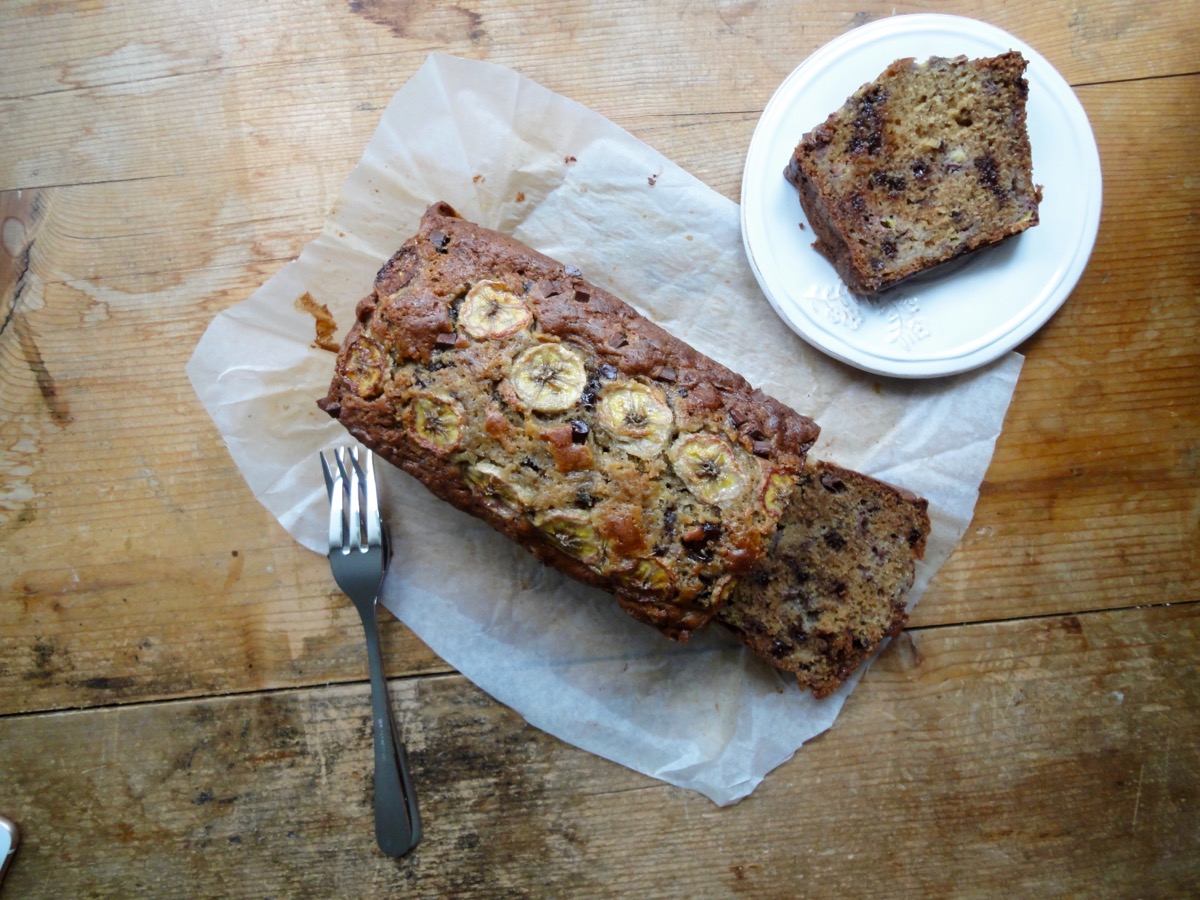
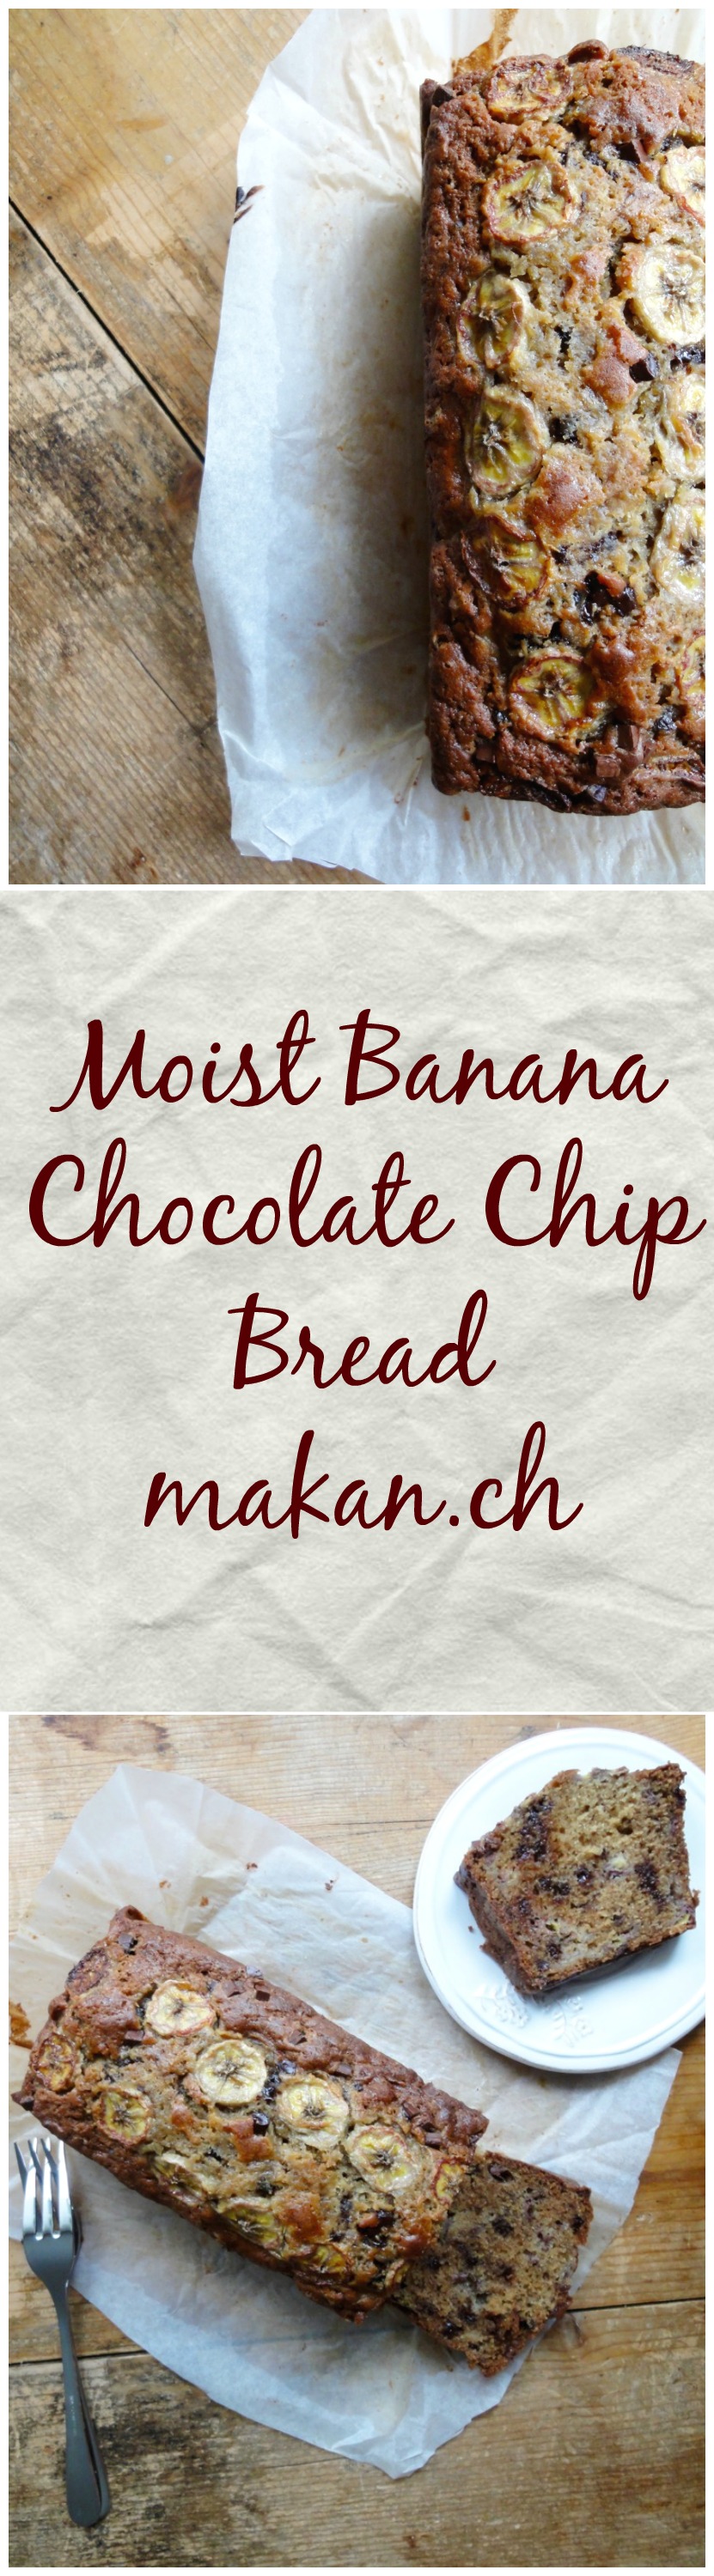
Moist Banana Chocolate Chip Bread


Mmmmmm banana 🙂 The only fruit that appears in our home at least 3 times a month. Coming from a tropical country, I was spoilt with different types of bananas. Heck, we even had banana tree’s growing at the back of our home but had to cut it all down because it was also a good hiding spot for thieves. The one’s we get here are simply just not as nice. So, instead of eating it just like that, I wait for it to get really ripe then add it into my muesli, muffins, bread, and ice-cream. The ice-cream however is a little bit disgusting because it really gets so slimy when you start eating it.
This recipe is really really easy. So easy I whipped it up at 2 in the morning, simply because I could not sleep. I had to make it very quietly though since the hubby was sleeping in the other room. All it took was a medium sized pot, a wooden spoon, a loaf pan and patiences. I initially wanted to bake it in a muffin pan, but I had a new loaf pan which I got 50% off the original price and wanted to give it a try. Plus, there’s a certain satisfaction I get looking at cakes or bread that come in a shape of a loaf. The greek yogurt or sour cream in this recipe makes the loaf really moist, hence the name.
Ingredients
- ½ cup Butter, melted
- 1 cup Brown Sugar*
- ½ teaspoon Salt
- 2 teaspoons Vanilla Extract
- 2 nos Egg
- 1 ½ cups All-Purpose Flour
- 1 teaspoon Baking Soda
- ½ cup Greek Yogurt or Sour Cream
- 3 medium sized (reserve 1 for top) Banana
- ½ cup Chocolate Chips
- ½ cup Walnuts (optional)
Directions:
- Pre-heat oven to 175°C (350°F). Line a 9×5-inch loaf pan with parchment paper. Set aside.
- In a medium pot, add butter on medium heat until just melted. Remove from heat.
- Add sugar and salt, mix well.
- Add eggs one by one, mixing well after each egg. Add vanilla extract.
- Add flour, baking soda, greek yogurt and mashed banana’s. (Just mash 2 banana’s with your hand) Mix till just combined.
- Mix in chocolate chips and walnuts (if using).
- Pour batter into prepared loaf pan.
- Sprinkle some chocolate chips on top. Then. slice up 1 banana and arrange it on the top of the batter.
- Bake for 1 hour. If the bread is still not cooked but has browned on top, place an aluminium sheet on top of the loaf and bake for another 15 – 30 minutes. Use a cake skewer to check if the bread is fully baked. See tips below.
- Once baked, remove from oven and allow to cool for 15 minutes before removing it from the pan.
- Leave to cool completely on a wire rack.
Tips:
- *If the banana’s you use are sweet, feel free to reduce the amount of sugar.
- My bread took 1 hour 30 minutes to bake. After the 1 hour mark, I placed an aluminium sheet on top of the loaf and baked for 15 minutes and removed it to bake for another 10-15 minutes.
- When checking cake doneness, be sure to poke cake skewer in several places of the bread. Sometimes, it’s the banana’s that stick to the skewer fooling you into baking the bread longer.
- Conversion Table
Enjoy and happy baking!
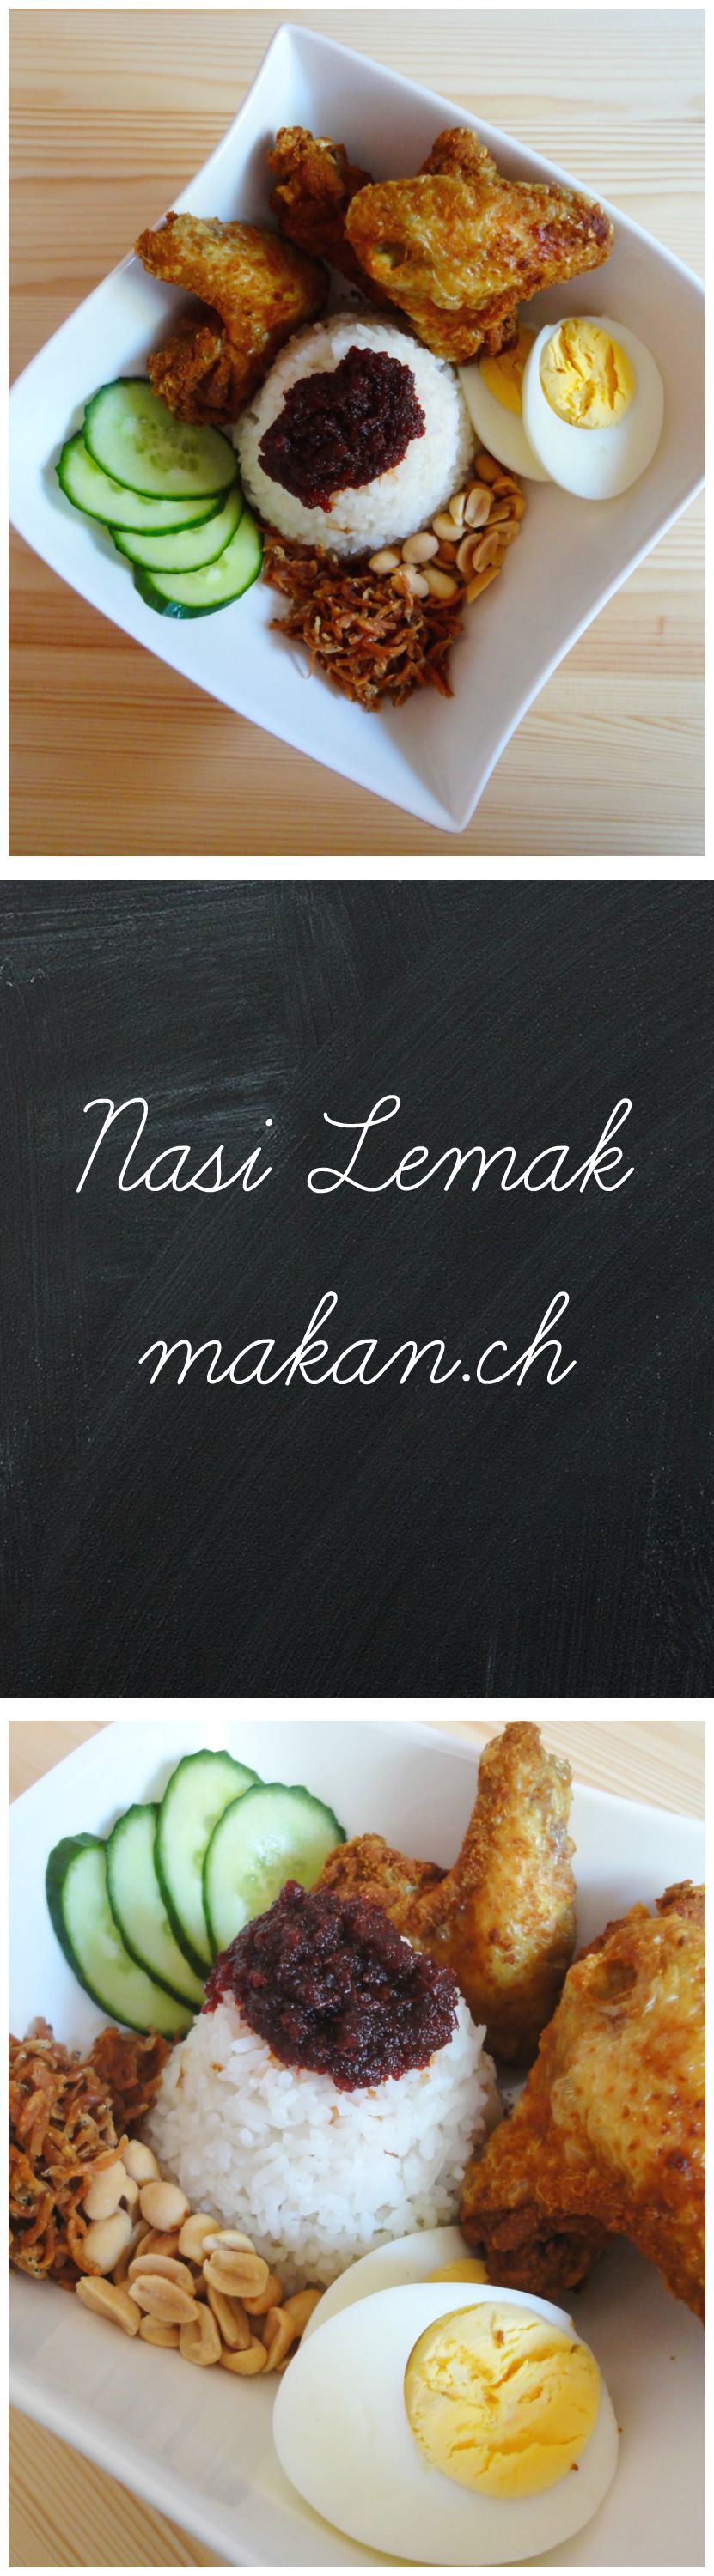
Nasi Lemak
A definite treasure in the heart of a true Malaysian. If you have ever been to Malaysia, Nasi Lemak is one of the many foods you MUST have! Nasi Lemak is also Malaysia’s national dish…and as a Malaysian that lives abroad, having Nasi Lemak really cures the homesickness or it can just have the total opposite effect and make you more homesick. Either or, having Nasi Lemak really makes a Malaysian happy. It’s frowned upon if you are a Malaysian and you do not like Nasi Lemak…and if you are one, please kindly throw your IC and passport away ?.
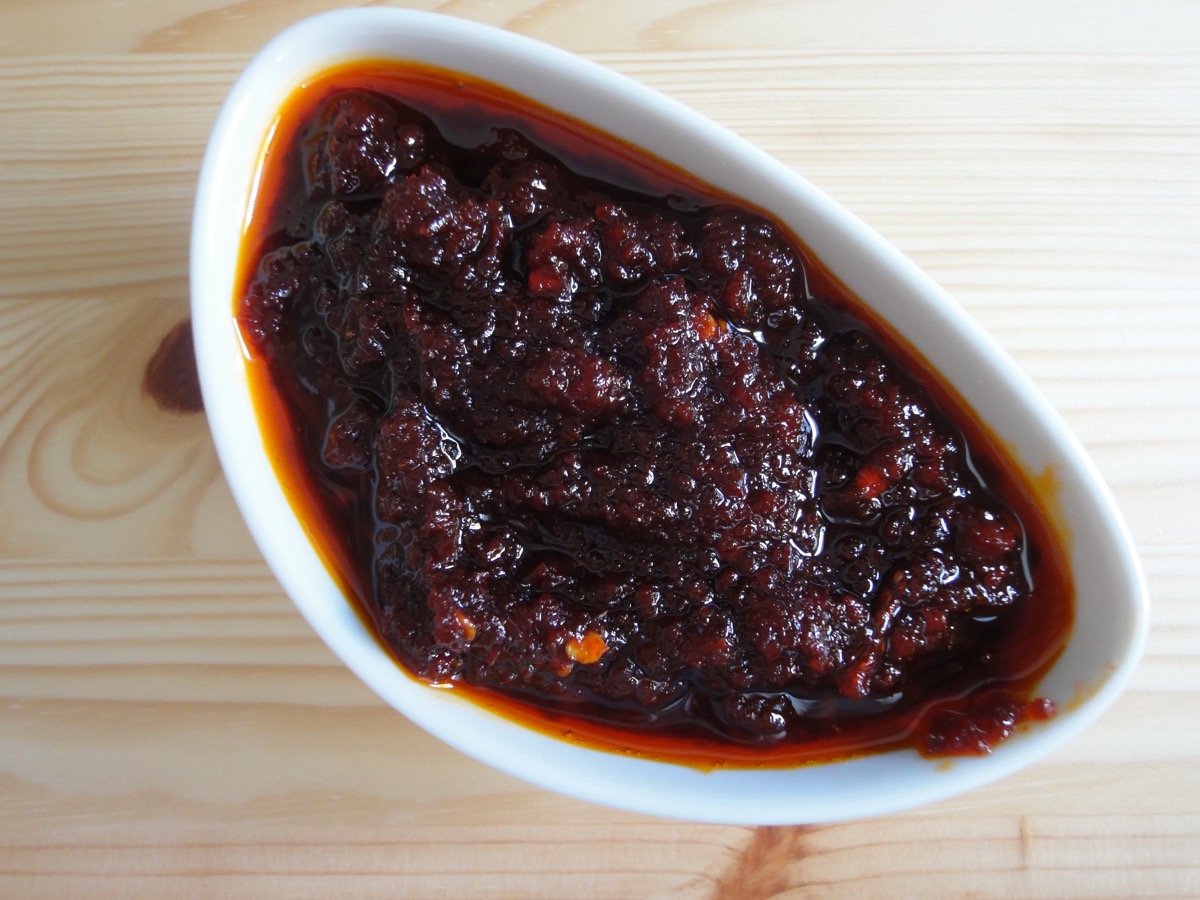
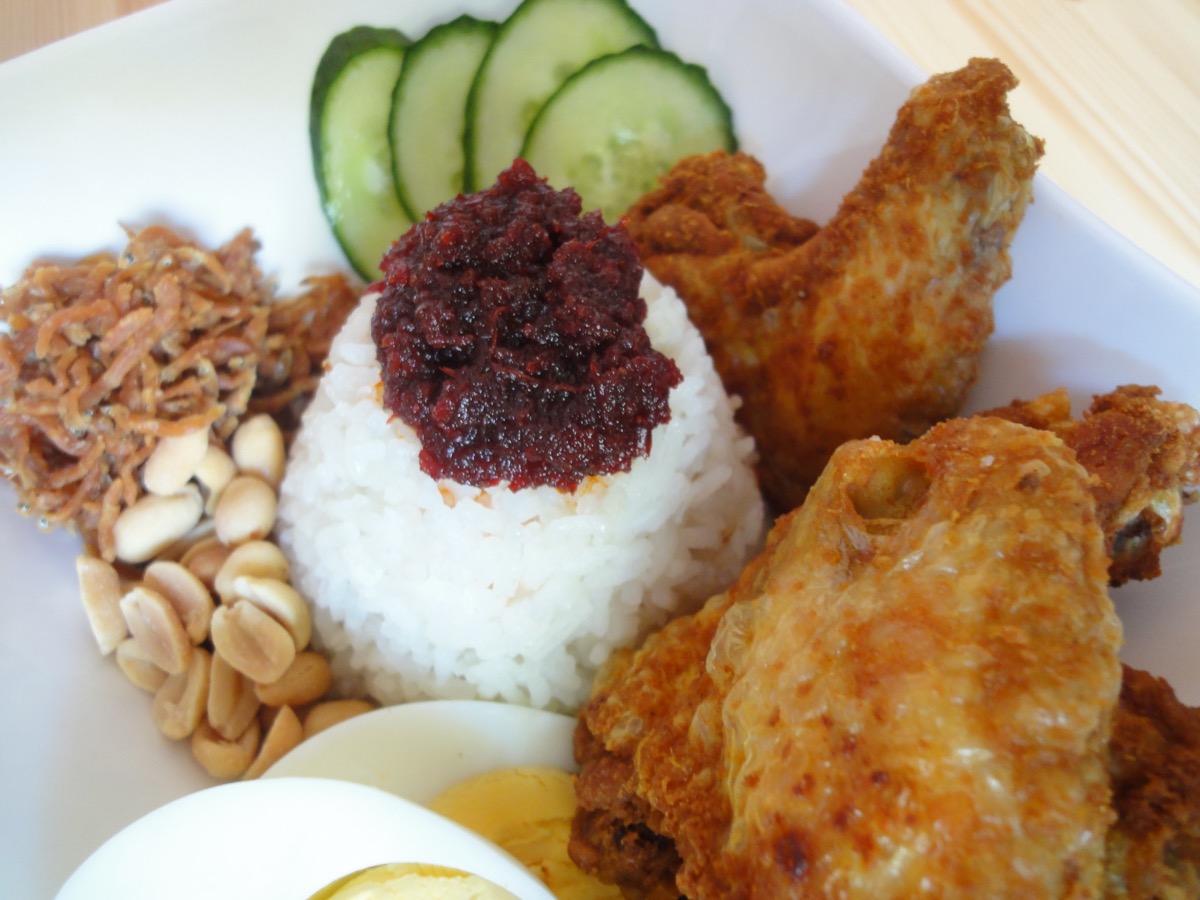
So what is this Nasi Lemak? It literally means fatty/oily rice. Why fatty/oily rice? Because the rice is cooked in delicious creamy coconut milk together with pandan leaves and lemongrass. It is traditionally served with sambal, fried ikan bilis (dried anchovies), cucumber slices, roasted peanuts and a boiled egg which is then wrapped up in a banana leaf and then formed to look like a pyramid. If you have Nasi Lemak as a heavier meal, it is common to add some fried chicken, fried fish, and meat rendang.
When do you eat Nasi Lemak? ANYTIME! Breakfast, lunch, tea-time, dinner and supper! It’s very common when you visit a mamak that you see about 4 packets of Nasi Lemak on your table throughout the day. There are also Nasi Lemak shops or vendors who only sell Nasi Lemak. That’s how much we love our Nasi Lemak.
Writing about it makes me want to have a plate of it right now!
Anyways, this entry is dedicated to the 52nd Malaysia Day which is held on the 16th of September every year to commemorate the establishment of the Malaysian federation which is the joining of Malaya, North Borneo (Sabah), Sarawak, and Singapore (till 1965). I was not in time to post it during the national day which was on the 31st of August, so Malaysia Day is just as good.
May Malaysians always live in unity and harmony. Let’s put aside all our differences and use it for our benefit to make Malaysia a great country once again.
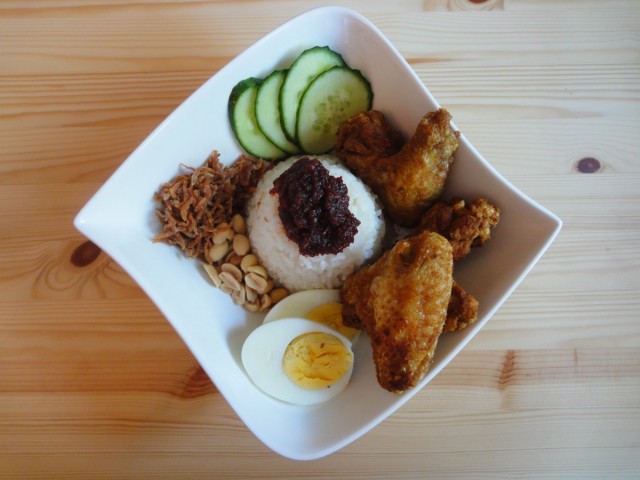
My Nasi Lemak consists of sambal, fried baby ikan bilis, cucumber slices, roasted peanuts, boiled egg and turmeric chicken. I get my baby ikan bilis from my hometown, simply because it’s the best! Sorry, this snobbiness with seafood came naturally being born on an island 😀
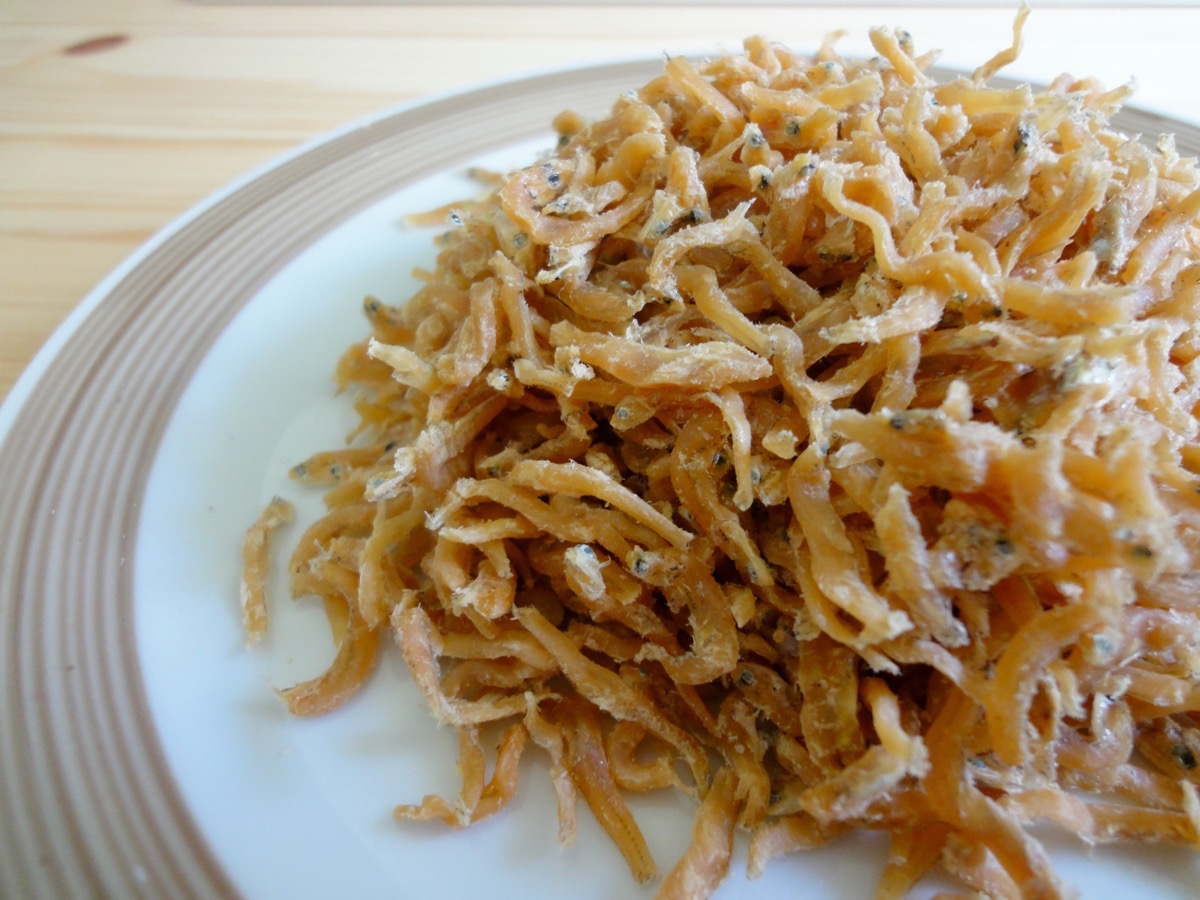
Baby Ikan Bilis – Baby Dried Anchovies
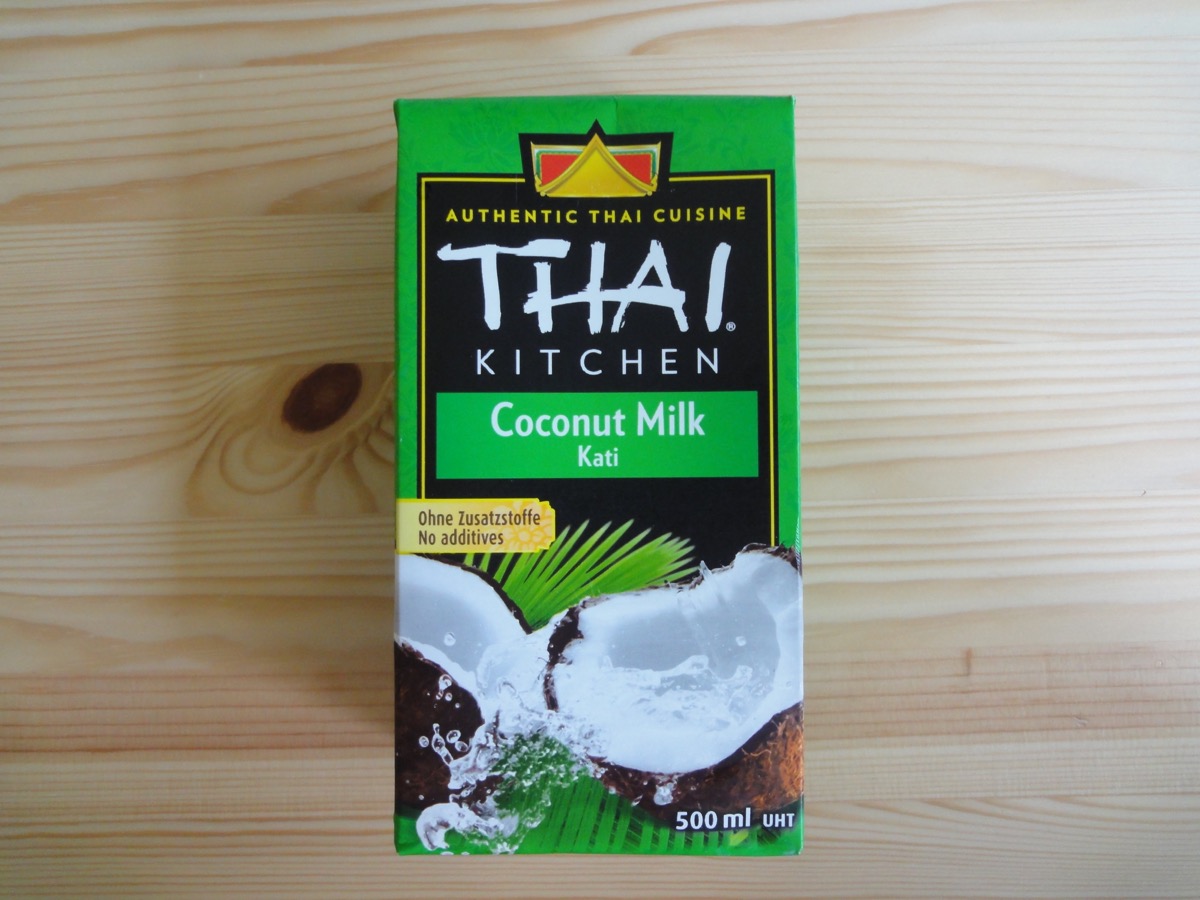
Coconut Milk found in grocery stores here
Coconut Rice
- 2 cups Rice, washed
- 1 cup Thick Coconut Milk (santan)
- 1 cup + 1 tablespoon Water
- 4 Pandan Leaf, knotted
- 2 stalks Lemongrass, bruised
- To taste Salt
Turmeric Chicken
- 6 pieces Chicken Wings
- 2 teaspoons Turmeric
- 2 teaspoons Salt * I like it salty
- 1 teaspoon White Pepper, powder
Condiments
- Sambal
- Cucumber Slices
- Hard Boiled Egg
- Roasted Peanuts
- Fried Ikan Bilis (anchovies)
Directions:
- Coconut Rice
- Wash and clean rice.
- Add rice, coconut milk, water, pandan knots, lemongrass and salt to rice pot. Cook.
- Once rice is done, fluff it up.
- Remove pandan knots and lemongrass before serving.
- Turmeric Chicken
- Clean chicken wings.
- In a bowl, add turmeric, salt and pepper.
- Marinade chicken for at least 30 minutes.
- Heat pan to medium high and add oil.
- Fry chicken wings till crispy. About 15-20 minutes.
- Nasi Lemak
- On a serving plate, add coconut rice, turmeric fried chicken and choice of condiments.
- Serve and enjoy!
Tips:
- Cups to Grams conversion
- Sambal recipe
- Add banana leaf onto serving plate for a more traditional feel.
Enjoy!
Complete plate of Nasi Lemak
Fried Mee Hoon / Fried Rice Vermicelli #1
Mee Hoon/Mihun/Bihun/Bee Hoon or rice vermicelli is made from, rice! You can have it fried, in soups, in dishes with gravy, and even in salads. There is another type of noodle that looks very similar which is known as glass or cellophane noodles made from mung beans, but these are not the same.

Mee Hoon / Rice Vermicelle
Mee Hoon is available in most Asian shops and to my surprise, even in the local grocery store. It’s inexpensive and makes a quick and simple meal or if you like it fancy, then fancy it up. I always have 2-3 packets of mee hoon in my pantry for my extra extra lazy days. This recipe even easier and simpler as it’s only seasoned with soy sauce, rice wine, oyster sauce, sesame oil and the basic salt and pepper. Add in some vegetables and meat or eggs and you’ve got a complete meal. In Malaysia, you can find this type of fried Mee Hoon in economy rice food stalls.
There are two types of soy sauce that I am used to. The first is light soy sauce (kicap masin) which is very watery and salty. The other is dark soy sauce (kicap manis/ketjap manis) which is thick, dark, and sweet. When it comes to soy sauces, I am very picky. Too picky that I’d rather lug 3 litres of it in my check-in bag than to buy it from here (or other brands). To me, there’s no other soy sauce brand as good as HW Cap Ayam (HW Chicken Brand) which is made in Sabah. A few months back, there was even an obviously photoshopped photo of a guy before and after consuming this soy sauce who then turned into a handsome guy after eating it that was circling around Facebook. 😀

Top caption: After eating Sabah Chicken Brand Soy Sauce.
Not all soy sauces are the same though. It varies according to the country it comes from. Japan, Korea, China, Philippines and Indonesia all have their own version of soy sauce, but the difference is just very slight.
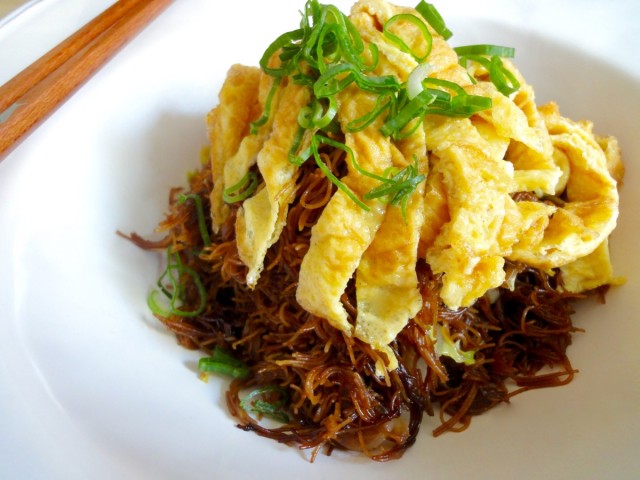
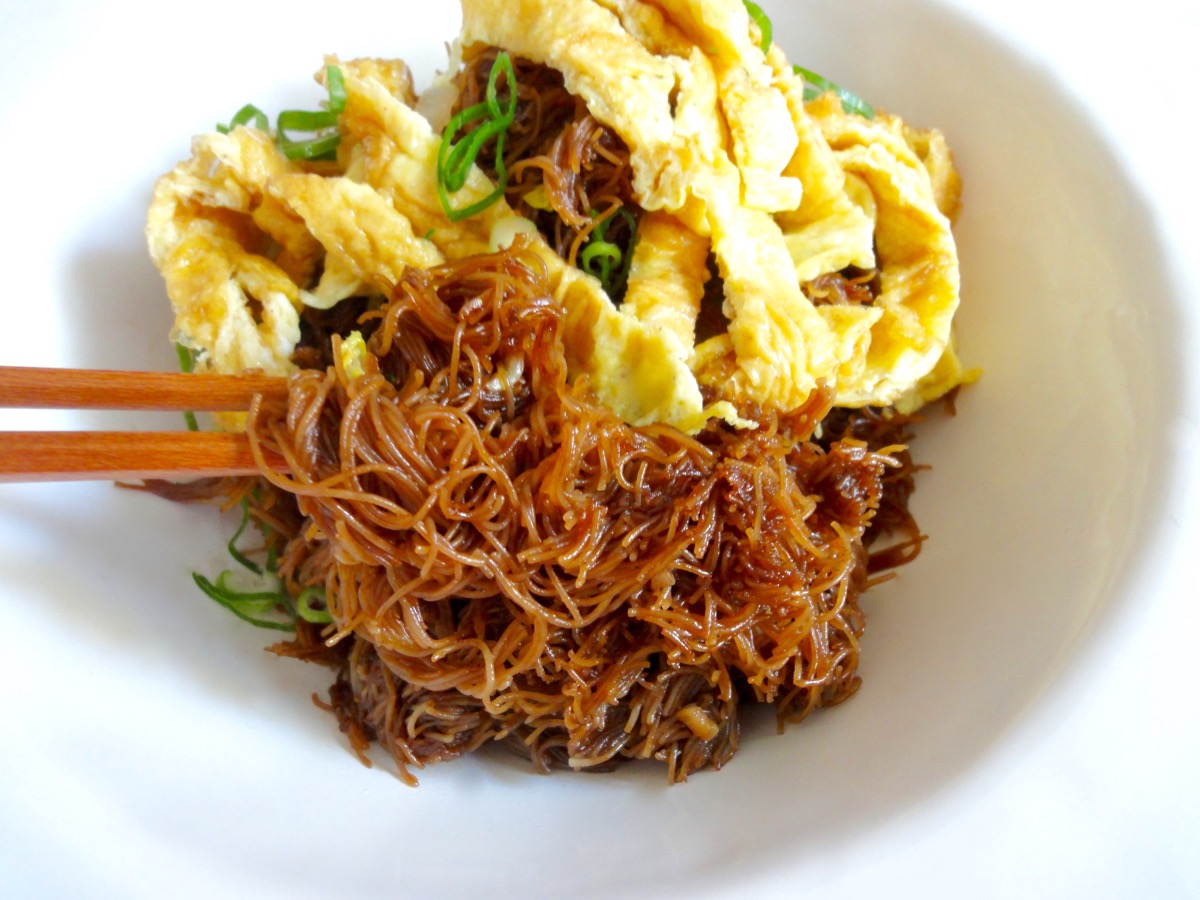
So here it is, a very simple and basic fried mee hoon topped with fried omelette recipe.

Ingredients
- 1 packet (200 grams) Mee Hoon / Rice Vermicelli
- 1 medium Onion, chopped
- 3-5 cloves Garlic, chopped
- ½ inch Ginger, grated
- Half Chinese Cabbage*, cleaned and cut into stripes
Wet Seasoning
- 2 Tablespoons Light Soy Sauce
- 2 Tablespoons Dark Soy Sauce
- 1½ Tablespoons Oyster Sauce
- 1½ Tablespoons Shaoxing Wine ( Chinese Cooking Wine)
- ½ Tablespoon Sesame Oil
- To Taste Salt
- To Taste White Pepper
Garnish
- 2 nos Egg, fried or fried omelette
- 1 Bundle Spring Onions, chopped
- To Garnish Fried Onions
- To Garnish Sriracha or Chilli Sauce
Directions:
- Fried Mee Hoon
- Soak mee hoon according to instructions on packet. Normally I soak it in cold water for 5-7 minutes or till it has soften.
- Discard water and strain.
- Transfer mee hoon into a container. Add wet seasoning. (This is to ensure you evenly season the mee hoon. Seasoning while it’s cooking is a little tricky.)
- In a wok or a deep non stick pan, fry onions, garlic and ginger in some vegetable oil till fragrant.
- Add meat if using. Cook through.
- Add mee hoon and balance wet seasoning. Continue frying for 5 minutes.
- Add vegetables (you can also pre-cook vegetables) and fry till vegetables are cooked.
- Serve or keep aside till other dishes are cooked.
- Fried Omelette
- Whisk eggs with 1 tablespoon of water, and salt and pepper.
- Pour into a lightly greased non stick pan on medium high heat.
- Cook till the edges are slightly browned and flip it.
- Cook for another minute or two.
- Transfer fried omelette onto a chopping board and cut into thin or thick slices.
- Top fried mee hoon with fried omelette and desired garnish and serve.
Tips:
- *Use any type of vegetable you like such as mustard greens, bok choy, bean sprouts or snap peas.
- Serve with side dishes such as tofu, stuffed aubergines, fried egg, fish cake, and many more.
- To add some spice, add a few birds eye chillies while cooking or serve on the side in some soy sauce.
Enjoy!
Classic Lasagne
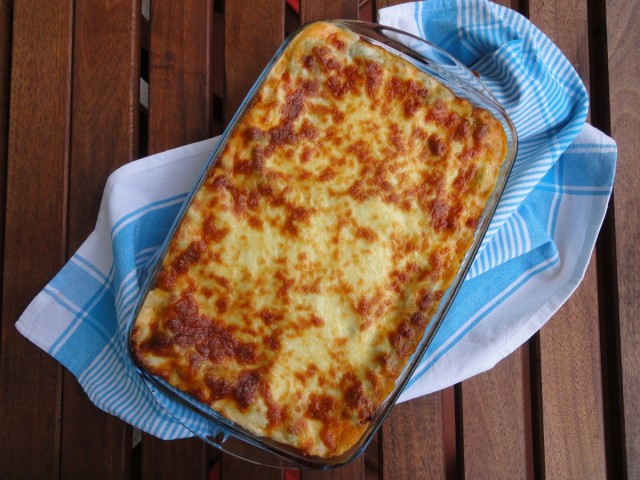
There’s no doubt that my pictures are still horrible. If someone wants to offer me a free photography crash course I will delightfully accept, or perhaps we can trade? Let’s say a dish of lasagne and some cookies? Please? But anyways, my goal here is to not make Pinterest perfect pictures, but ones that actually are realistic to make and taste fine. At least, thats what I believe.
As most know, Lasagne is made from layers of ragù alla bolognese (commonly known as bolognese), béchamel (white sauce ; made from roux and milk, and an oignon pique), pasta layers and topped with cheese.
Oignon pique is french for pricked onion – a bay leaf tacked with cloves to a peeled onion.
Lasagne was introduced to me by my mother. She took me to a place called Dave’s Deli when I was around 9 years old, she had the lasagne while I had something else…I asked her what lasagne is and I was stupidly put off by it. What was I thinking!! So, being a pesky youngest child…I got to eat nearly half of her lasagne because it was just so freaking good! Don’t know if they have kept their standards, but that left a good imprint in my life.
Though Lasagne was not a famous pasta dish back then in Malaysia, a close family friend used to make it for birthday parties. I was very excited when she started bringing it to birthday parties and after party No.3, I finally asked her how she made it. She told me to just follow the instructions on the box. That simple! Sadly, she has passed on and I never got to have her lasagne again. So dear Aunty Lorna, I hope you are watching down from heaven and hope I’m doing well with my lasagne!
During my final diploma semester in college, we had this module where the students had to take over the college cafeteria (or food court). My friend Ronnie and I were assigned to the hot kitchen and prepared lasagne in mass. It was quite a hit and we got some good compliments from the lecturers and students. Even a well known Malaysian celebrity chef’s sister bought our lasagne! I remember she once bought 6 pieces of it to take home for her family.
Now, I have this chance to share my lasagne with every one. I even managed to convince my husband, who WAS not big on lasagne…to love it. This is one of the dishes where he does not mind having for the next 2 meals. Though I managed to convince my husband, I don’t think I could ever convince my siblings and parents to have my lasagne. I made it once for them 6 years ago and it was a huge flop! Guess they must be thanking their lucky stars to have survived that huge flop. 😉
Note: For the béchamel recipe, I use the metric weighing system as I get accurate measurements.
So here it is.
Ingredients
- 9-12 Lasagne Sheets, fresh or dried
- 1½ cups Mozzarella Cheese, shredded
- 1 teaspoon Oregano
Ragù
- 500 grams Minced Beef
- 2 Tablespoons Olive Oil
- 1 medium sized Onion, chopped
- 4 pieces Bay Leaf
- 3 cloves Garlic, minced
- ¼ cup Red Wine
- 1 can (400g) Crushed Tomatoes
- ¼ cup Tomato Paste
- 2 Tablespoons Worcestershire Sauce
- 1 Tablespoon Oregano
- 1 Tablespoon (add more if sauce is very sour) Brown Sugar
- 3-4 Carrots, grated (optional)
- To Taste Salt
- To Taste Black Pepper, crushed
Béchamel
- 50 grams All Purpose Flour
- 50 grams Butter
- 600 ml (2½ cups) Milk
- A pinch Nutmeg
- Half Onion
- 2 pieces Cloves
- 1 piece Bay Leaf
- ½ cup Parmesan Cheese, grated
- To Taste Salt
Directions:
- Ragù
- Heat up a pan with olive oil. Brown minced beef.
- Add onions, garlic and bay leaf. Stir until the onions soften.
- Deglaze pan with wine.
- Mix in canned tomatoes, tomato paste, herbs, and Worcestershire sauce. Add carrots if using.
- Cook until slightly reduced, about 15 minutes. Add in brown sugar. You can add more if the sauce if too sour.
- Season with salt and pepper.
- Set aside.
- Béchamel
- Pierce the halved onion with cloves and bay leaf (oignon pique).
- Lightly toast flour in a medium sized pot. Do not brown the flour.
- Once it starts smelling like toasted nuts, add butter. Stir well. (This is now called roux)
- Cook roux till it smells like again, toasted nuts.
- Whisk milk 300ml at a time into the roux, till combined.
- Continue mixing in the rest of the milk, bring to the boil.
- Add parmesan cheese and oignon pique.
- Season with nutmeg and salt.
- Set aside for at least 15 minutes. Discard oignon pique before using.
- Lasagne assembly (go according to instructions on box, I use Barilla Lasagne sheets)
- Pre-heat oven to 220°C (430°F) and grease a deep lasagne glass dish (13 x 9-inch).
- Spread 1 cup ragù or just enough to cover the dish with a thin layer of sauce.
- Lay lasagne sheets on top – I use 3 sheets per layer.
- Spread 1 cup of béchamel over the sheets.
- Repeat till you reach the third layer*
- Finish off with a generous spread of béchamel.
- Top with mozzarella and oregano.
- Bake for 20 minutes.
- Allow to rest for 15 minutes before serving.
Tips:
- * you can add more layers as you see fit.
- use vegetable lasagne sheets ex. spinach lasagna sheets
Enjoy!
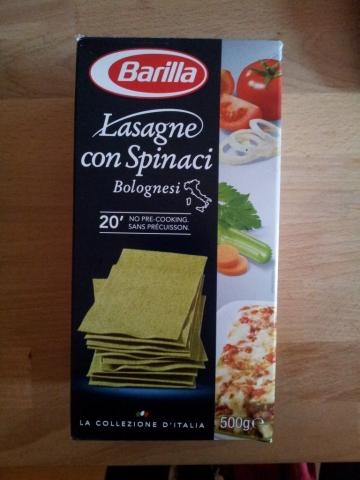
Spinach Lasagne sheets form Barilla
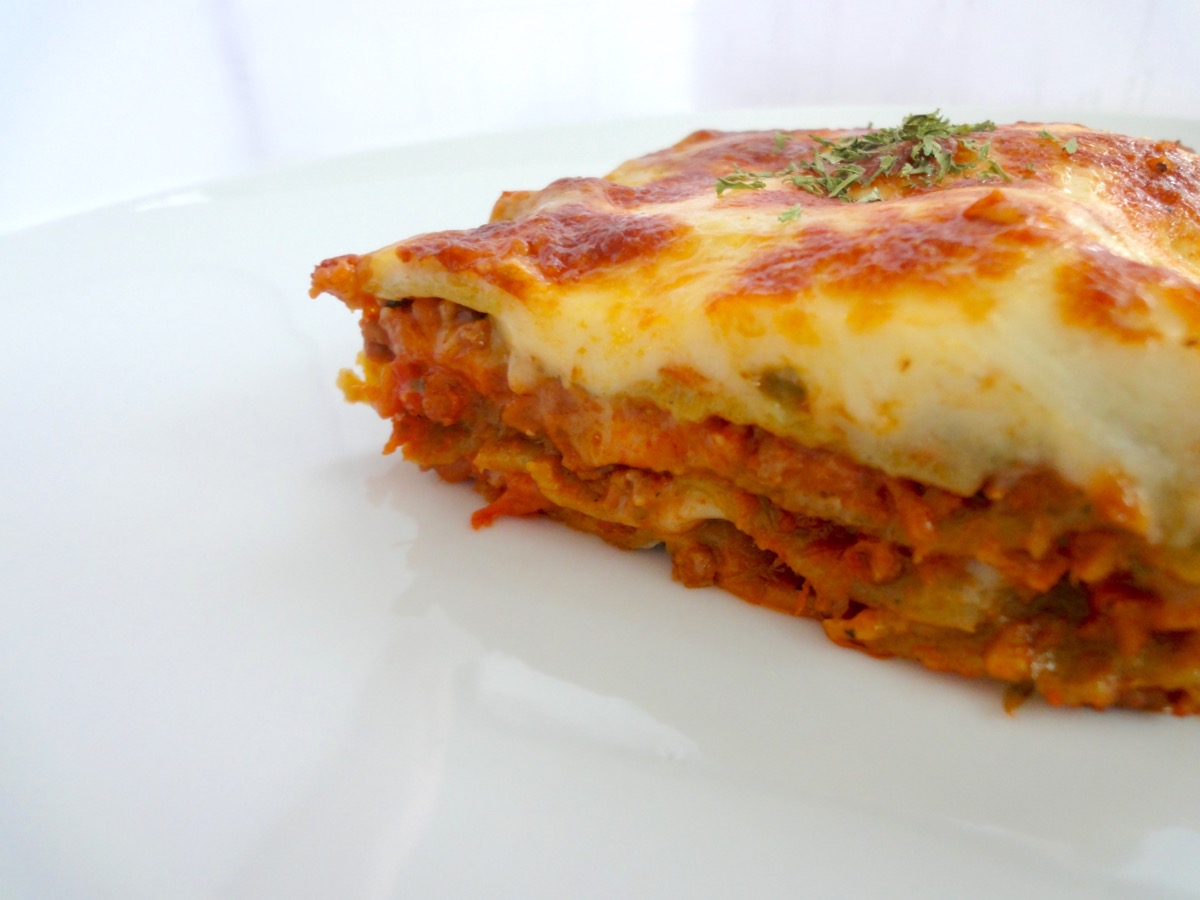
A very poor shot of it. I was too hungry!
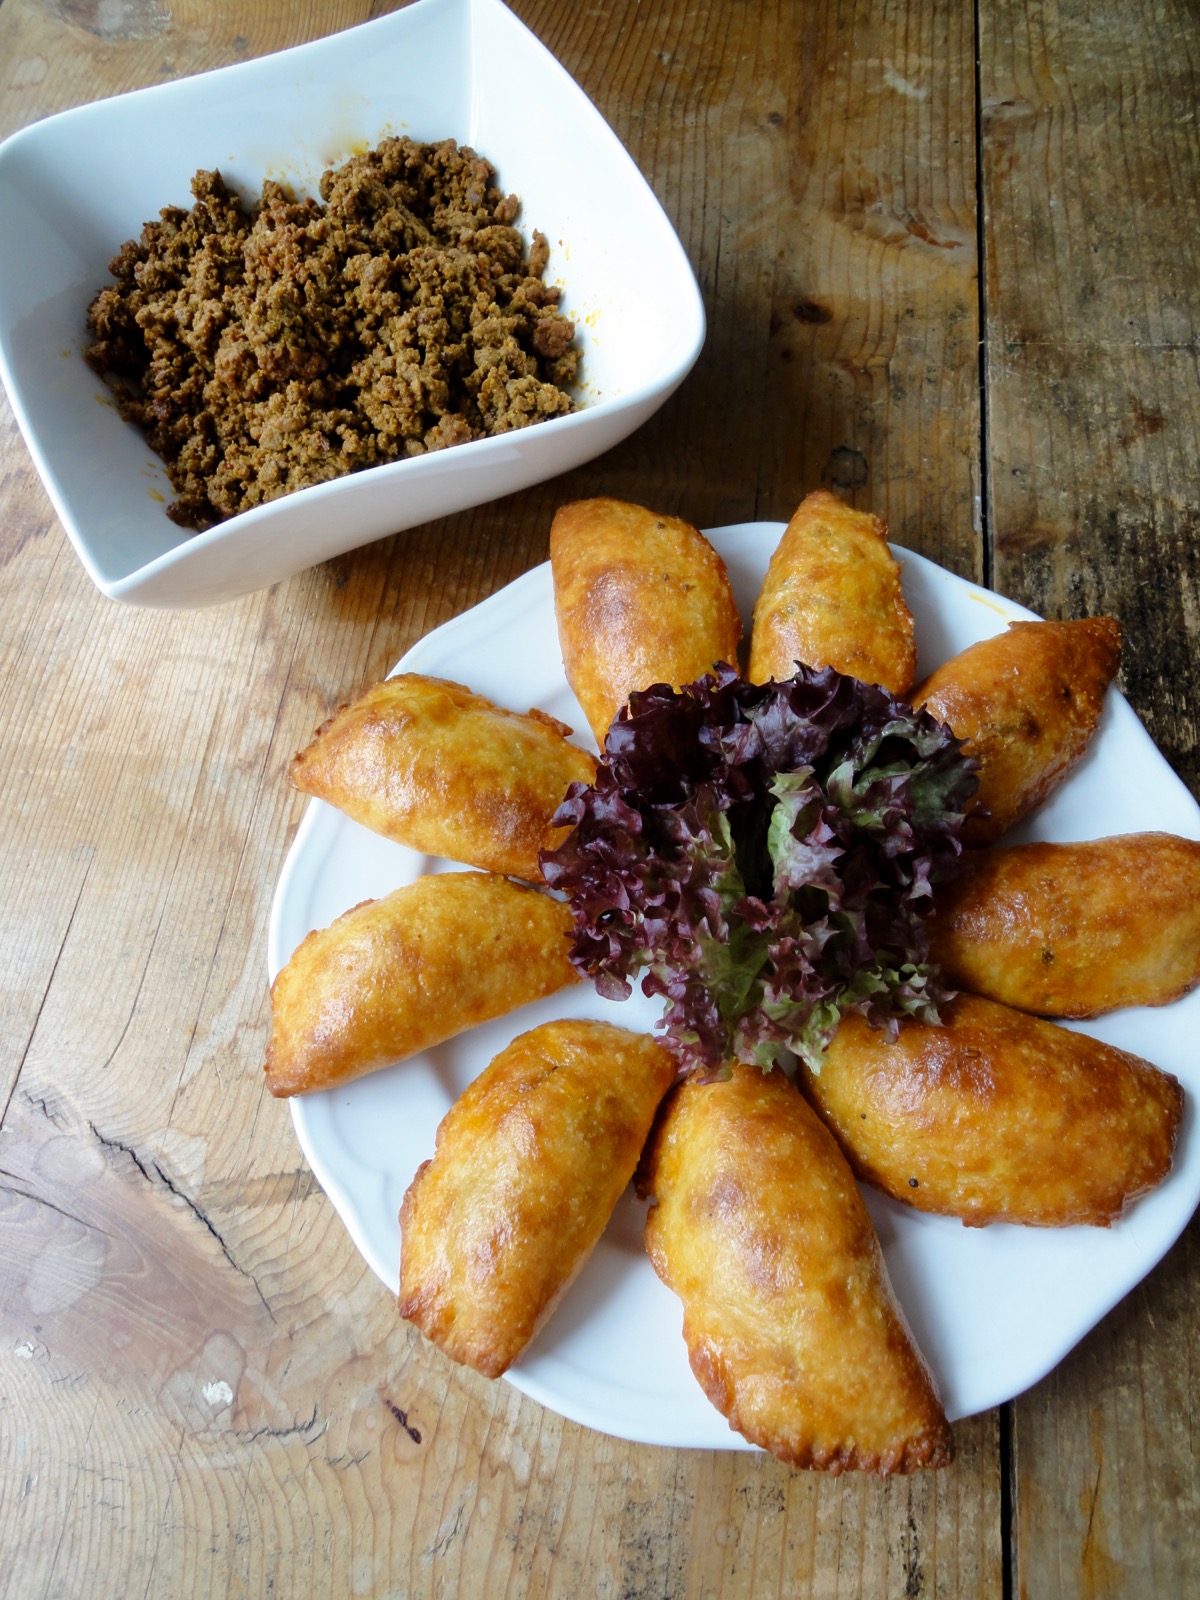
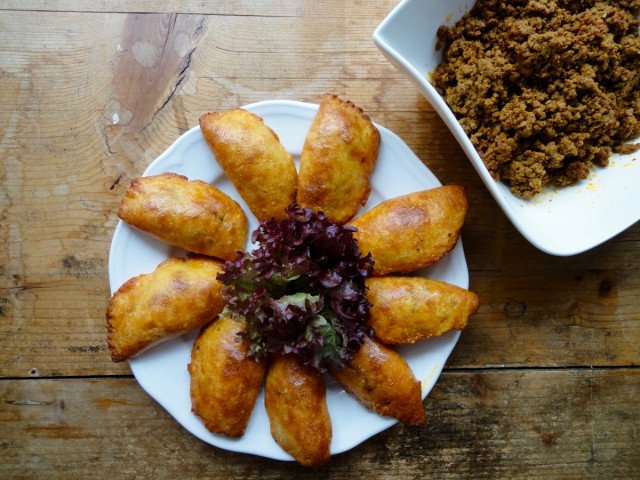
Keto Malaysian Curry Puffs / Karipap
Know that feeling when you start a diet that restricts you from eating certain foods and that’s the very time you want to eat it? Yup. The forbidden foods are the most delicious. Mine happens to be curry puffs. I’m just human…
Curry puffs or as we call it, Karipap is a comfort food for Malaysians. Well, any Malaysian food is comfort food to us. 🙂 Karipap is also known as epok-epok and is quite similar to Empanadas. Karipap is a dough stuffed with dry curried minced meat or sardines and then fried. Some add a quarter of a hard boiled egg in it. On a regular day, I would make Karipap using ready made puff pastry as I don’t have a good hand with dough ( I always over handle it). My Easy Sardine Curry Puffs recipe using puff pastry.
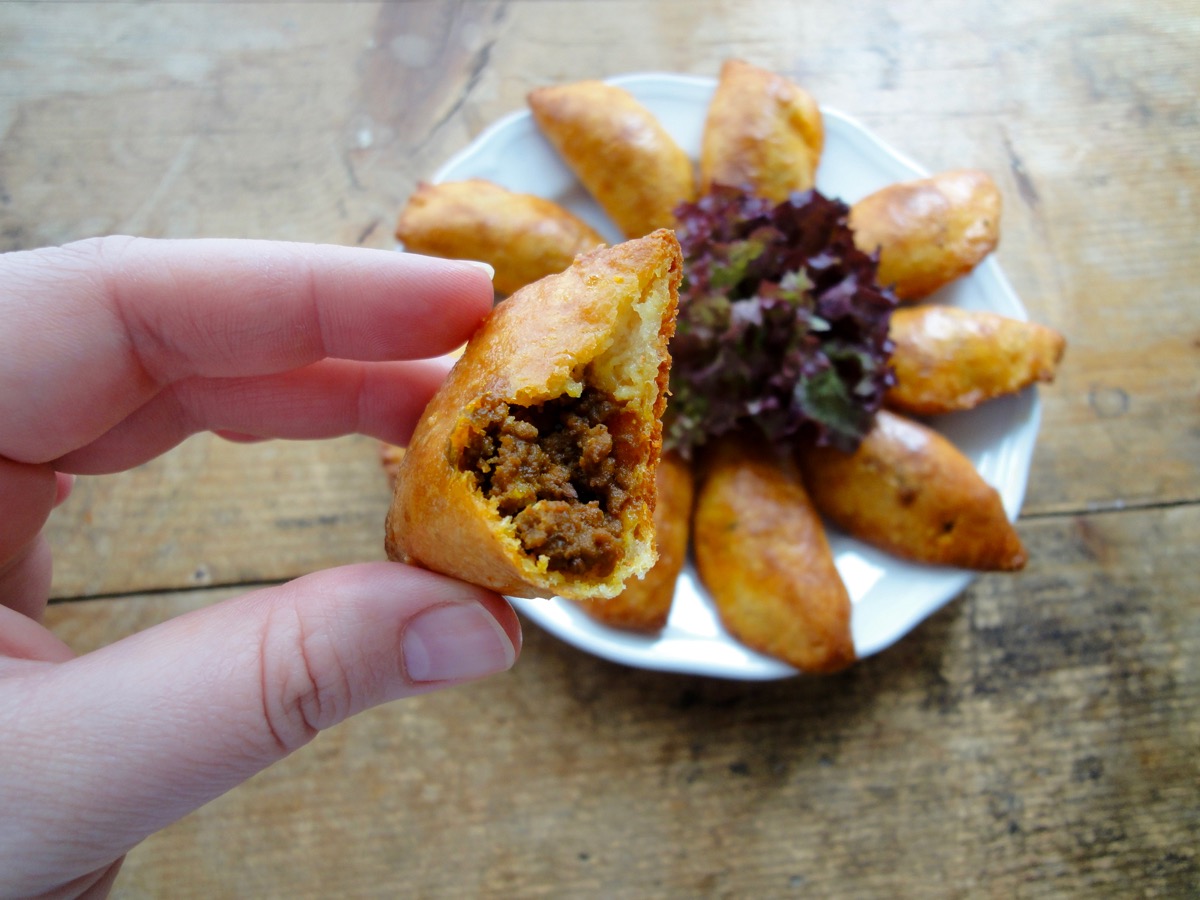
But since I’m on a Keto way of eating, I had to find an alternative. The filling is perfectly fine and I did not have to use any substitutes. The dough however, was my problem. Few days ago, I found a Keto empanada recipe and it took me back to my trip to Spain last summer and I had 2 empanadas and that reminded me of karipap. So after some research, I decided to use a Keto empanada dough recipe but fill it with dry mince meat curry to make Malaysian karipap. I was a little hesitant because using a cheese dough recipe for karipap as it seemed like an abomination to karipap, but after I had my first bite I can safely say, IT’S DAMN DELICIOUS! You can’t even tell that it was made from cheese!

So my fellow Malaysian Keto eaters, I present to you Keto Karipap. This recipe is also suitable for Atkins dieters who are not in the induction phase.
Dry Minced Meat Curry
- 400 grams (13 oz) Minced Beef
- 26 grams (2 Tablespoons) Coconut Oil, for frying
- 2-inch Ginger, sliced
- 2 sprigs Curry Leaves
- 2 pieces Cinnamon Sticks
- 2 teaspoons Cumin Seeds
- 3 pieces Cardamom
- 3 pieces Star Anise
- 3 pieces Clove
- 2 teaspoons Coriander Powder (or Coriander Seeds)
- 2 teaspoons Mustard Seeds
- 45 grams (7 Tablespoons) Curry Powder, use less for less spicy
- 60 ml (¼ cup) Coconut Milk
- 60 ml (¼ cup) Water
- To Taste Salt
Cheese Dough
- 525 grams Shredded Mozzarella
- 150 grams (1½ cups + 1 Tablespoon) Almond Flour
- 3 Eggs, large
- 2 teaspoons Salt
- 1 Egg Yolk (for egg wash)
Directions:
- Dry Minced Meat Curry (total 490 grams after cooking / 12 grams per serving)
- In a nonstick pan or wok, sauté ginger in coconut oil till fragrant.
- Add curry leaves cumin seeds, cinnamon sticks, star anise, cloves, and cardamoms. Fry till fragrant.
- Add mustard seeds and minced beef. Fry till the minced beef is half cooked.
- Add curry powder, coriander powder, onion powder and garlic powder. Mix well.
- Pour in coconut milk (if using) and water. Stir well.
- Allow curry to simmer on low heat till most of the coconut milk and water has evaporated. Season with salt.
- Take curry off heat and set aside. Be sure to remove ginger, cinnamon sticks, star anise, cloves and cardamoms before filling it into the dough.
- Cheese dough (total 792 grams 36 pieces / 22 grams per piece)
- Preheat oven to 200°C (400°F) and line a baking tray with parchment paper. Set aside.
- Melt shredded mozarella. I used a non stick pan as I do not have a microwave.
- In a small bowl, add almond flour, salt and eggs. Mix together and set aside.
- Once the shredded mozarella has melted, leave it to cool for a few minutes (3 minutes).
- Using a spatula or by hand and mix the almond flour mixture with the melted cheese. Mix/knead till fully combined.
- Divide dough into 24 equal pieces (22 grams per piece)
- Roll out dough and add filling (12 grams/1 heap teaspoon).
- Pull the dough over and seal it.
- Transfer to baking tray and use a fork to press and seal the edges.
- Beat egg yolk and 1 Tablespoon of water together (egg wash).
- Brush karipaps with egg wash and bake for 15-20 minutes.
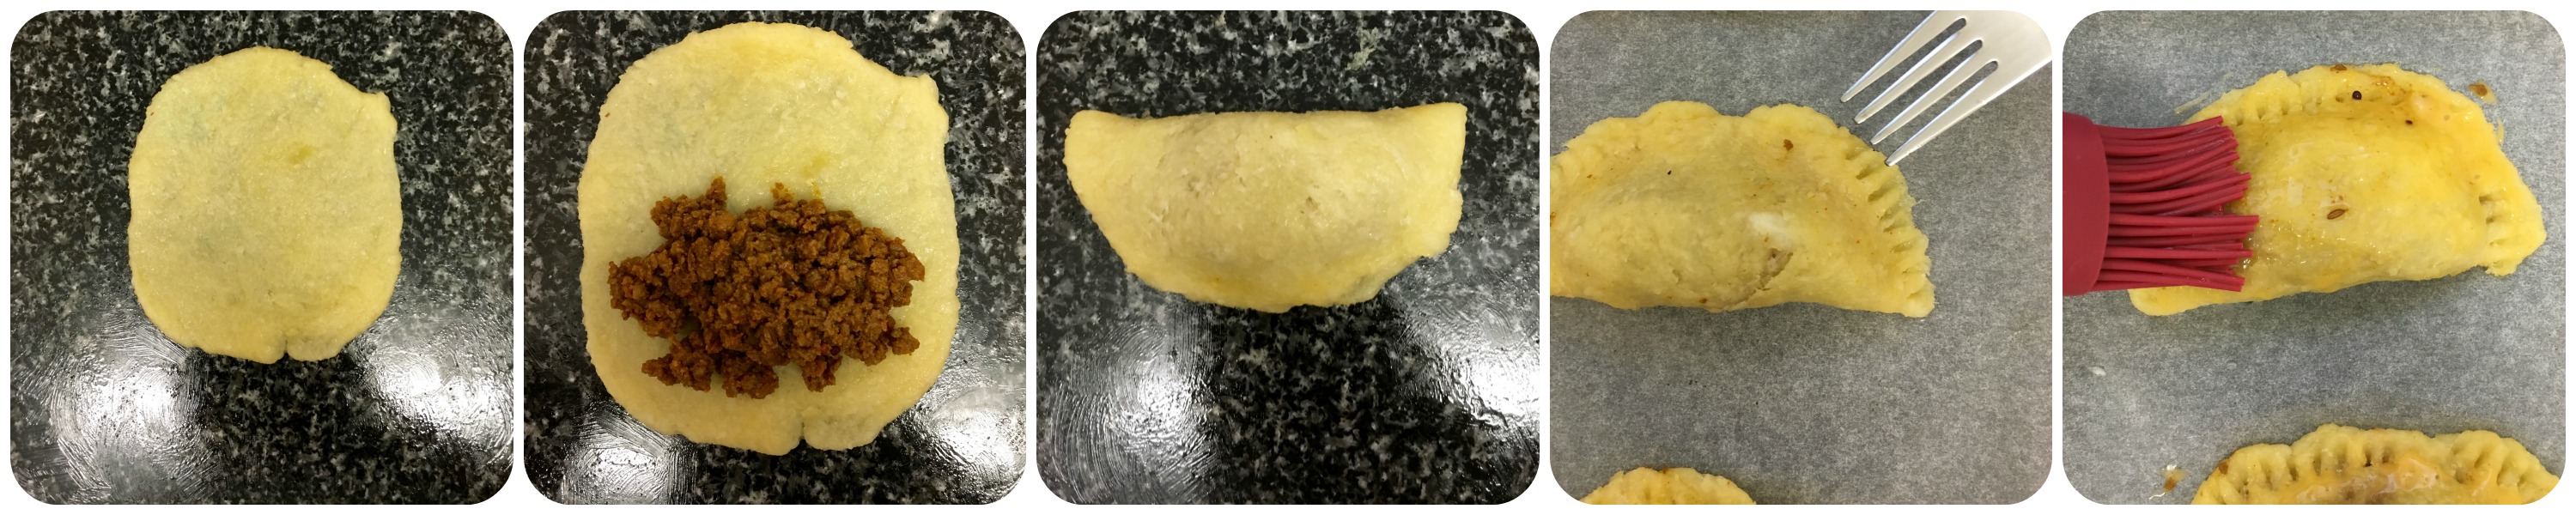
Flatten, Fill, Fold, Seal, Brush
Tips:
- Conversion Chart
- 1 cup shredded mozzarella = 113 grams
- 1 cup almond flour = 96 grams
- Recipe yields 36 pieces of karipap. If you do not want to make that many, simply divide recipe or freeze the karipaps.
- Use coconut milk that is unsweetened, lowest in carbohydrates, and full fat. I used Chaokoh coconut milk. If you want an even lower carb and fat version, omit the coconut milk in the curry.
- If you are using MyFitnessPal app to count calories, first copy the recipe URL then go to MyFitnessPal app to Recipes, select Create a New Recipe, then Add from the Web. Paste the URL, match ingredients and that’s it! Always match ingredients to the ones you use.
- Ingredient nutritional facts differ depending on brand.
- Nutrition Facts (based on my ingredients) : Per serving (1 curry puff) 106 kcal, Total Fat – 8 grams, Net Carbs – 1 grams, Protein – 5 grams.
Enjoy!