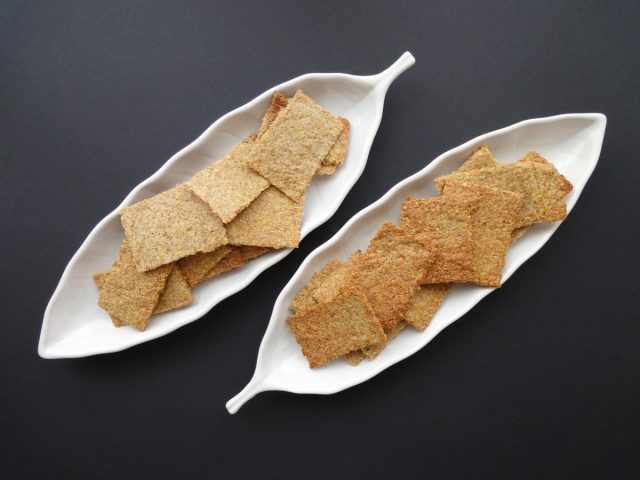
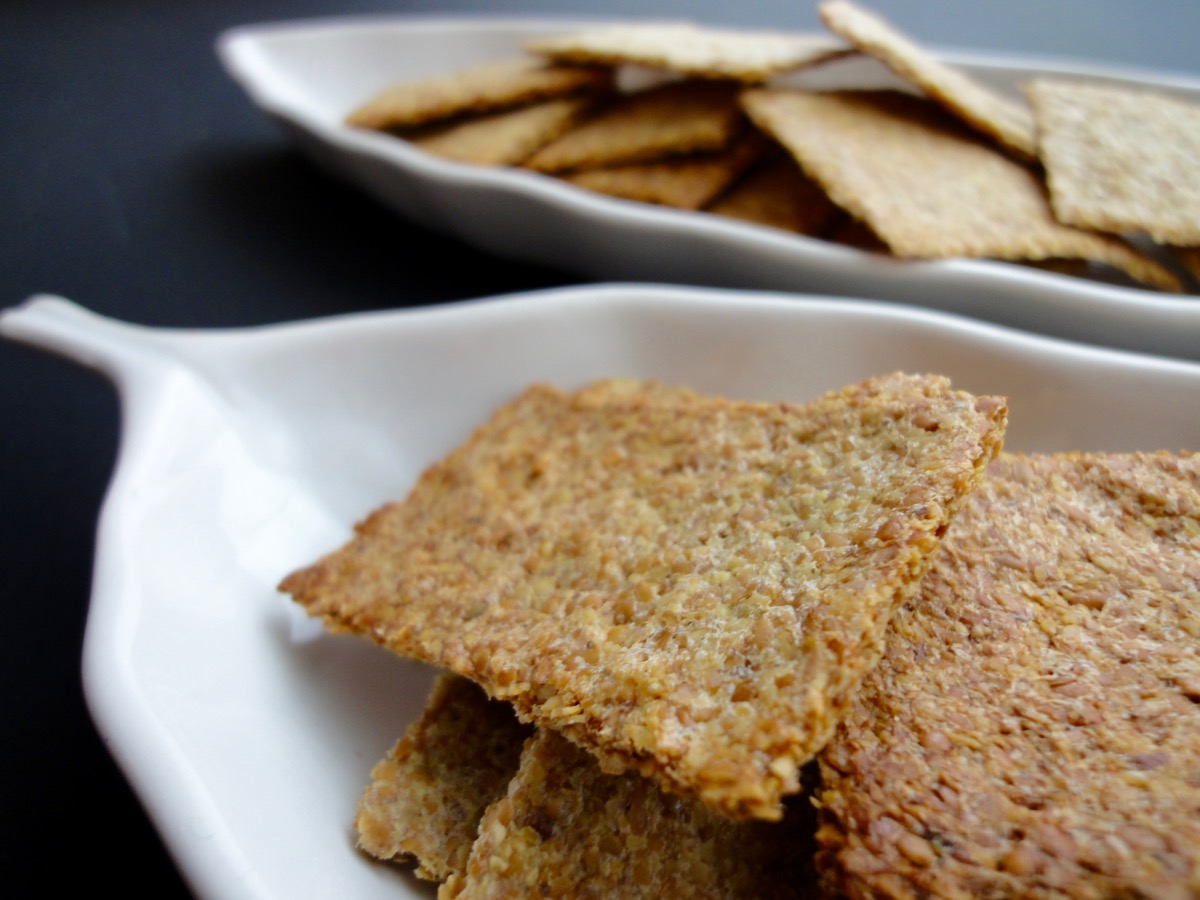
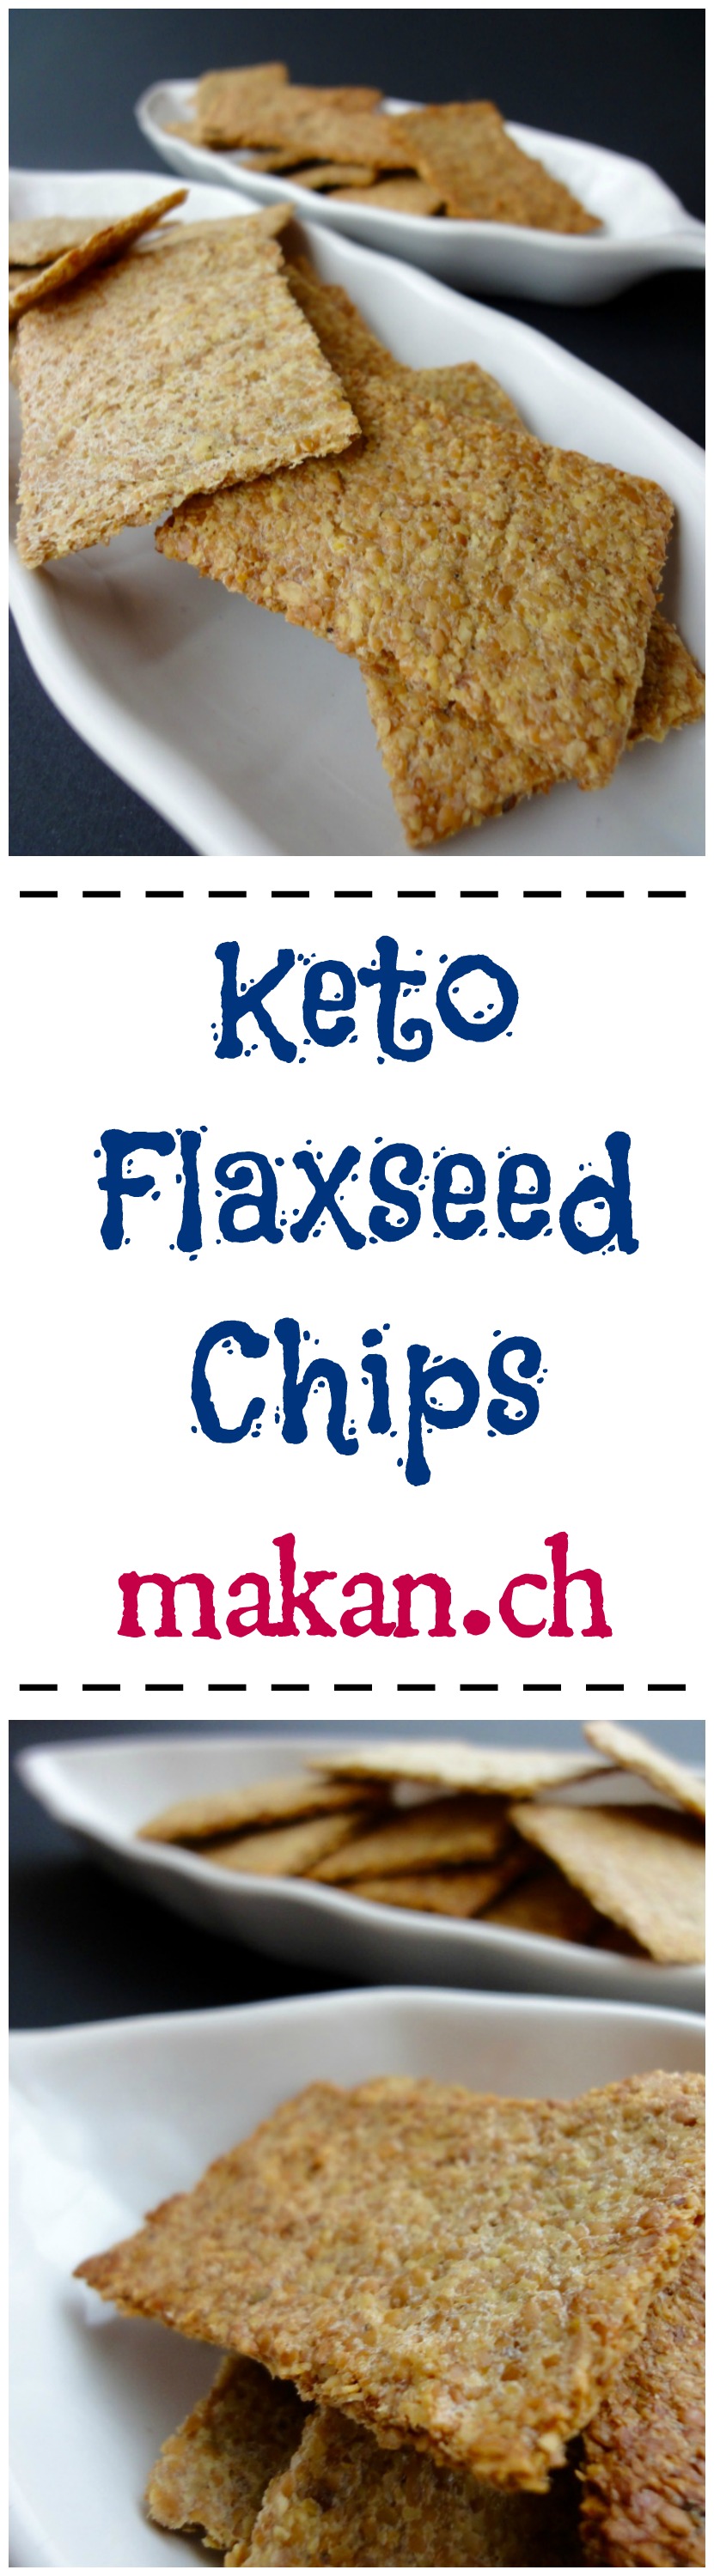
Keto Flaxseed Chips
Hello, hello! I’ve not been spending time on my blog for the past month! Honestly, I’m running out of ideas and I’ve been eating simple meals which I think don’t need to be on the blog. Anyways, I’m getting my groove back and certainly meal ideas for those who are on the keto way of eating.
Most chips sold in supermarkets are made from either potatoes or flour, which are obviously high in carbs. There’s reduced fat, fat free, sodium free and gluten free, but no low carb. So I was looking for something crunchy to snack on or have as dips and I came across this Low Carb Flaxseed Chips from Low Carb Recipe Ideas. I tried it out and got hooked. Hooked so much, I would make it at least once a week.
You can adjust seasoning according to what you like. I like mine a little spicy so I add a chili powder mix of cayenne, chili, cumin, and paprika. These chips are perfect as a dip or a high fiber snack.
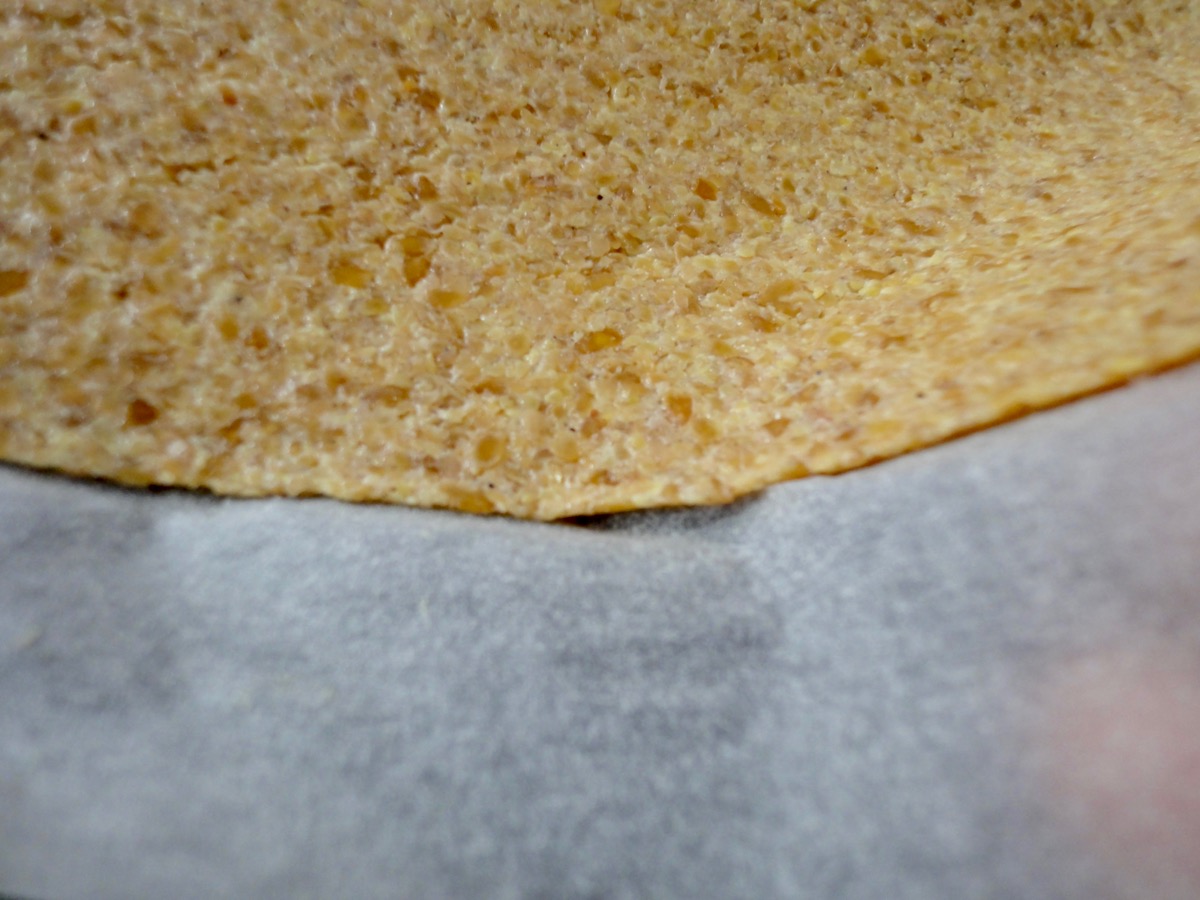
Roll it out as thin as you can between 2 parchment papers.
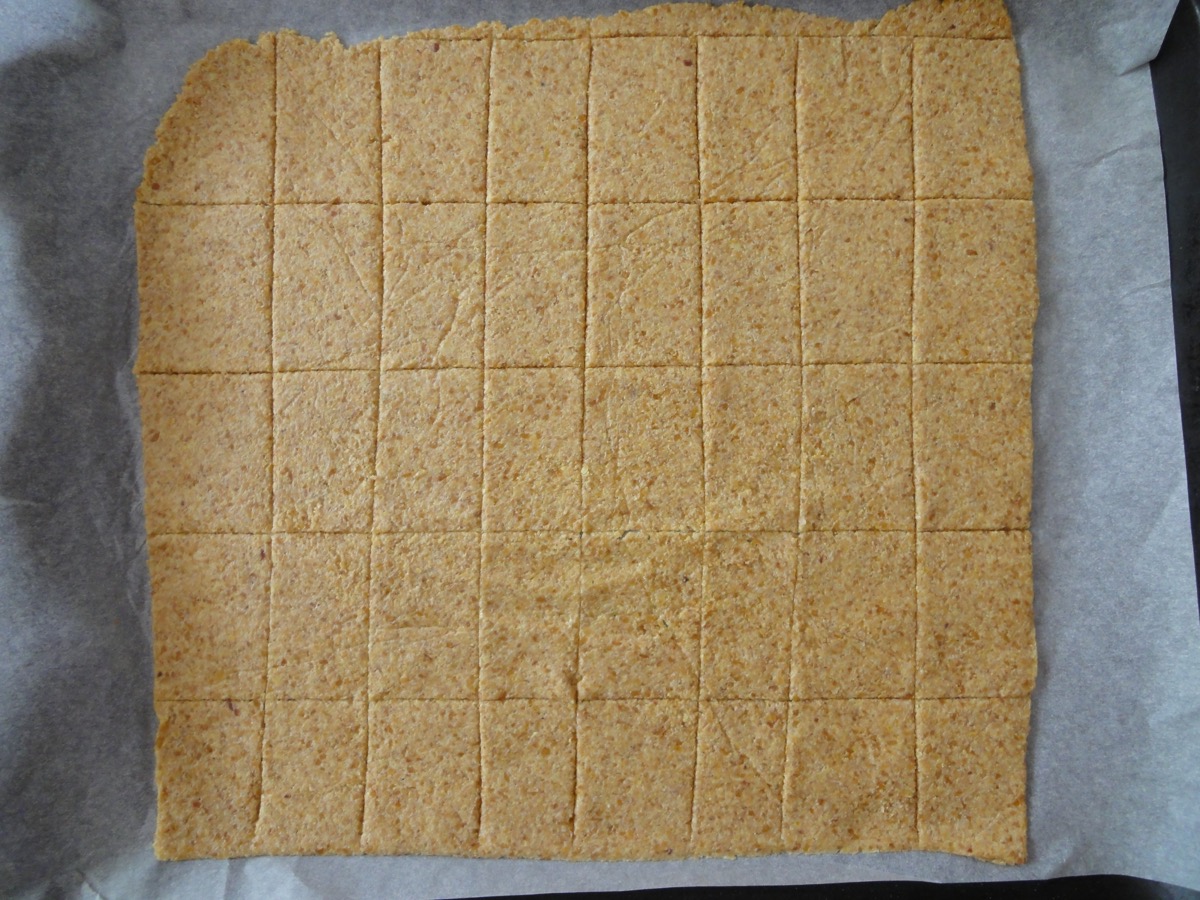
Cut it with a pizza cutter before baking.
Ingredients
- 1 cup Flaxseed Meal (Golden or Brown)
- 2 teaspoons Garlic Powder
- 2 teaspoons Onion Powder
- 2 teaspoons Chilli Powder Mix (Cayenne, Paprika, Chilli) *optional
- ½ cup Water
Directions:
- In a bowl, mix ground flax meal and seasonings well.
- Add water and mix till combined with a spatula.
- Cover and set the dough aside for 10 minutes.
- Pre heat oven to 200°c (400°F).
- Once dough is ready, roll it out between 2 parchment papers as thin as you like. (cooking times will vary according to thickness)
- Gently pull apart parchment paper from each side of the rolled dough onto the other (this is to make sure it does not stick to the paper while baking)
- Place the rolled dough with parchment paper onto a baking sheet and use a pizza cutter to cut into cracker sized pieces.
- Bake chips for 10-15 minutes (longer if thicker).
- Once chips are baked, turn off the oven, remove and break the crackers. Spread the crackers on the baking tray and return to the oven for another 10 minutes with the oven door slightly opened. (this is to dry it out so it gets crispy)
- Allow crackers to cool completely before storing.
Tips:
- Conversion Chart
- You can adjust seasoning according to what you like. I like mine a little spicy so I add a chili powder mix of cayenne, chili, cumin, and paprika. These chips are perfect as a dip or a high fiber snack.
- If you are using MyFitnessPal app to count calories, first copy the recipe URL then go to MyFitnessPal app to Recipes, select Create a New Recipe, then Add from the Web. Paste the URL, match ingredients and that’s it!
- Always match ingredients to the ones you use. Ingredient nutritional facts differ depending on brand.
- Nutrition Facts (based on my ingredients) : Per serving (8 pieces) 124 kcal, Total Fat – 9 g, Total Carbs – 7 g, Fiber – 6 g = NET Carbs – 1 g, Protein – 4 g.
Enjoy!

Apple Crumble
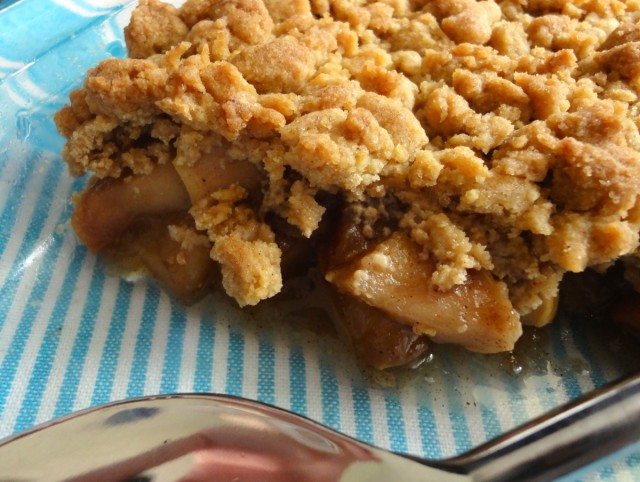
Apple crumble is one of my comfort food go-to’s. I enjoy eating it throughout the year with whatever apples I can get. This time though, I made this particular one because I mistakenly ordered a large bag (2.5 kilos) of cooking red apples. There was no name on the apple bag other than Grade 2 cooking apples. It was not too sweet, a little tart and crispy.
I was shuffling between making apple jam, apple butter or apple crumble…obviously went with the crumble because I have 4 types of jams in the fridge and that’s gonna take me some time to finish it off. Most recipes don’t require the apples to be cooked prior to baking, but I personally like cooking the apples prior so that it really gets infused with the spices but not too long that it gets too soft.
This recipe keeps for up to a week in the fridge and is great eaten hot or cold!

Apple Crumble
Apple Filling
- 6 large Cooking Apples
- ¼ - ½ cup (depending on sweetness) Brown Sugar
- 6 sticks / 1 tablespoon (powder) Cinnamon
- 4 pieces Star Anise
- 4 pieces Clove
- 2 pods Cardamon
- 1½ teaspoons Nutmeg
- 2 tablespoons Water
- 2 teaspoons Cornflour
- To taste Salt
Crumble
- 1 cup Flour
- 1 teaspoon Baking Powder
- ½ cup Butter, cubed
- ½ cup Packed Brown Sugar
- ¼ teaspoon Cinnamon Powder
- ¼ teaspoon Salt
Directions:
- Apple Filling
- Set aside apple filling aside.
- Take 1 teaspoon of water and mix it with the cornflour. Add to apple filling and mix well.
- Cook on medium high for 15 minutes.
- Add to a saucepan or pot. Except for the cornflour, mix in all the apple filling ingredients.
- Core and cut apples into 1 inch chunks.
- Crumble
- Remove and combine more by hand.
- In a food processor, add all the ingredients and pulse until large crumbs are formed.
- Assembly & baking
- Pre-heat oven to 190°C.
- In a 9 x 9-inch glass or ceramic baking dish, add the apple filling.
- Pour crumble evenly over the filling.
- Bake for 30 minutes.
- Serve immediately with vanilla ice cream, cream, or even custard.
Tips:
Happy baking & enjoy!
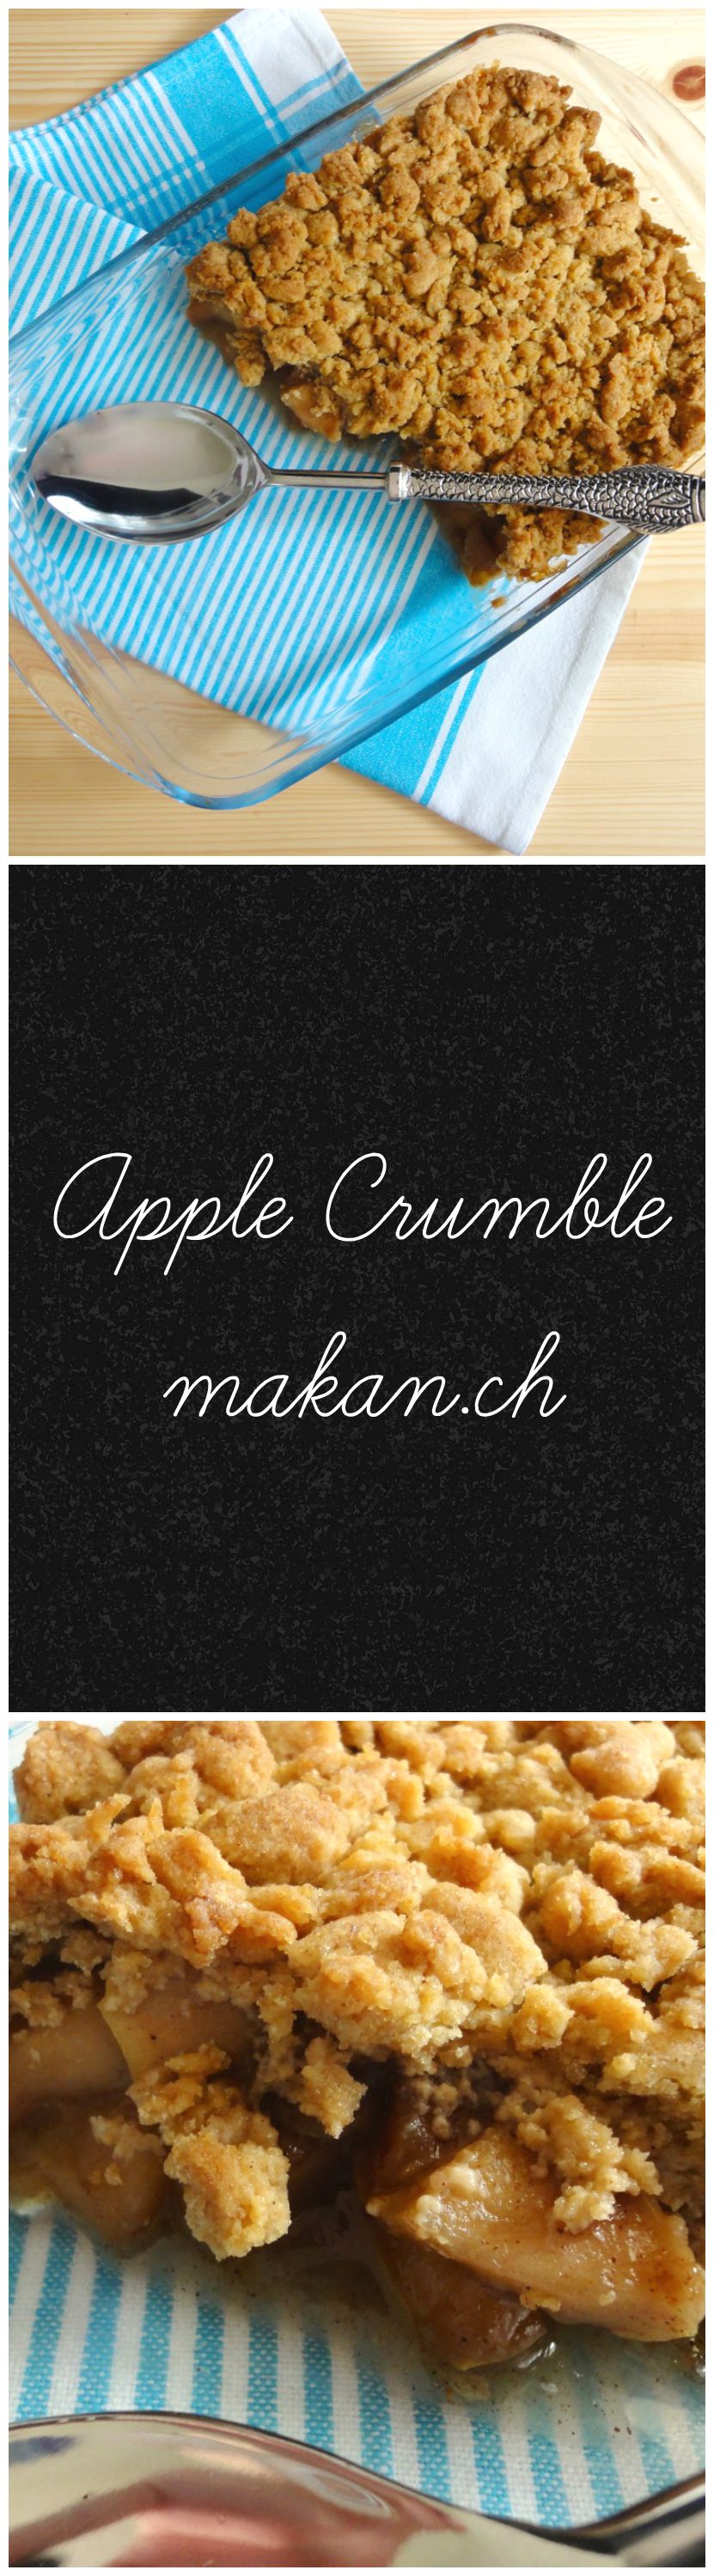
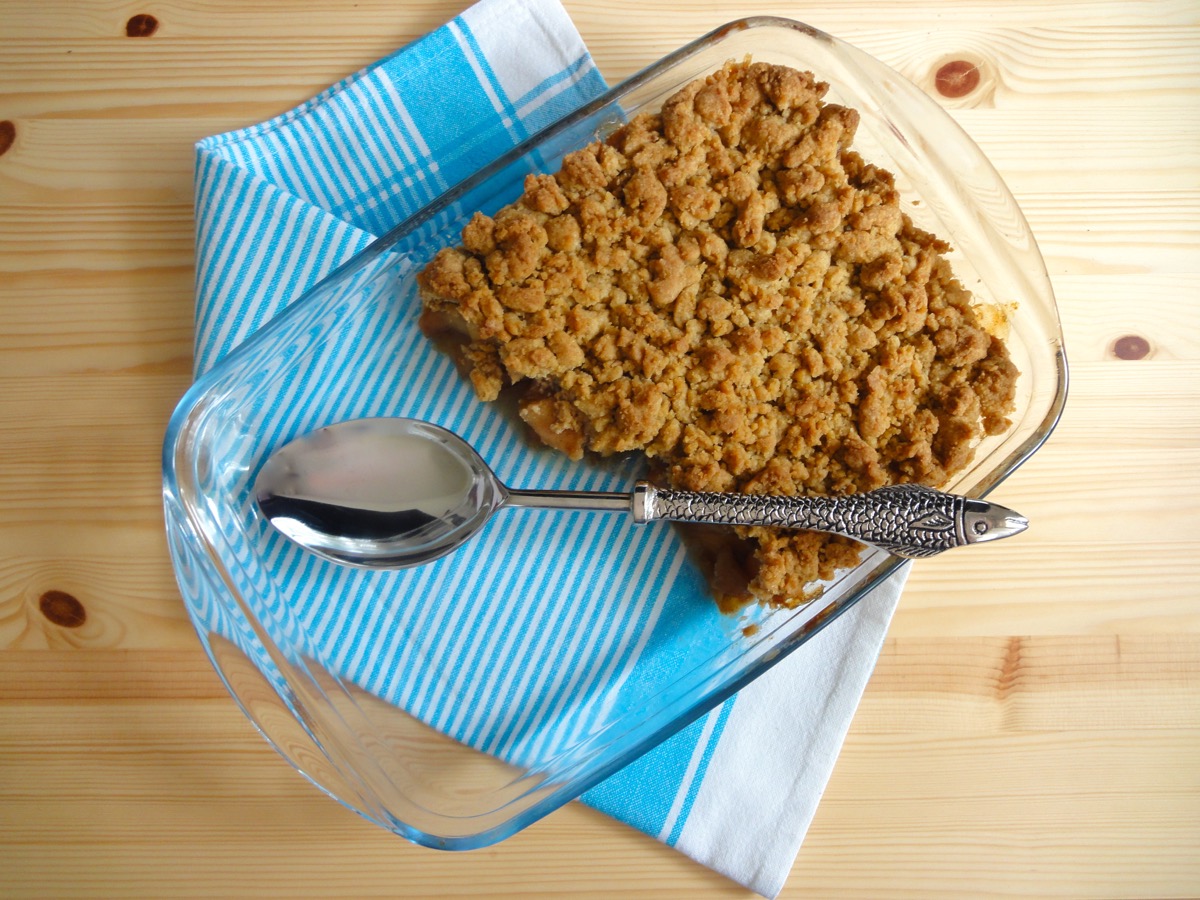
Apple Crumble with my new fishy serving spoon!
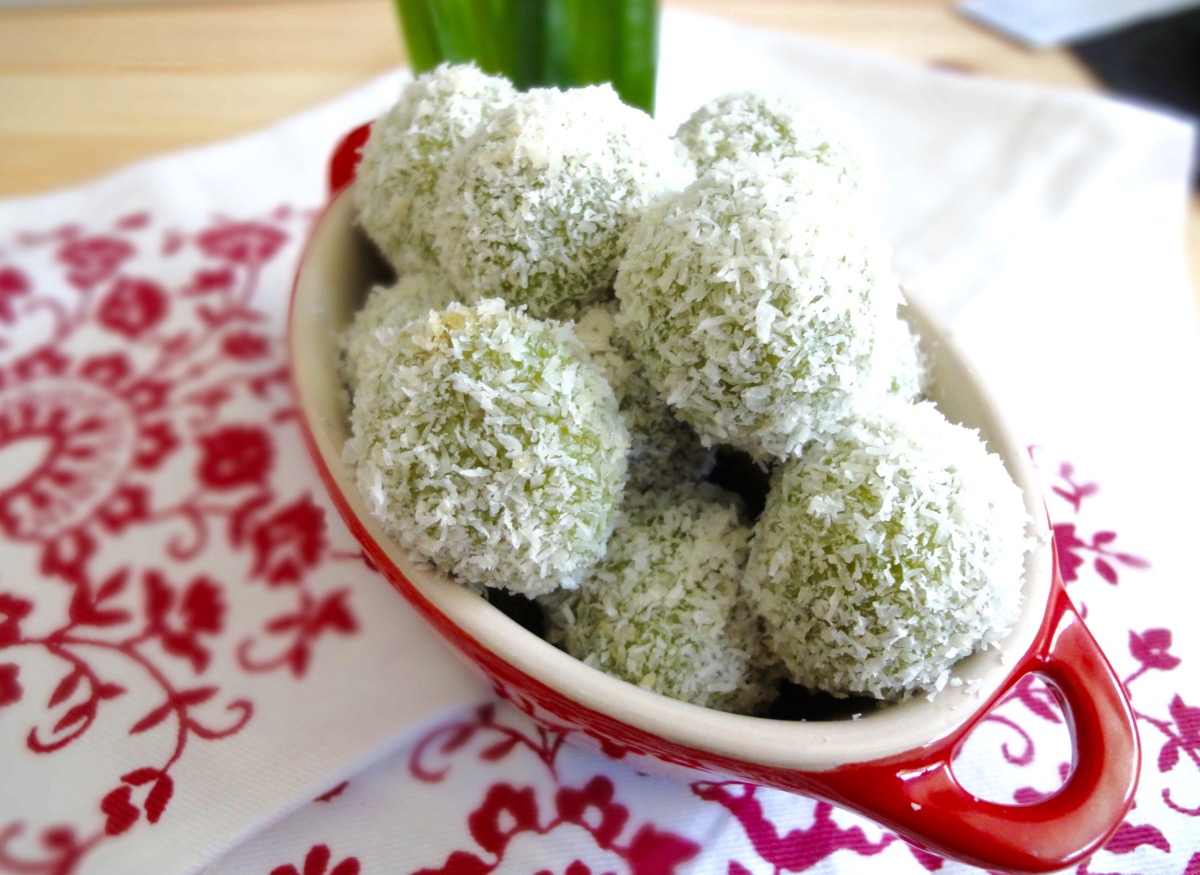
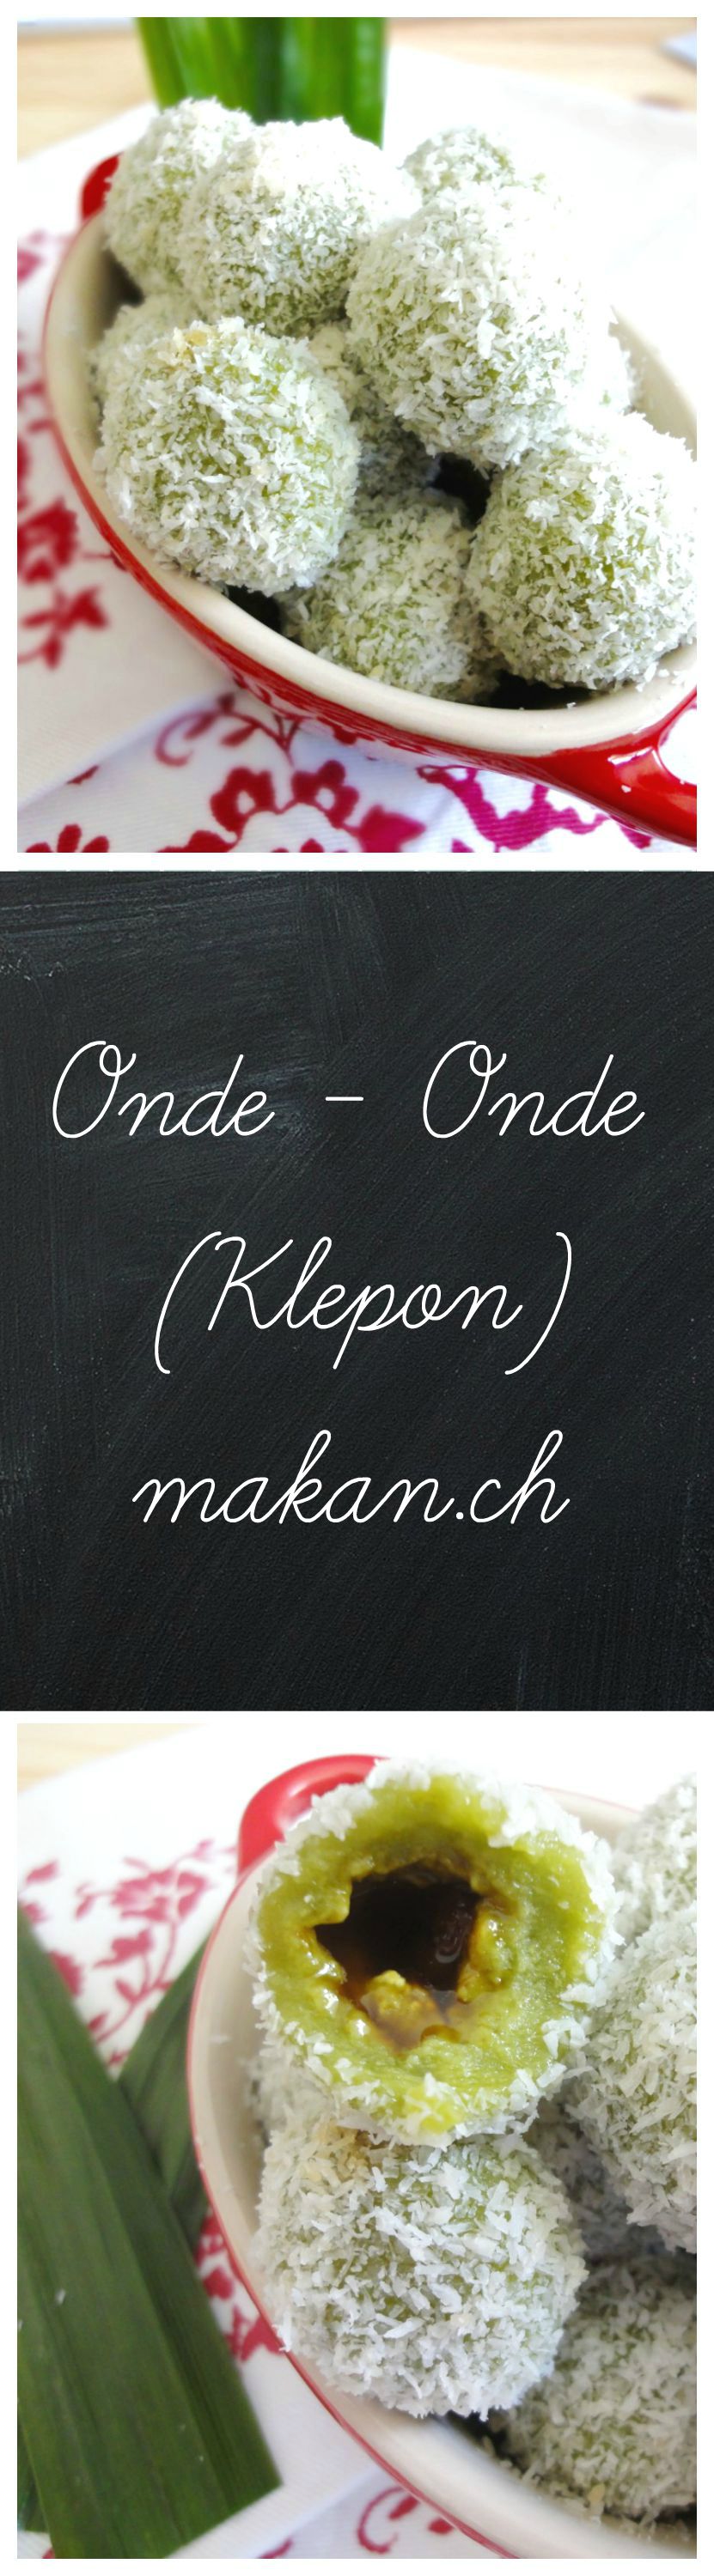
Onde – Onde (Klepon)


Onde-onde, ondeh-ondeh or in Indonesia – klepon is a dessert or tea-time snack made out of glutinous rice flour or sweet potato, filled with gula melaka (coconut palm sugar) and coated with grated coconut. Onde-onde can be found in morning markets, school canteens and sold by Mak Cik’s or Pak Cik’s (aunties or uncles) selling kuih (cakes).
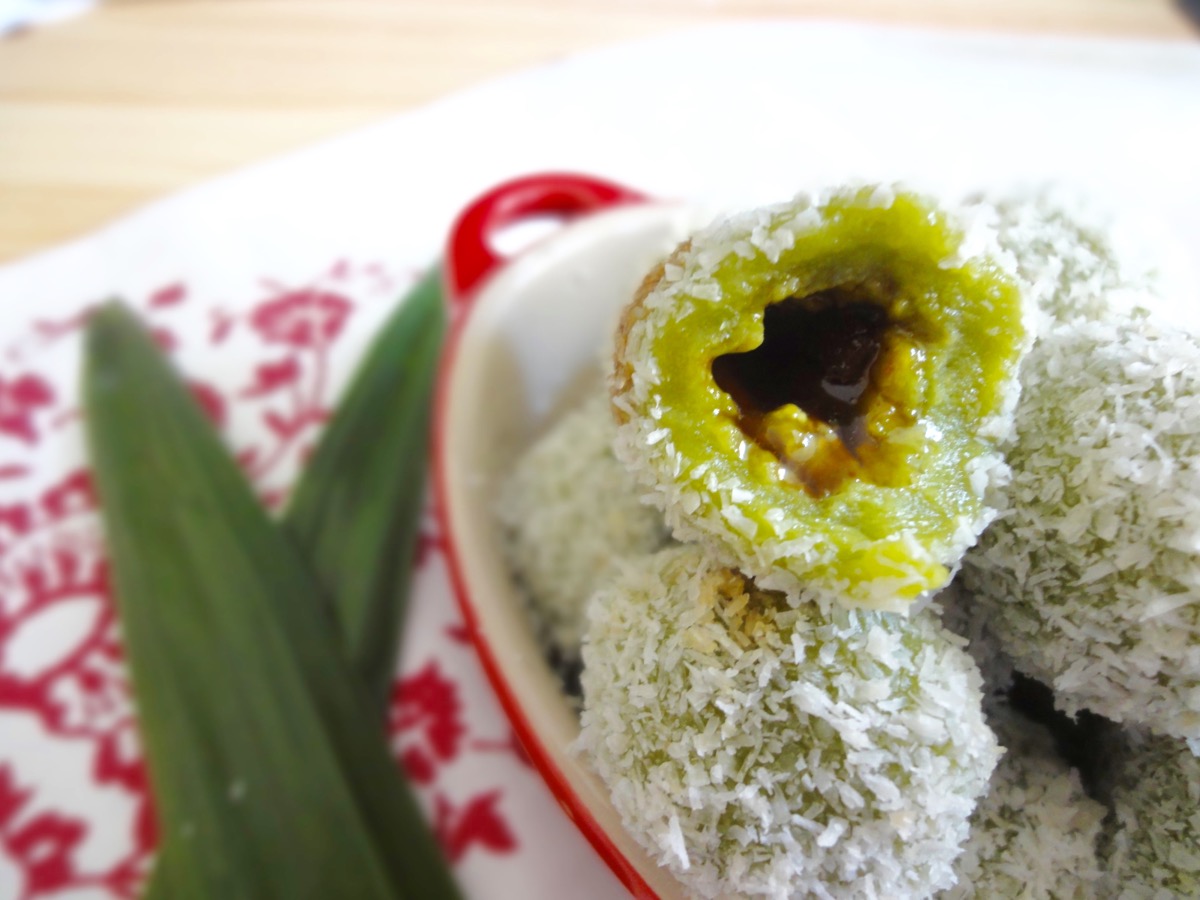
Melted gula melaka inside the onde-onde.
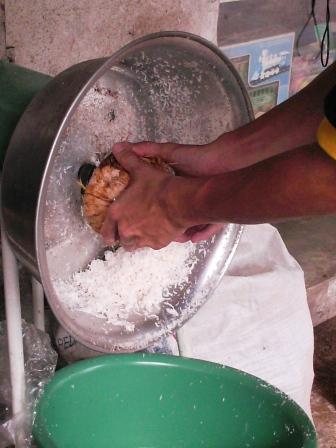
This recipe was requested by my close friend Martin. I can’t remember how the subject came up but he said ‘make onde-onde lah…then put on your website’. So right after I got off the phone with him, I started gathering the ingredients. Lucky for me, I had all of it on hand. The only thing that’s missing is freshly grated coconut. I have yet to find finely grated coconut here, so I used desiccated coconut but steamed it for 30 minutes before using it. This is to rehydrate the desiccated coconut. It does taste and feel different compared to the freshly grated ones, but what to do! Below is a machine used to grate coconut in Malaysia. Here’s a video on how it’s used.
Though I am able to make it at home, I still prefer the ones sold in Malaysian markets. Perhaps I’m a little stingy when it comes to using my gula melaka since I only have limited stock from Malaysia. Of course you do not need to use the ones from Malaysia as most Asian shops sell palm sugar from Thailand or Vietnam.
Recipe adapted from Sea Salt with Food
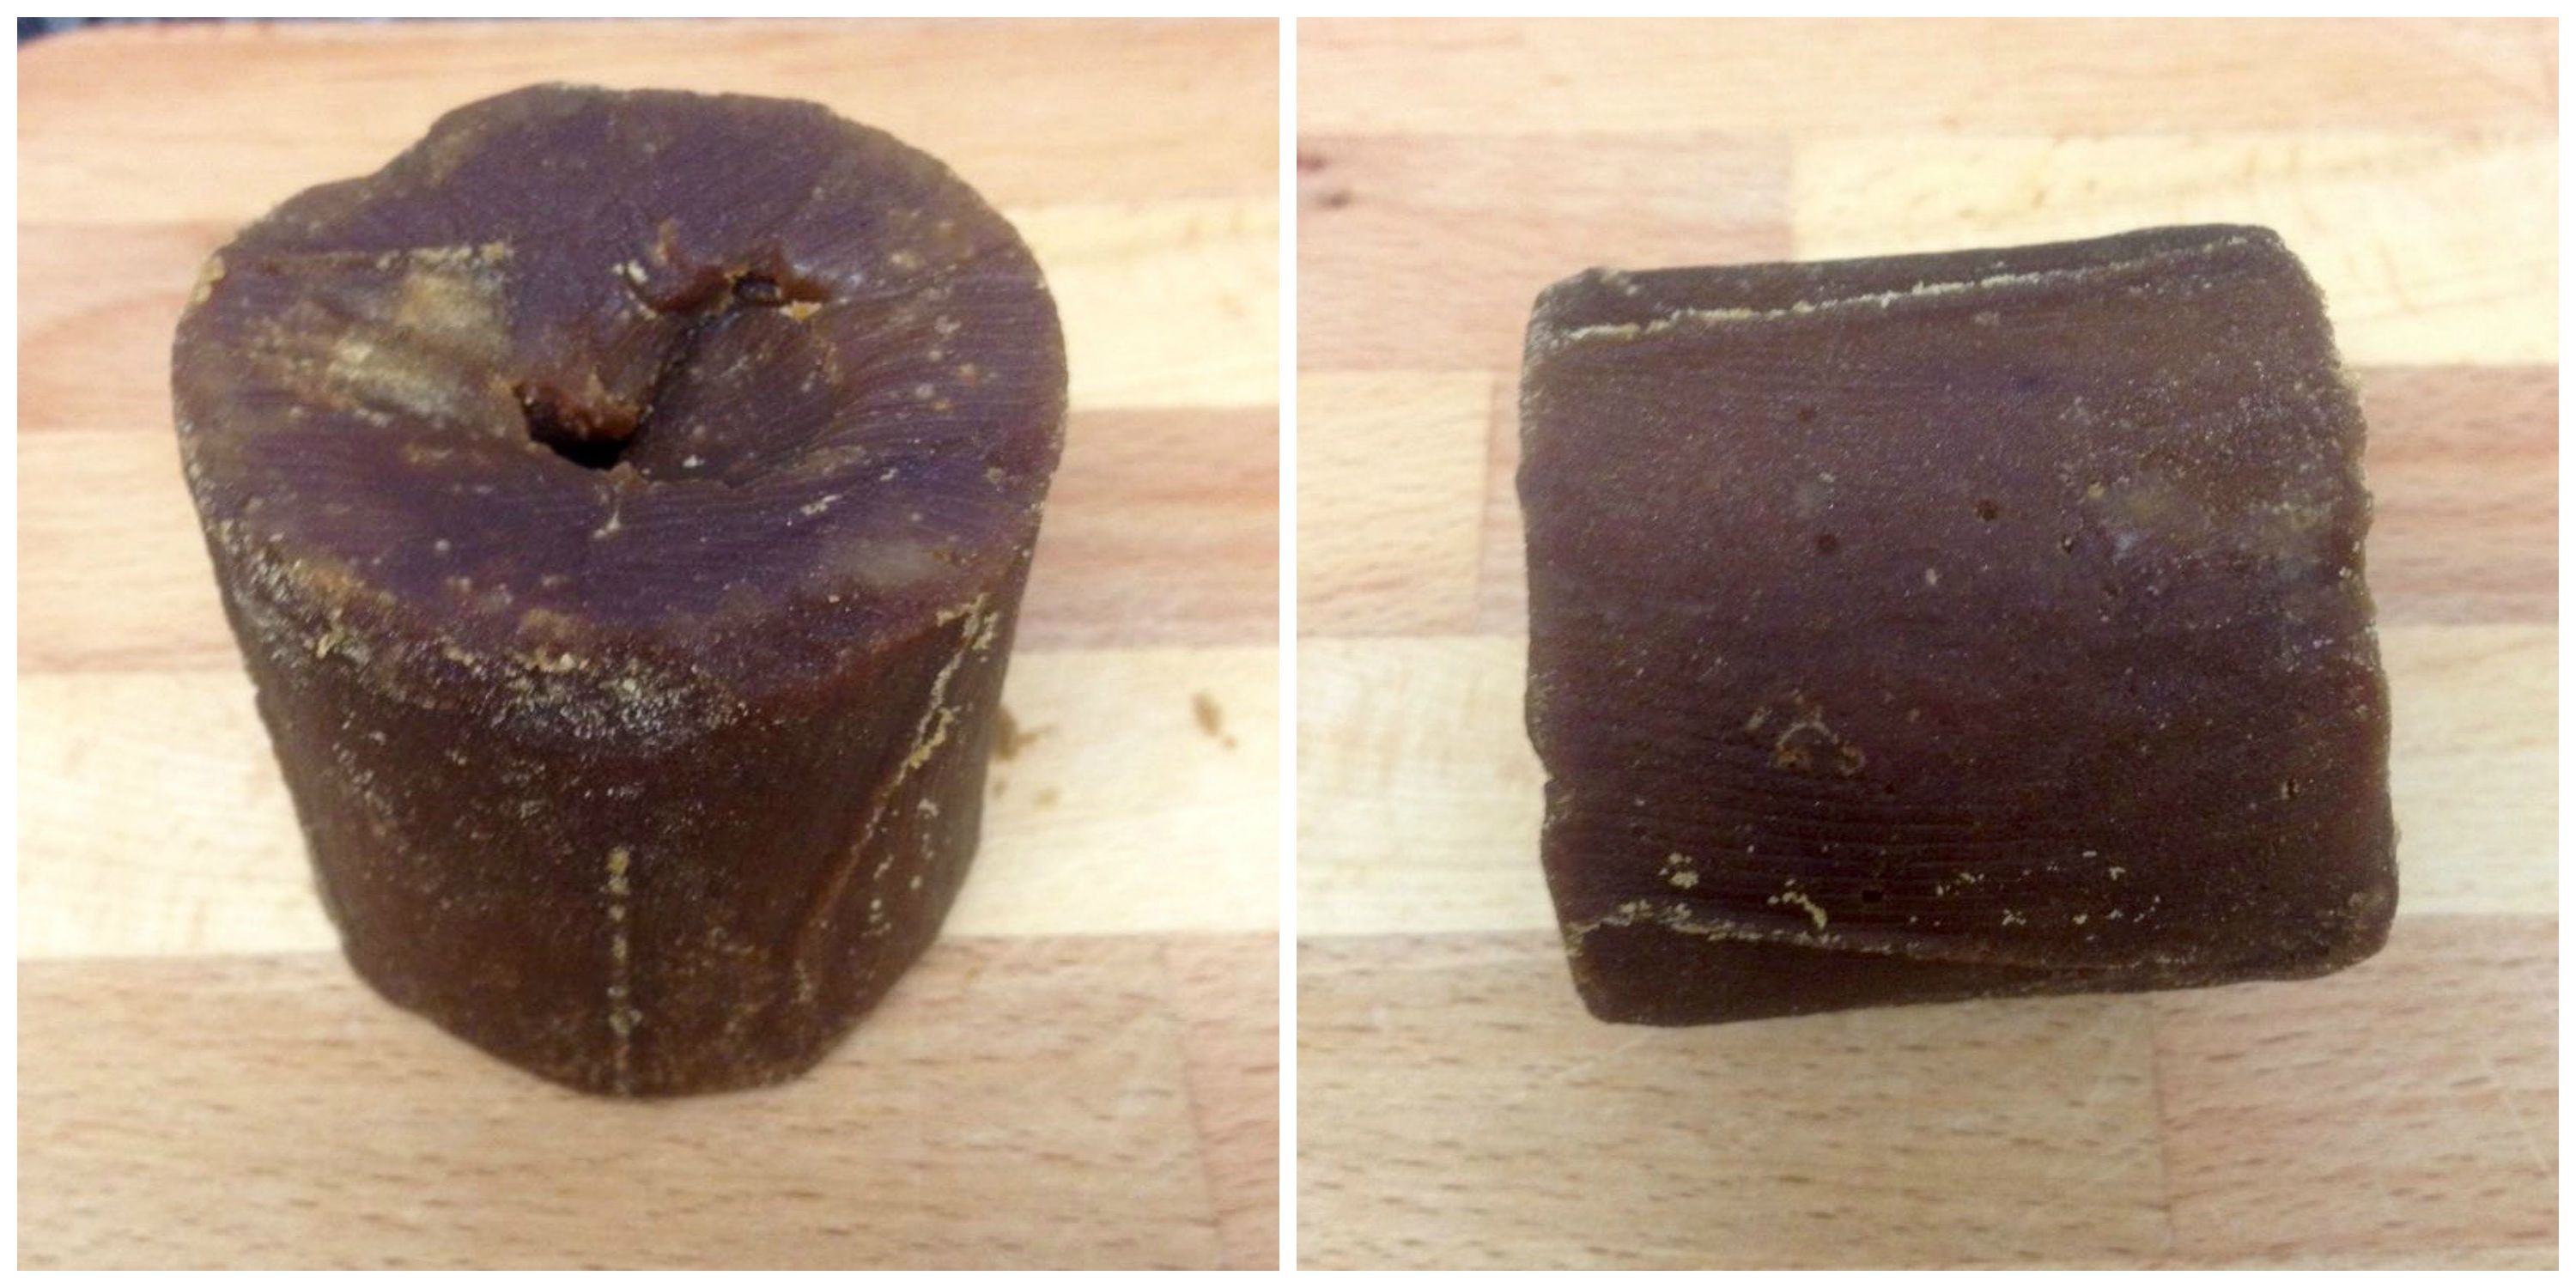
My block of Gula Melaka, about 3 inches high and 2 inches in diameter.
Pandan Extract
- 12 Pandan Leaves
- 1 cup Water
Coconut Topping
- 1 cup Desiccated Coconut / Freshly Grated Coconut
- To taste Salt
Onde - Onde
- 2 cups (204 grams) Glutinous Rice Flour
- 1 cup Pandan Extract
- 1 tablespoon Sugar
- 1 small block Gula Melaka (Coconut Palm Sugar), chopped into small pieces
Directions:
- Pandan Extract
- Wash pandan leaves. Cut pandan into 2 cm strips. (This helps to blend faster)
- Add cut pandan leaves and water into blender or food processor.
- Blend till juices have been extracted. About 3-4 minutes.
- Strain pandan extract with a cheesecloth.
- Coconut Topping*
- Mix desiccated coconut and salt in a heat proof bowl.
- Steam for 30 minutes.
- Onde – Onde
- Mix glutinous rice flour with pandan extract (you may not need all) and sugar until it forms into a dough.
- Roll dough into small balls (about 1 tablespoon each).
- Flatten dough and fill the centre of dough with gula melaka (about 1/4 – 1/2 teaspoon).
- Seal the gula melaka with the dough and gently roll it to form a ball.
- Bring a medium sized pot of water to boil.
- Boil the onde-onde in batches. Do not overcrowd the pot.
- When the onde-onde floats to the surface, use a slotted spoon to remove.
- Coat the onde-onde in steamed grated coconut immediately.
- Allow onde-onde to cool before serving.
Tips:
- You can get palm sugar from any Asian shop.
- If you do not have fresh pandan leaves, you can use pandan extract or flavouring.
- Store onde – onde in a container and enjoy within 2 days.
- Do not refrigerate, it will become very hard.
- 1 cup glutinous rice flour = 104 grams
- Cups to Grams conversions
* If using freshly grated coconut, you can skip this step.
Enjoy!
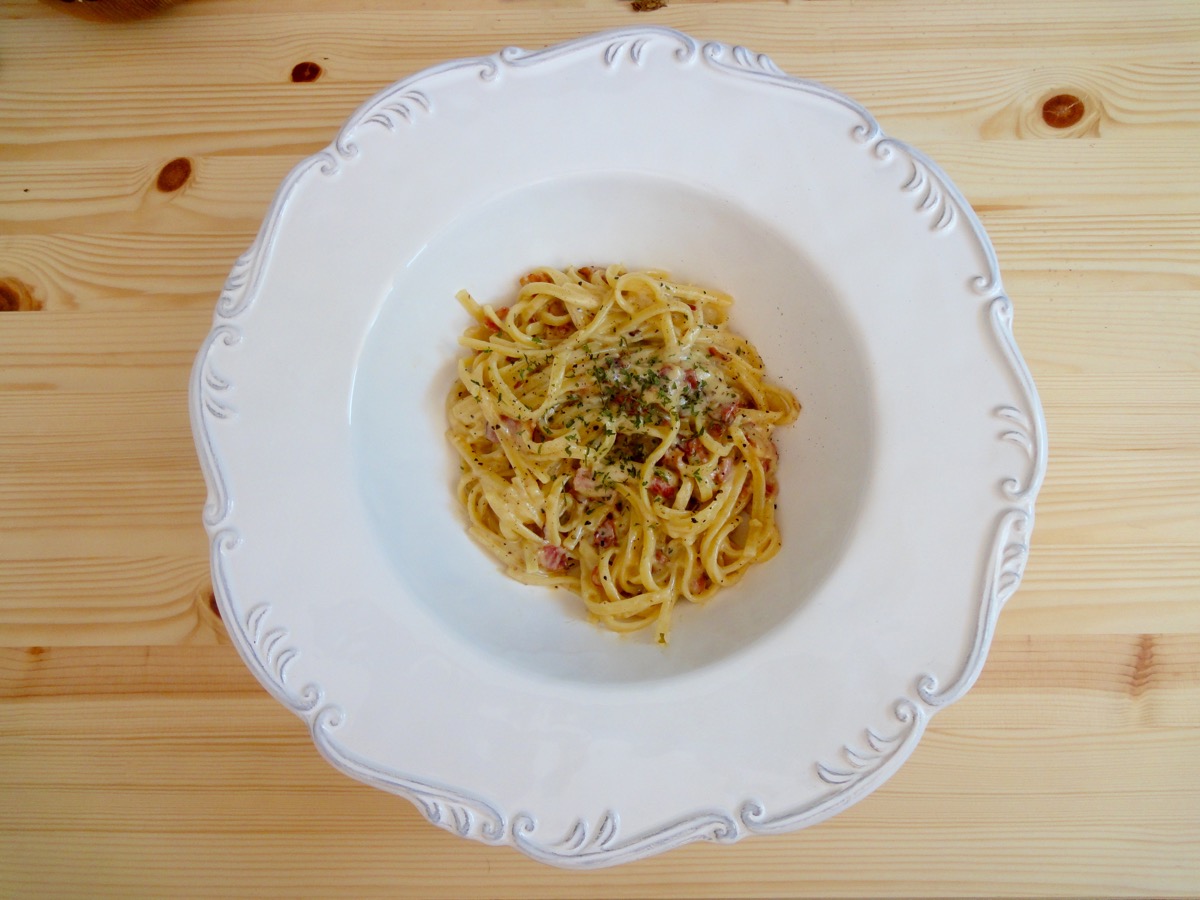
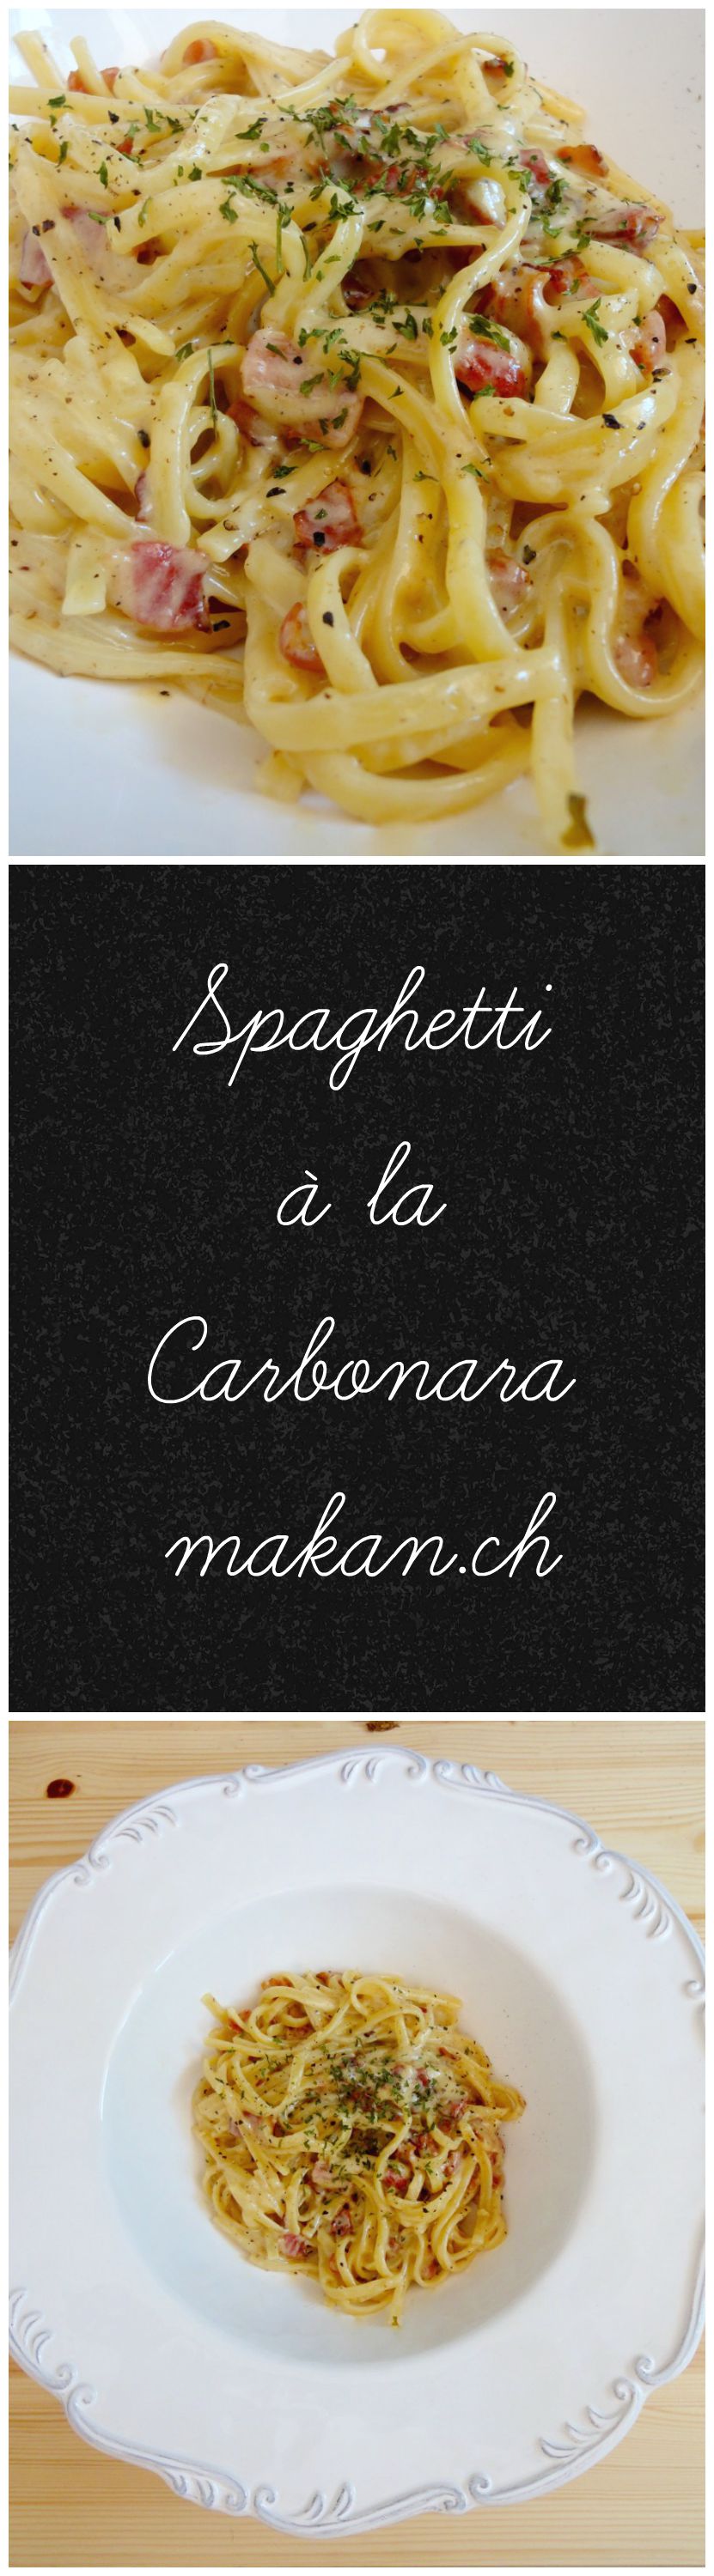
Spaghetti à la Carbonara
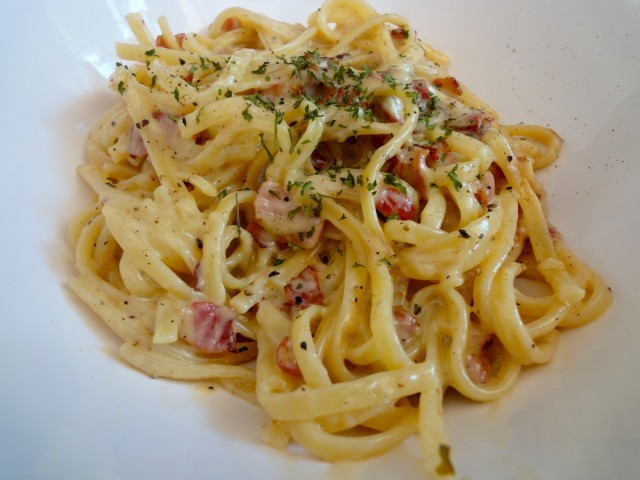
…the cheaper version…
My husband won my heart with his carbonara on our first christmas as a couple and when he still cooked for me. Ever since, we both have been constantly trying to improve our carbonara. We’ve watched videos, read multiple blog entries, and ate at some restaurants in pursuit of finding the best carbonara.
On a day when I have more spending money, I will post an authentic Spaghetti à la Carbonara recipe. As for now, we shall do with the cheaper but still tasty and satisfying version of Spaghetti à la Carbonara.
Ingredients
- 2 portions Spaghetti
- 1½ cups Bacon, cut into small pieces
- 2 cloves Garlic, crushed
- 4 nos Egg Yolks
- ½ cup (+/-) Parmesan Cheese or Grana Padano
- To taste Salt & Freshly Ground Pepper
For Boiling
- Enough for boiling Water
- To taste Salt
Directions:
- Cook spaghetti in a pot with salted water until al dente. Set aside about
1/21/4 cup of the water. Drain. - Meanwhile, cut bacon and fry in pan.
- Once bacon starts to get crispy, add garlic and stir for a minute. Do not let it brown.
- Season with salt and lots of black pepper.
- In a separate large bowl, whisk parmesan and egg yolks.
- Using water from boiled spaghetti (still hot, about
1/21/4 cup), pour in slowly while whisking the egg mixture. - Add cooked spaghetti and bacon. Mix.
- Serve immediately.
Tips:
Enjoy!
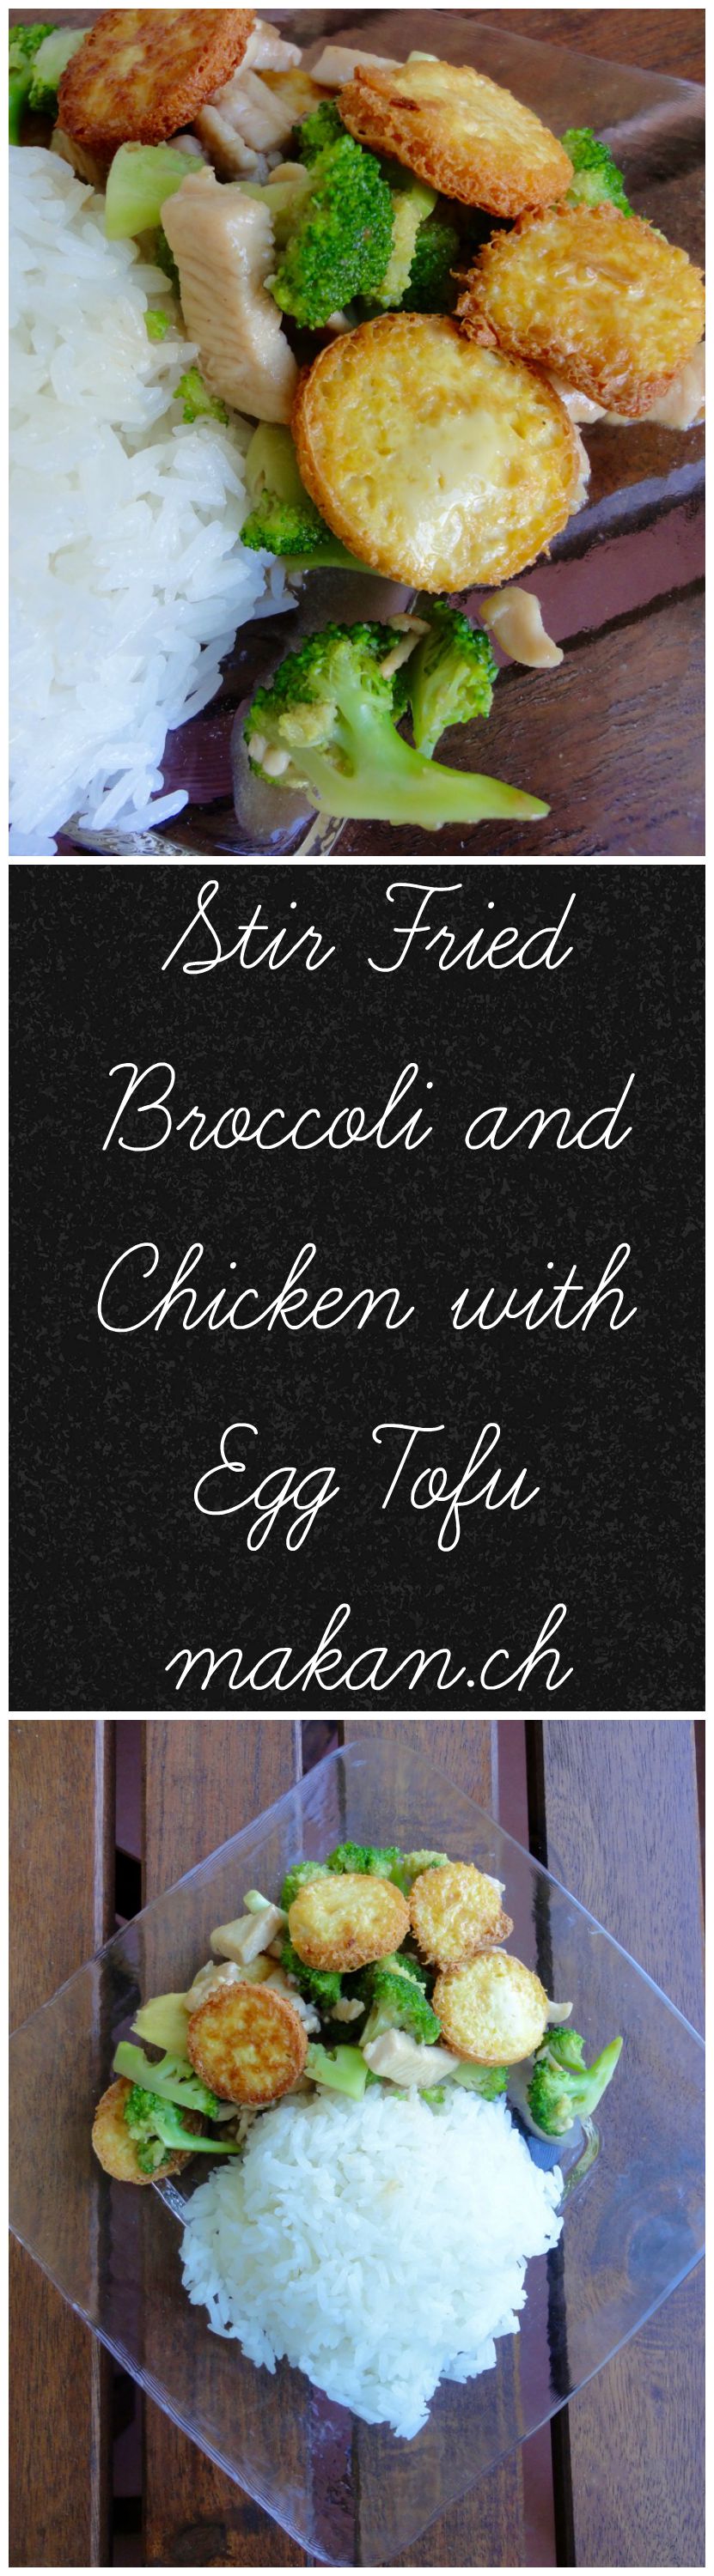
Stir Fried Broccoli and Chicken with Egg Tofu
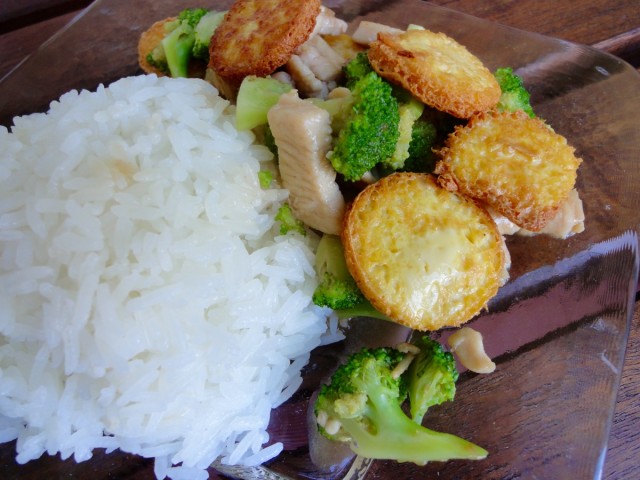
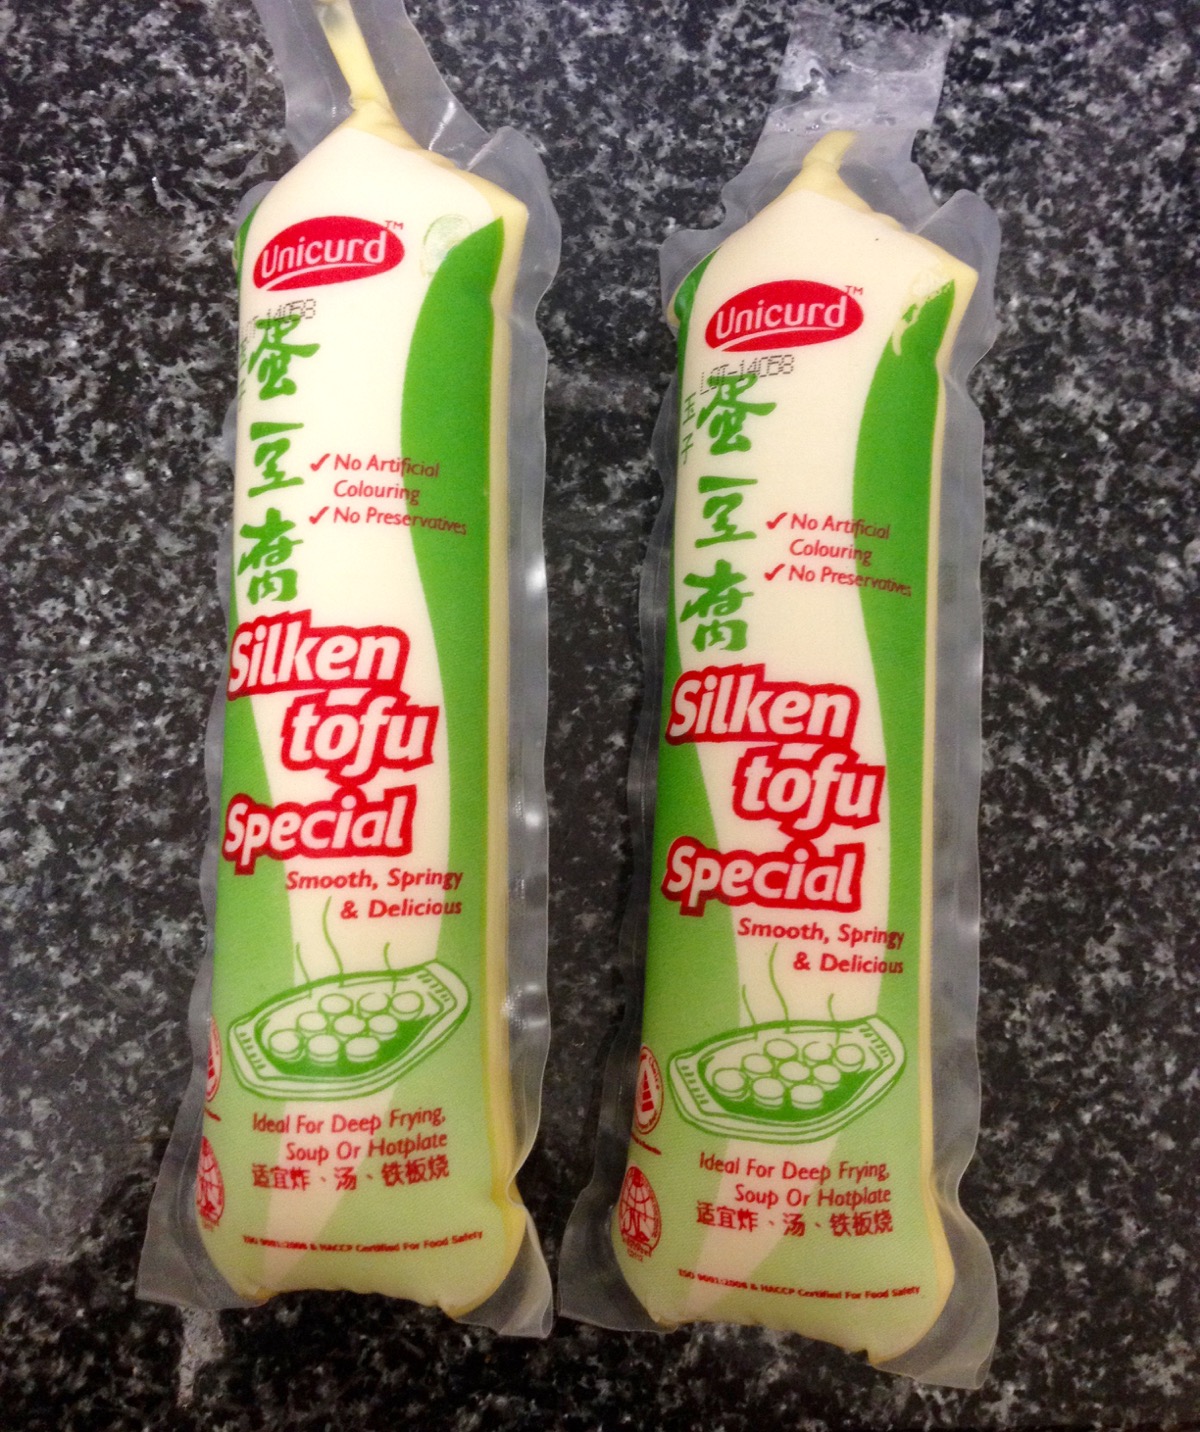
Egg tofu is often called Japanese egg tofu. It’s similar to Chawanmushi, but this one comes in a tube. Frying this tofu is a little bit of a pain as the oil splatters…unless I’m doing something wrong and someone has a trick! A little bit of pain just to eat this? Worth it! At home I will scream like a little girl, but when I used to work at a Sushi Restaurant (I was placed behind the conveyor belt and customers were able to see me cooking), I could not scream when oil splattered especially when cooking gyoza’s, so I had to learn how to suck it up and look like a bad ass.
Anyways, this dish is pretty simple and fast to cook. I also use very little chicken in this, cus the hubby and I love broccoli, so I add more broccoli. We don’t have a good relationship with vegetables (we count eating a bunch of onions,potatoes and even chives as vegetables), so anytime I can add more veggies to a dish…I will.
Egg Tofu
Ingredients
- 1 tube Egg Tofu, sliced - 2cm each
- 1 tablespoon Cornflour, for dusting
- Enough for frying Peanut Oil
- 1 breast (c.a 120g) Chicken Breast, diced or sliced
- 2 ½ cups Broccoli, florets (fresh or frozen)
- 1-inch Fresh Ginger, sliced
Marinade for Chicken
- 2 teaspoons Light Soy Sauce
- 2 teaspoons Cornflour
Sauce
- 1 tablespoon Oyster Sauce
- ½ teaspoon Sesame Oil
- 1 tablespoon Shaoxing Wine (Chinese Cooking Wine)
- ¼ teaspoon White Pepper
- 2 tablespoons Water
- 2 teaspoons Cornflour
- To taste Salt
Directions:
- Marinade chicken in marinade. Bring a pot of water to boil (to blanch broccoli).
- Combine ingredients for sauce and set aside.
- Heat up oil in pan. Dust egg tofu in cornflour. Fry till golden brown. Drain excess oil with paper towels. Set aside.
- Remove oil from pan, leaving about 2 tbsp of oil.
- Fry ginger till aromatic, add chicken. While the chicken cooks, blanch broccoli.
- Add sauce to chicken and throw in broccoli.
- Stir fry till sauce thickens.
- Add egg tofu, gently stir as egg tofu is very delicate.
- Serve immediately with steamed rice.
Tips:
Enjoy!
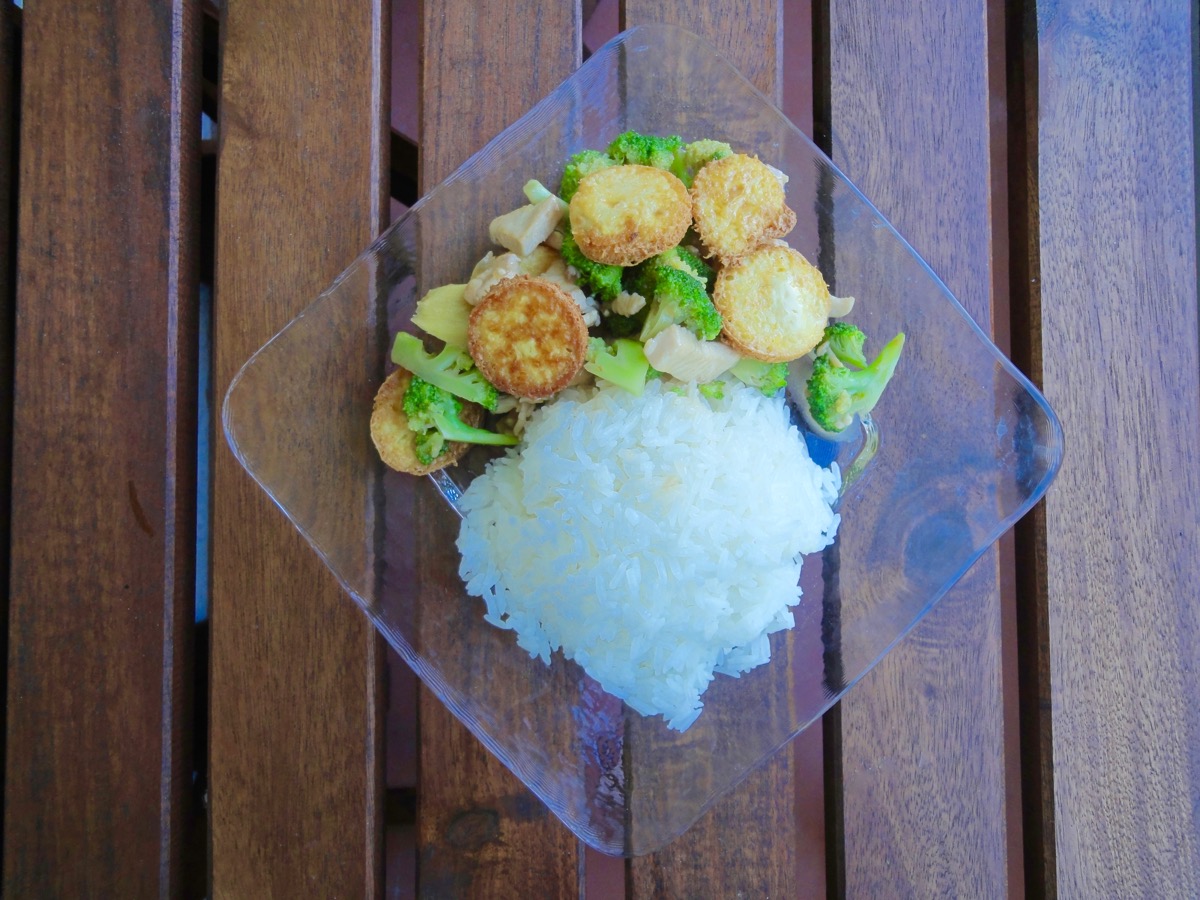
Sorry for the purple hue, it was getting dark.
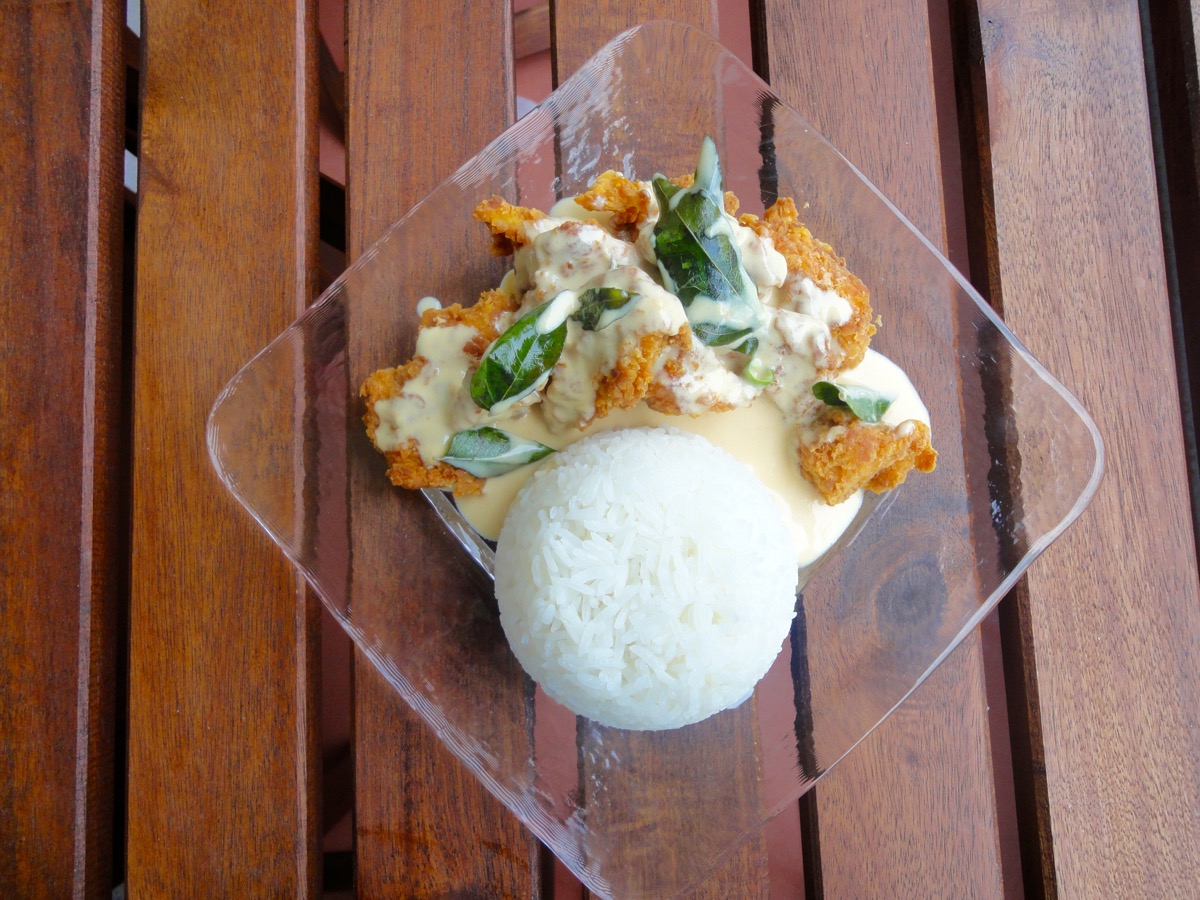
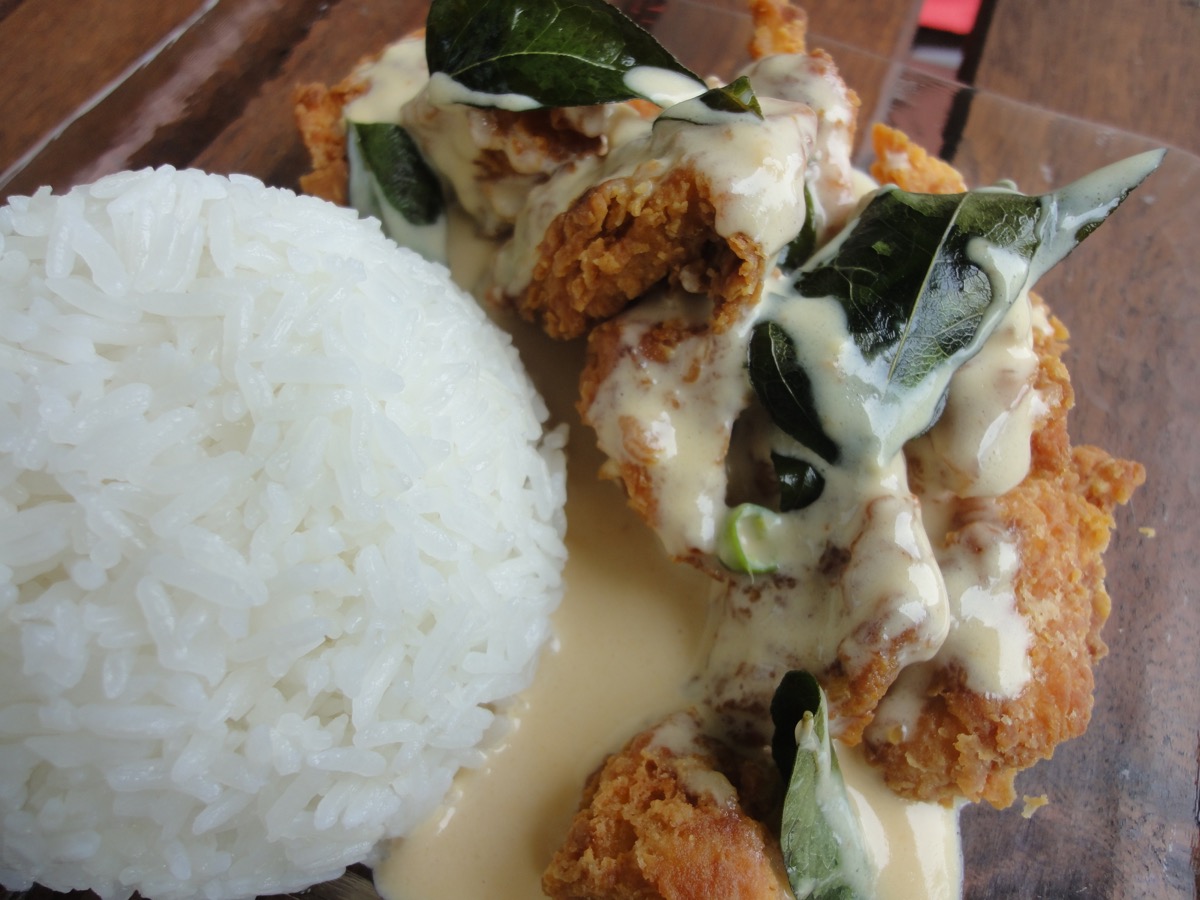
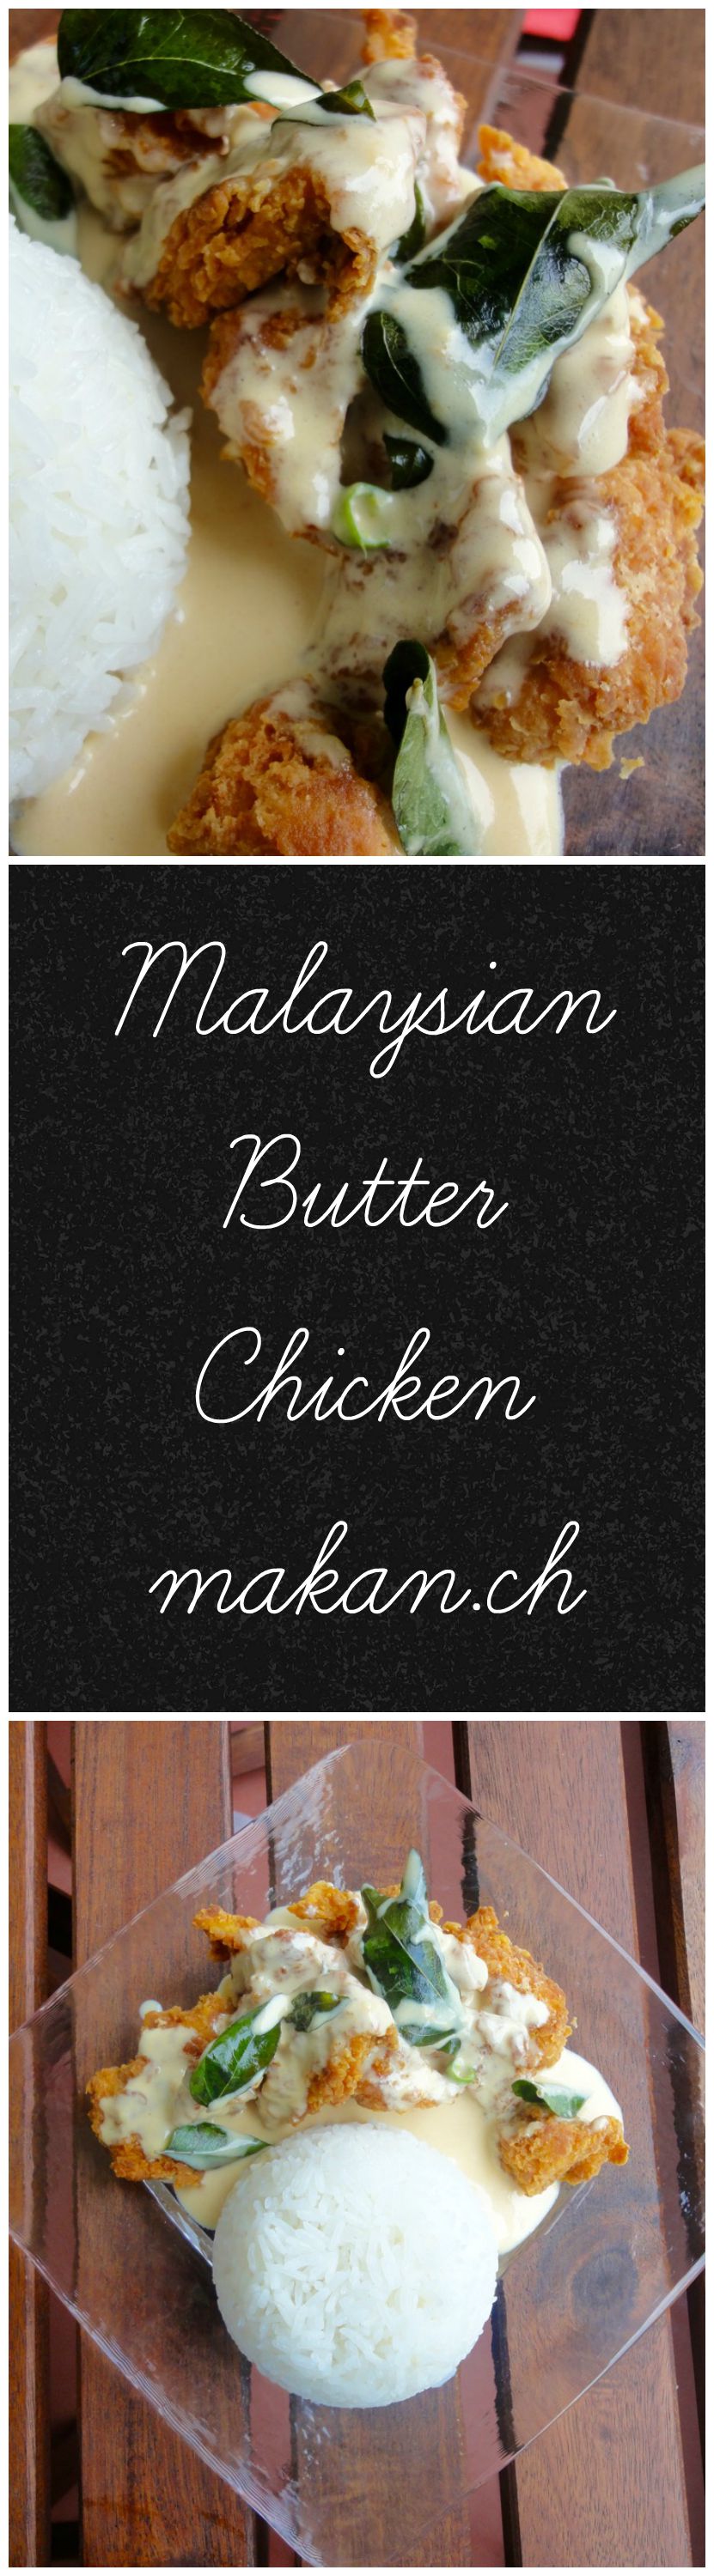
Malaysian Butter Chicken

Ahh yes, butter chicken. The favourite. Nope, it’s not the normal butter chicken you find at Indian Restaurants. This is a special one. It’s creamy, spicy and simply delicious. The first time I ate this, I was about 16 at a restaurant called Strawberry Fields Cafe in Malaysia. At first, I thought it was disgusting as it used evaporated milk for the sauce. Evaporated is normally used in desserts and to use it in a hot savoury dish was alien to me. But boy was I glad I ordered it after much convincing from a friend. When the waiter placed it in front of me, I got scared as it had a ton of small green chillies (chili padi). I put up a brave front, and took my first bite. OMG. Heavenly. It was love at first sight. Not as spicy as I thought it would be given the amount of chilli on it, i’m guessing the milk in it helped? Still, I gobbled it down and if I could have licked my plate at the Cafe, I would have.
7 years later, butter chicken came back to my mind. I was afraid the hubby would not take to it as he was new to eating more spicy food and to mix it with milk…but it very quickly went away after he took his first bite. He loved it and has requested that it be cooked for his birthday every year.
Hopefully you will love this recipe as much as we do!
Ingredients
- 400 grams (16oz) Chicken Breast, cut into pieces
- 2 Tablespoons Curry Powder
- ½ teaspoon Salt
- ¼ teaspoon White Pepper
- 1 Egg, Whole
- 1 ½ cups Flour
- 1 Tablespoon Corn Flour
- Enough for frying Peanut Oil
Sauce
- ¼ cup Butter
- 1 ¾ cups (410ml/can) Evaporated Milk
- 2-3 sprigs Curry Leaf
- 2-3 pieces (according to taste) Birds Eye Chilli (green/red)
- To taste Salt & Pepper
Directions :
- Chicken
- Marinate the chicken in curry powder, salt and pepper for at least an hour. If short of time, 15 minutes will do.
- Beat an egg and mix well with the chicken pieces.
- Heat up enough oil in a pan or wok for frying.
- Coat chicken pieces in flour and fry till golden brown. Keep aside.
- Sauce
- In a separate pan, heat up butter.
- Add curry leaves and fry till fragrant.
- Mix in evaporated milk and reduce heat. Let simmer till slightly thickened.
- Add chillies and continue to simmer till thickened.
- Mix in chicken and serve immediately with steamed rice, veggies of your choice or a simple cucumber and pineapple salad.
Tips:
- I prefer using peanut oil for this as the chicken pieces stay crunchy till serving time.
- Fried chicken pieces are also great on it’s own, which is known as popcorn chicken.
- Cups to Grams conversion
Enjoy!
Roasted Green Beans
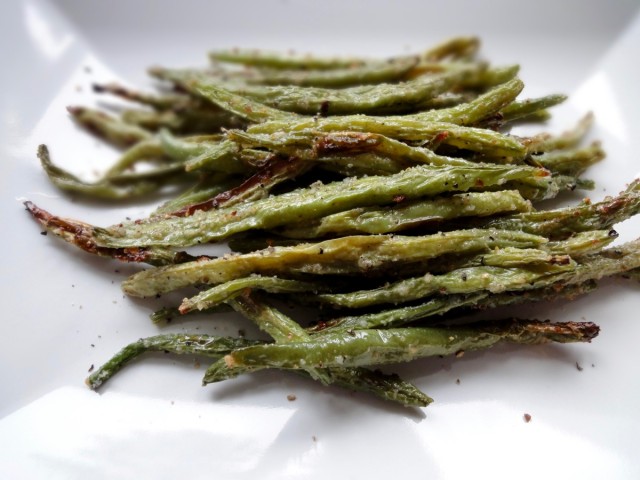

Since I’ve been at this whole eating healthier/trying to shed some weight, I’ve been trying to eat more vegetables. I like vegetables, just that sometimes I don’t pay attention to it as much as I do my protein and starch. Most of the time I like to just dump my vegetables into a pot to boil or I would buy ready-made frozen spinach where you just have to put it in a pot with a tablespoon of water and cook it.
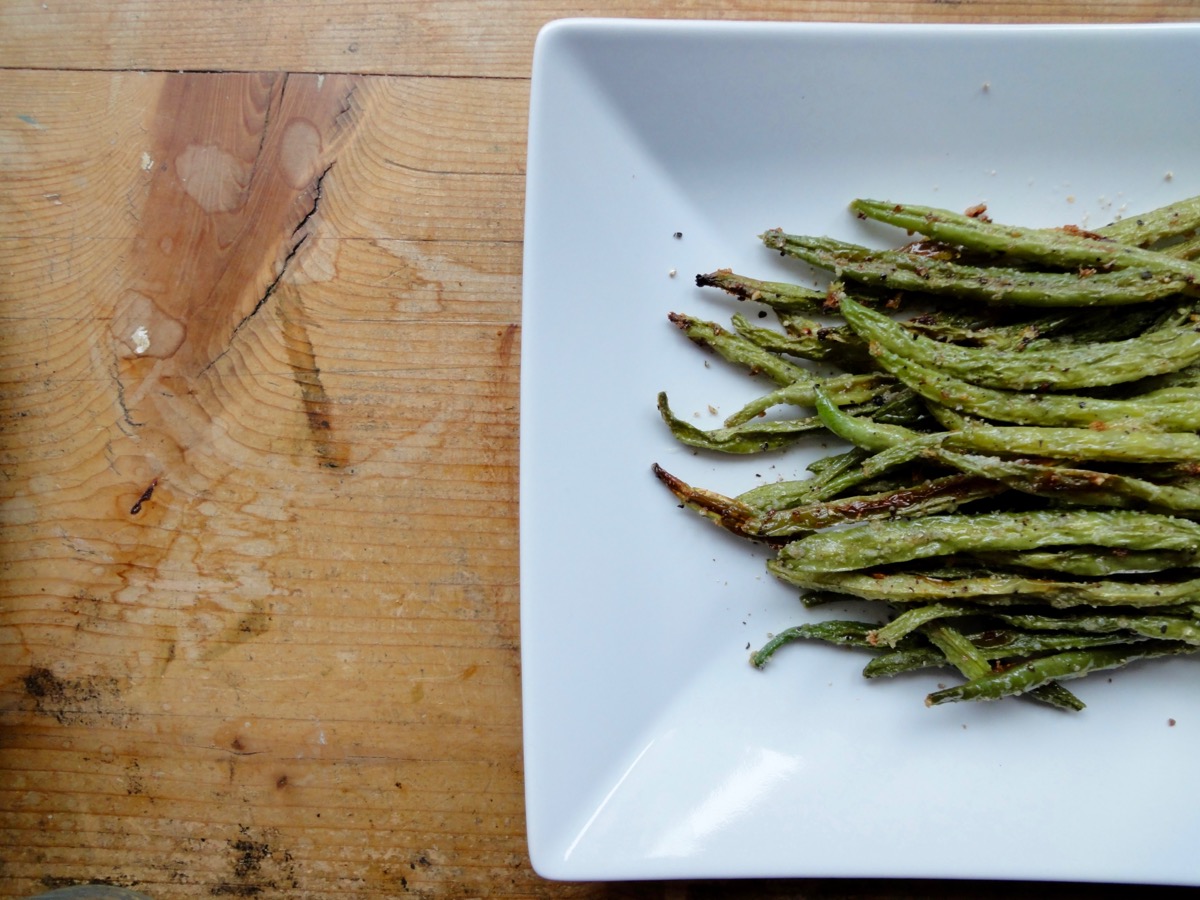
Green beans are the one of our top favourite vegetables. However, my husband likes it boiled/steamed till it’s very soft (like most restaurants in Switzerland) whilst I like it still crunchy. I thought roasting it would solve our problem of having our beans two different ways as it gets soft but still has a crunch due to the high temperature of roasting it. He is not a fan of this but I love it. In fact, I just had this for lunch. Just roasted green beans. Belly is still grumbling, but what to do!

This recipe is very basic. Just green beans, some oil, salt, ground black pepper, and garlic powder. Many recipes call for adding parmesan cheese, but that’s simply up to you.
Ingredients
- 500 grams ( 1 pound) Green Beans
- ½ Tablespoon Olive Oil
- ½ teaspoon Garlic Powder
- ¼ teaspoon Salt
- To Taste Freshly Ground Black Pepper
Directions:
- Pre-heat oven to 200°C (400°F) and prepare baking tray with parchment paper.
- Break the top and tail of the green beans and rinse it. Dry with paper towels.
- Spread green beans onto baking tray. Drizzle with oil and sprinkle with salt, ground black pepper and garlic powder.
- Mix green beans to coat evenly.
- Bake for 20 minutes. Serve immediately.
Tips:
- Conversion Table
- You can use fresh or frozen green beans. Frozen green beans need to be defrosted before baking.
- For nutritional information, please visit my Yummly page and scroll to the bottom of the recipe.
- If you are using MyFitnessPal app to count calories, first copy the recipe URL then go to MyFitnessPal app to Recipes, select Create a New Recipe, then Add from the Web. Paste the URL, match ingredients and that’s it!
- Always match ingredients to the ones you use. Ingredient nutritional facts differ depending on brand.
Enjoy!

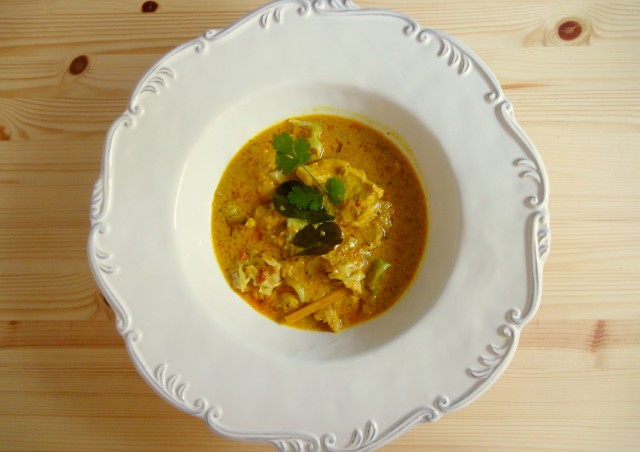
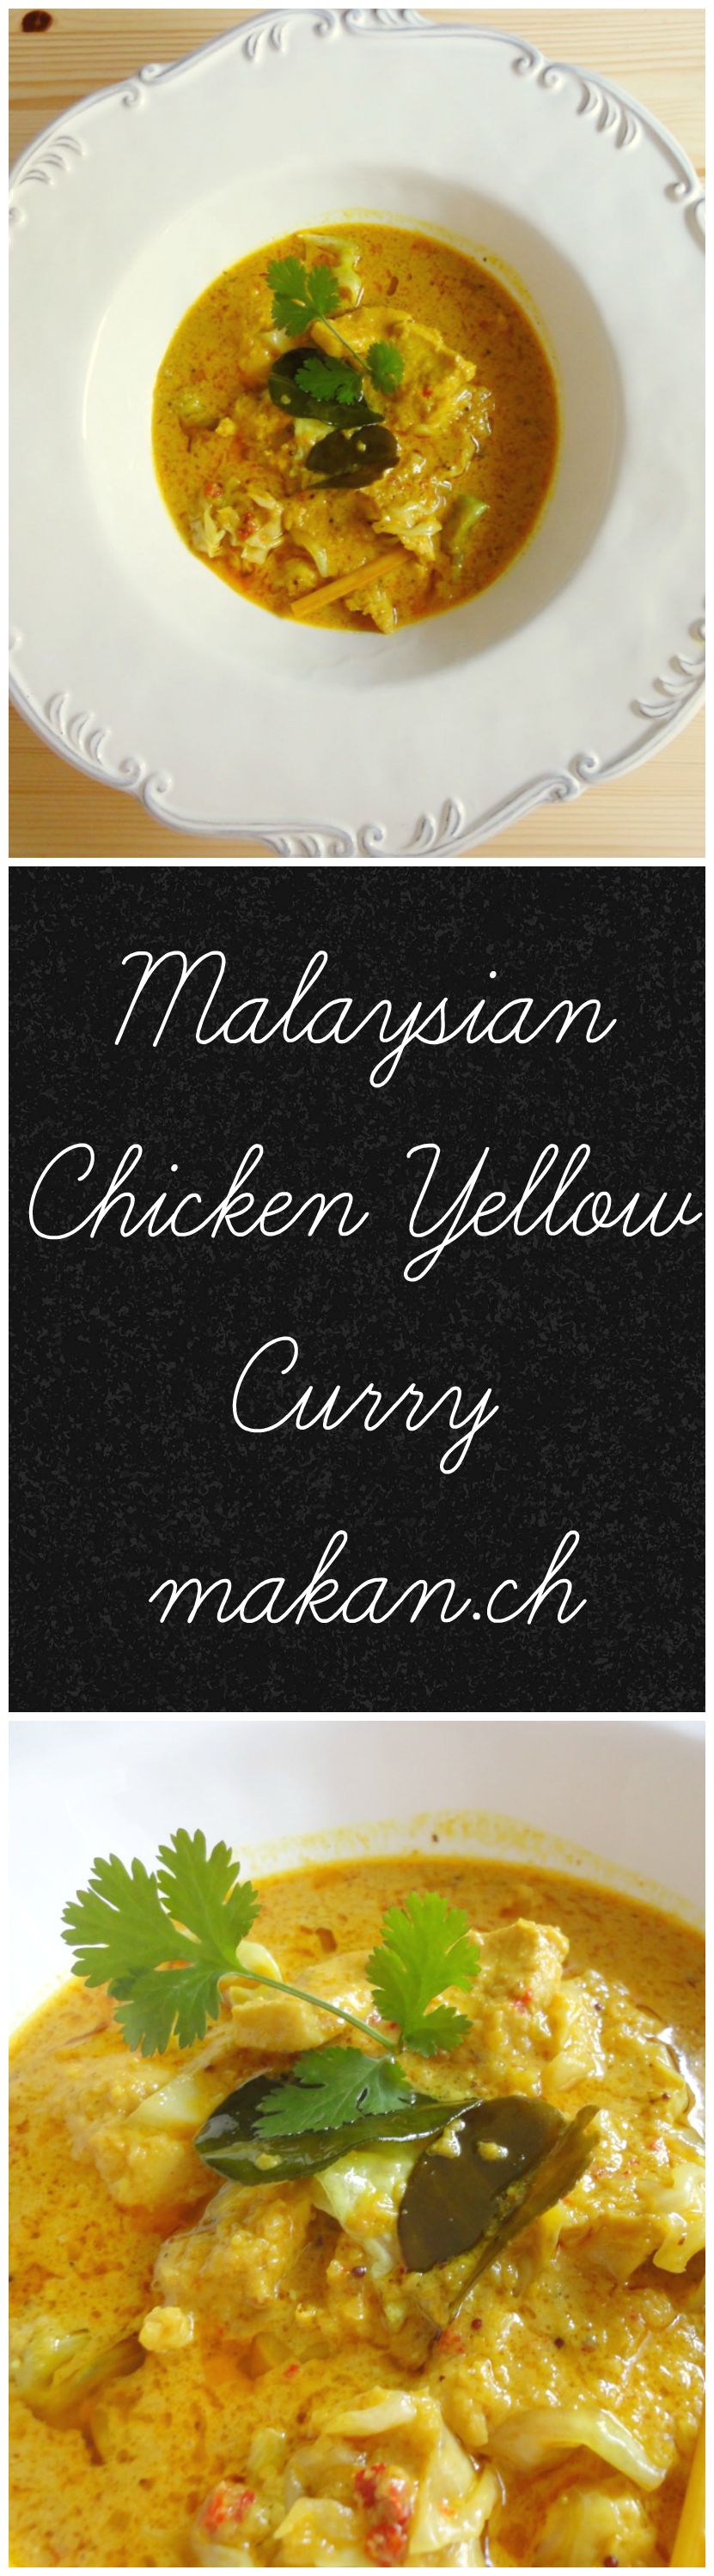
Malaysian Chicken Yellow Curry
Looks like Autumn has begun in Switzerland! Finally some cold days after a very hot summer. But don’t we all just complain about the weather? Whether or not it’s cold or hot, there is always something to complain about. I personally love the cold, that’s because I’m always at home and ready to snuggle up on my sofa with lots of pillows and blankets…and when it get’s colder, I have a great excuse to make some hot chocolate.
As with most Malaysian recipes, there’s no real precise measurement. There’s a word in Bahasa Malaysia which we use for this : agak-agak which means circa, to guess, approximately, more or less, or estimation. For unseasoned cooks, doing it the agak-agak way can turn out either really good, or really bad. I’ve had my fair share of bad dishes (but still edible) due to my bad agak-agakness. Malaysian cooking derives a lot from helping or watching the cooking parent or grandparent in the kitchen. Lucky for me, I use to love standing behind my mother while she cooked (mainly to get the first bite of it) and that has somehow worked out a little for me…I could have done more watching and paying attention.
Anyways, this recipe not an official Malaysian yellow curry. Every family has their own version of a yellow curry. It is also known as masak lemak which means (when directly translated) fattily cooked due to the use of coconut milk. The basics of a masak lemak dish consist of coconut milk, lemongrass and some chilli to spice it up. In this recipe, I also add kaffir lime leaves to give it a nice scent and flavour to the dish. This is totally optional, but you won’t regret it.
For the spice paste, this one is another Malaysian thing you have to learn. Westerners call it, fry till fragrant. But all these spices are already so fragrant before cooking, you might under cook it – resulting in less tasty dishes or just less in every aspect of it. We call it fry till the minyak pecah which means fry till the oil breaks. If that makes sense to you without any explanation then, thumbs up! It’s also quite hard to describe this minyak pecah thing. But I will try! It’s fry till the oil starts separating from the paste and the paste does not look emulsified. It has to look like a Hollandaise sauce that has split. This can take between 15-20 minutes, sometimes even more – depending on how much paste you are frying. If someone else has a better was of explaining this method, do send me an e-mail!
I wish you all the best of luck and hope you cooking this dish.
Ingredients
- 400g / 14oz Chicken
- Half White Cabbage
- 2 cups Thick Coconut Milk
Spice Paste (grounded or blended )
- 3 stalks (while part only ; reserve rest to fry) Lemongrass
- 1 medium sized Yellow Onion
- 2 medium sized Red Onion
- 4 cloves Garlic
- 2-inch Ginger
- 2-inch / 2 teaspoons Turmeric Root / Powder
- 8 pieces Candlenut
To fry
- 1 cup Peanut or Vegetable Oil
- 1 teaspoon Mustard Seeds
- 3 stalks (green part) Lemongrass
- 4 pieces Kaffir Lime Leaves
Directions:
- Cut chicken into small pieces. You can use any part of chicken.
- Shred cabbage into bite sized pieces and clean.
- Set aside
- Spice Paste
- Cut onions into quarters.
- Slice the white part of the lemongrass finely. Reserve the rest of the stalk for frying.
- Peel and slice ginger and turmeric root. You might want to use gloves if using turmeric root as the colour stains nails and fingers for a few days. Alternately, you can use 2 teaspoons of turmeric powder to substitute.
- Add all into food processor or blender together with chillies, and candlenuts.
- Blend till it forms a smooth paste or till you can’t see the fibres from lemongrass.
- Set aside.
- To fry
- In a wok or large pan over medium high heat, add spice paste and green part of the lemongrass.
- Stir fry for 15 minutes or till the paste starts breaking up. *see above text for some explanations*
- Once paste is ready, add mustard seeds and fry for a minute.
- Add chicken and fry in the paste for 2 minutes.
- Add kaffir lime leaves.
- Stir in coconut milk and 1/2 cup water (optional).
- Let it simmer till chicken cooks and the gravy thickens.
- Add in cabbage and simmer till soften.
- Season with salt.
- Serve immediately with steamed white rice or let the curry sit for a few hours before serving. This improves the flavour.
Tips:
- Curry will taste better the next day
- Take out lemongrass stalk and kaffir leaf before serving
- Cups to Grams conversions
Enjoy!
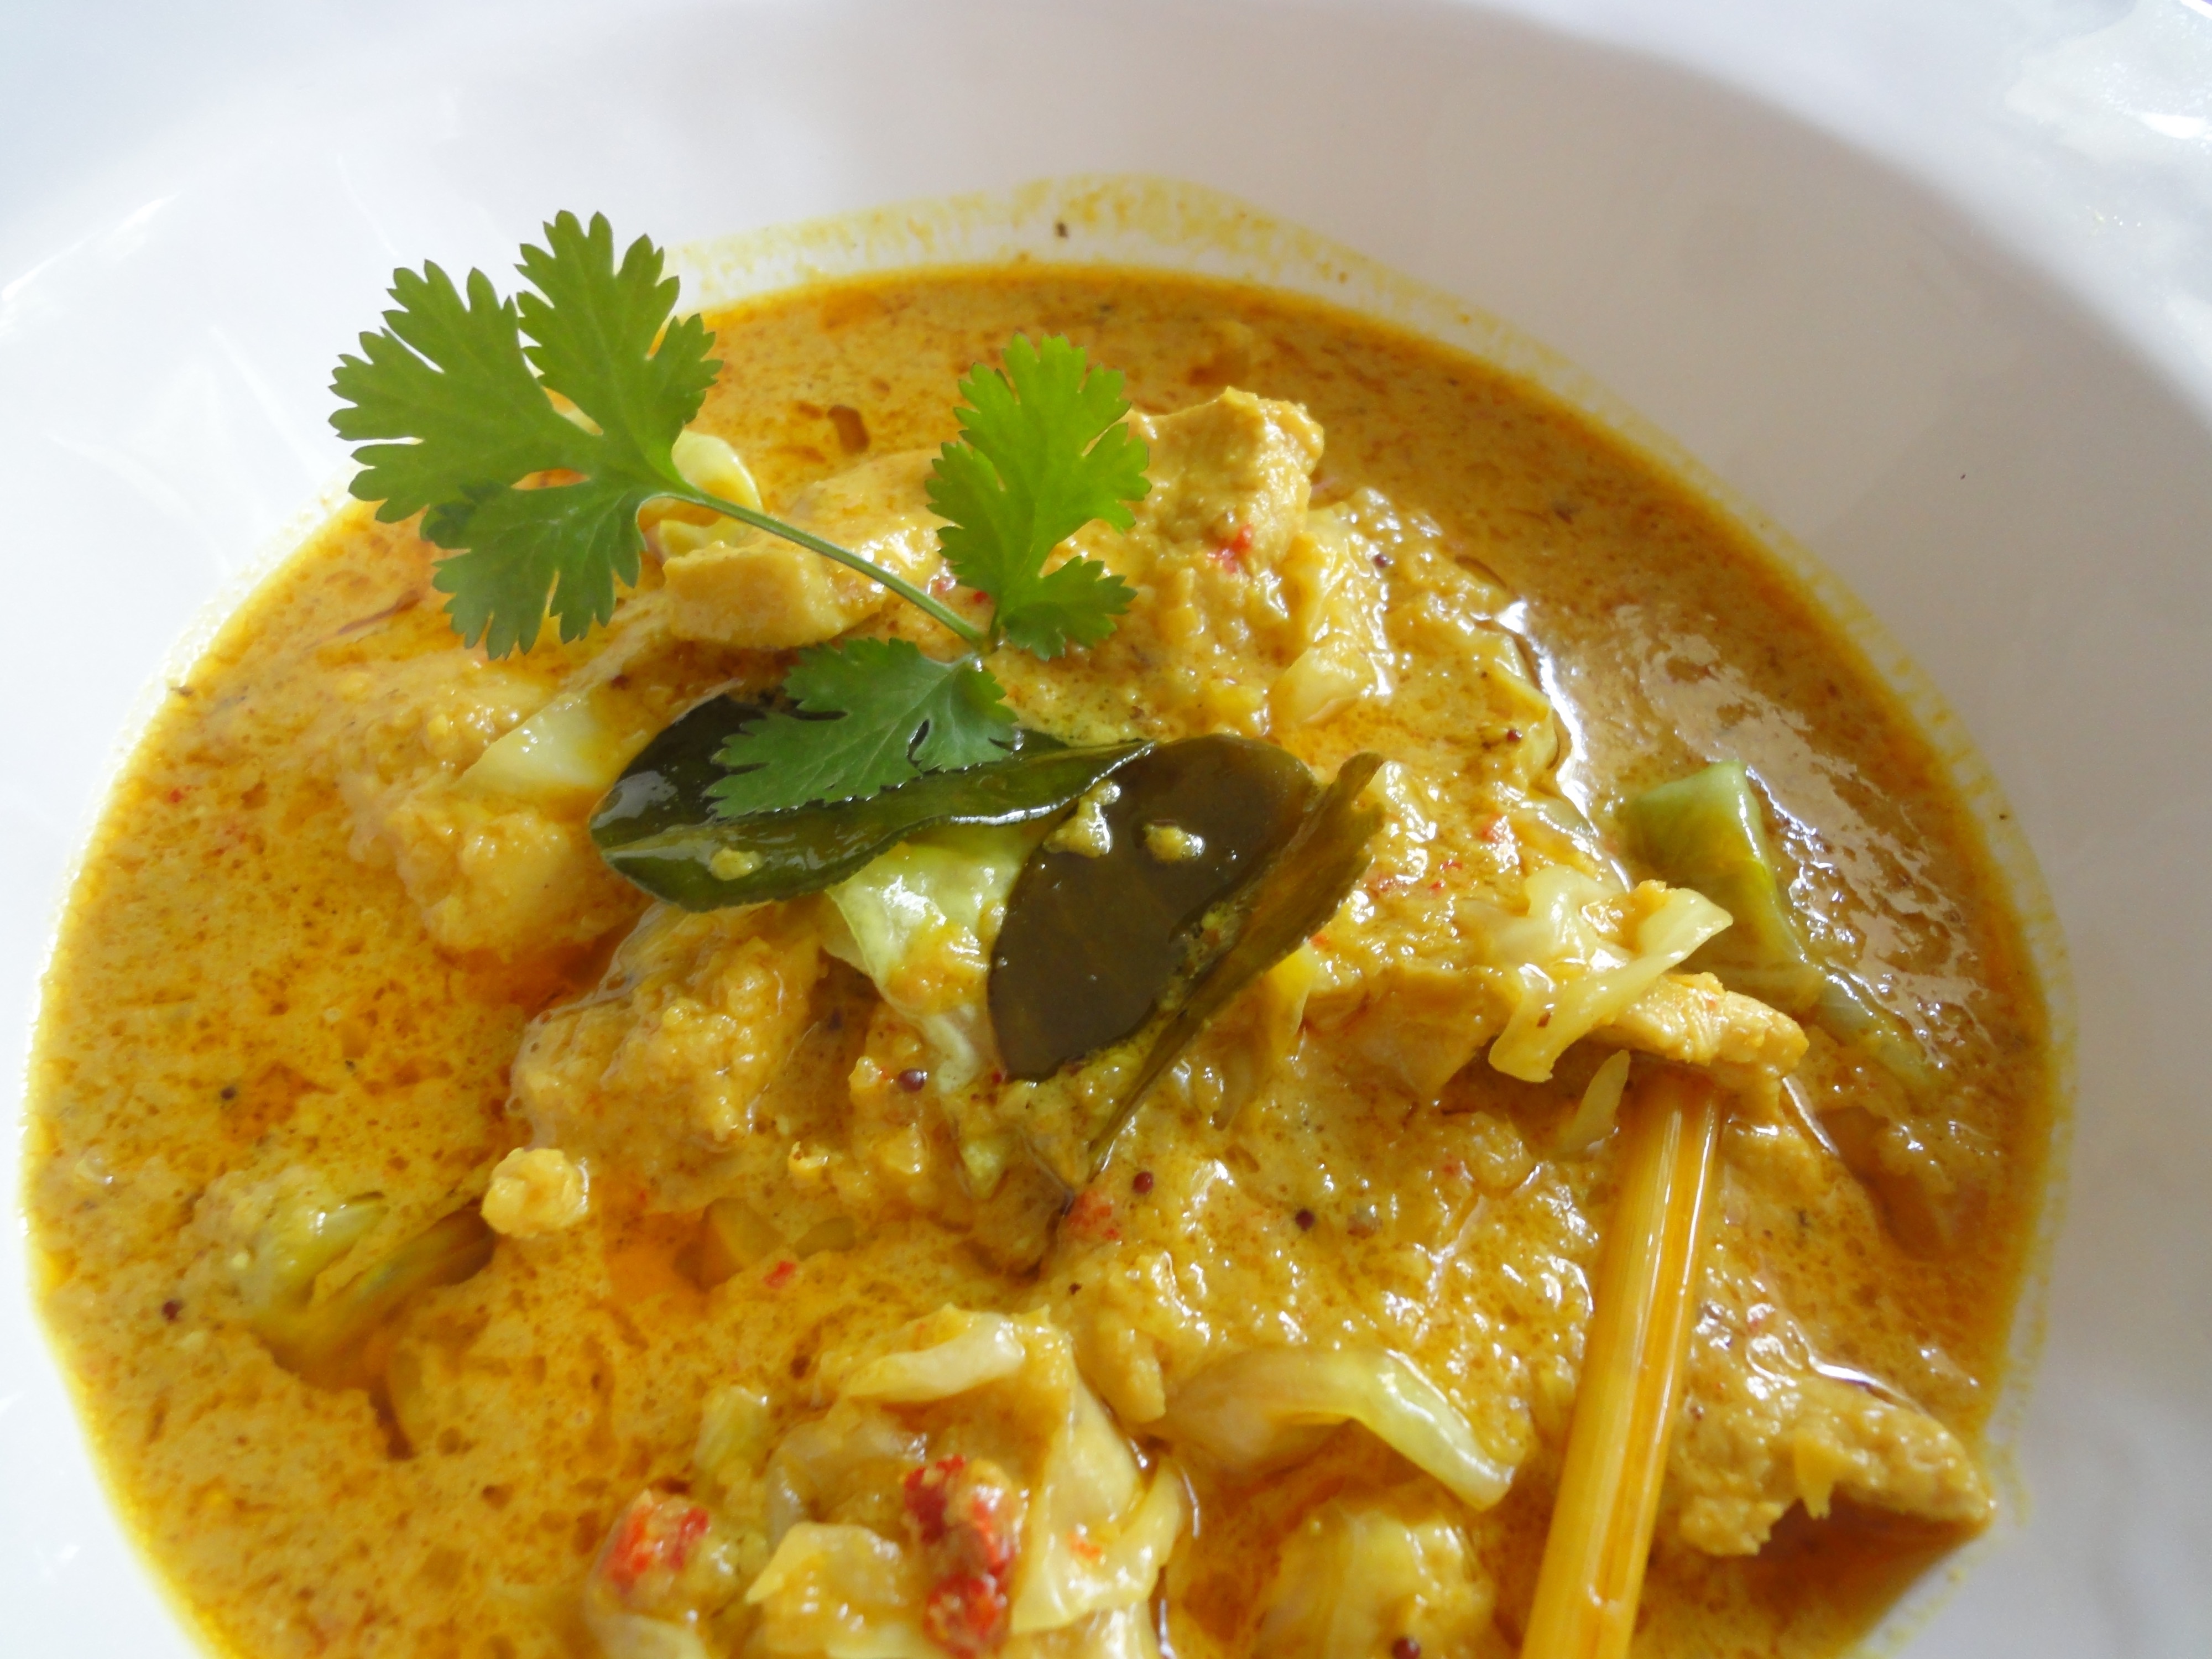

Yellow Curry served with freshly steamed white rice.
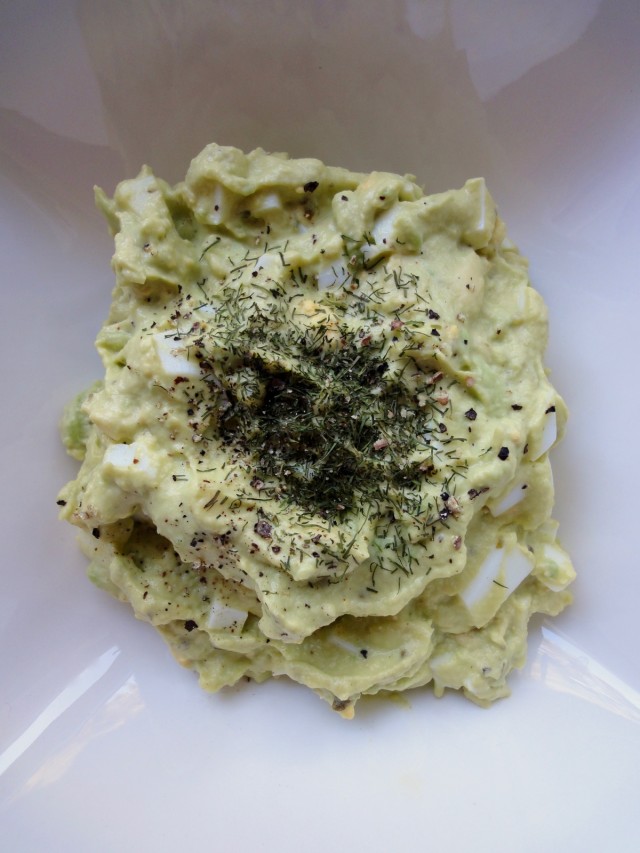
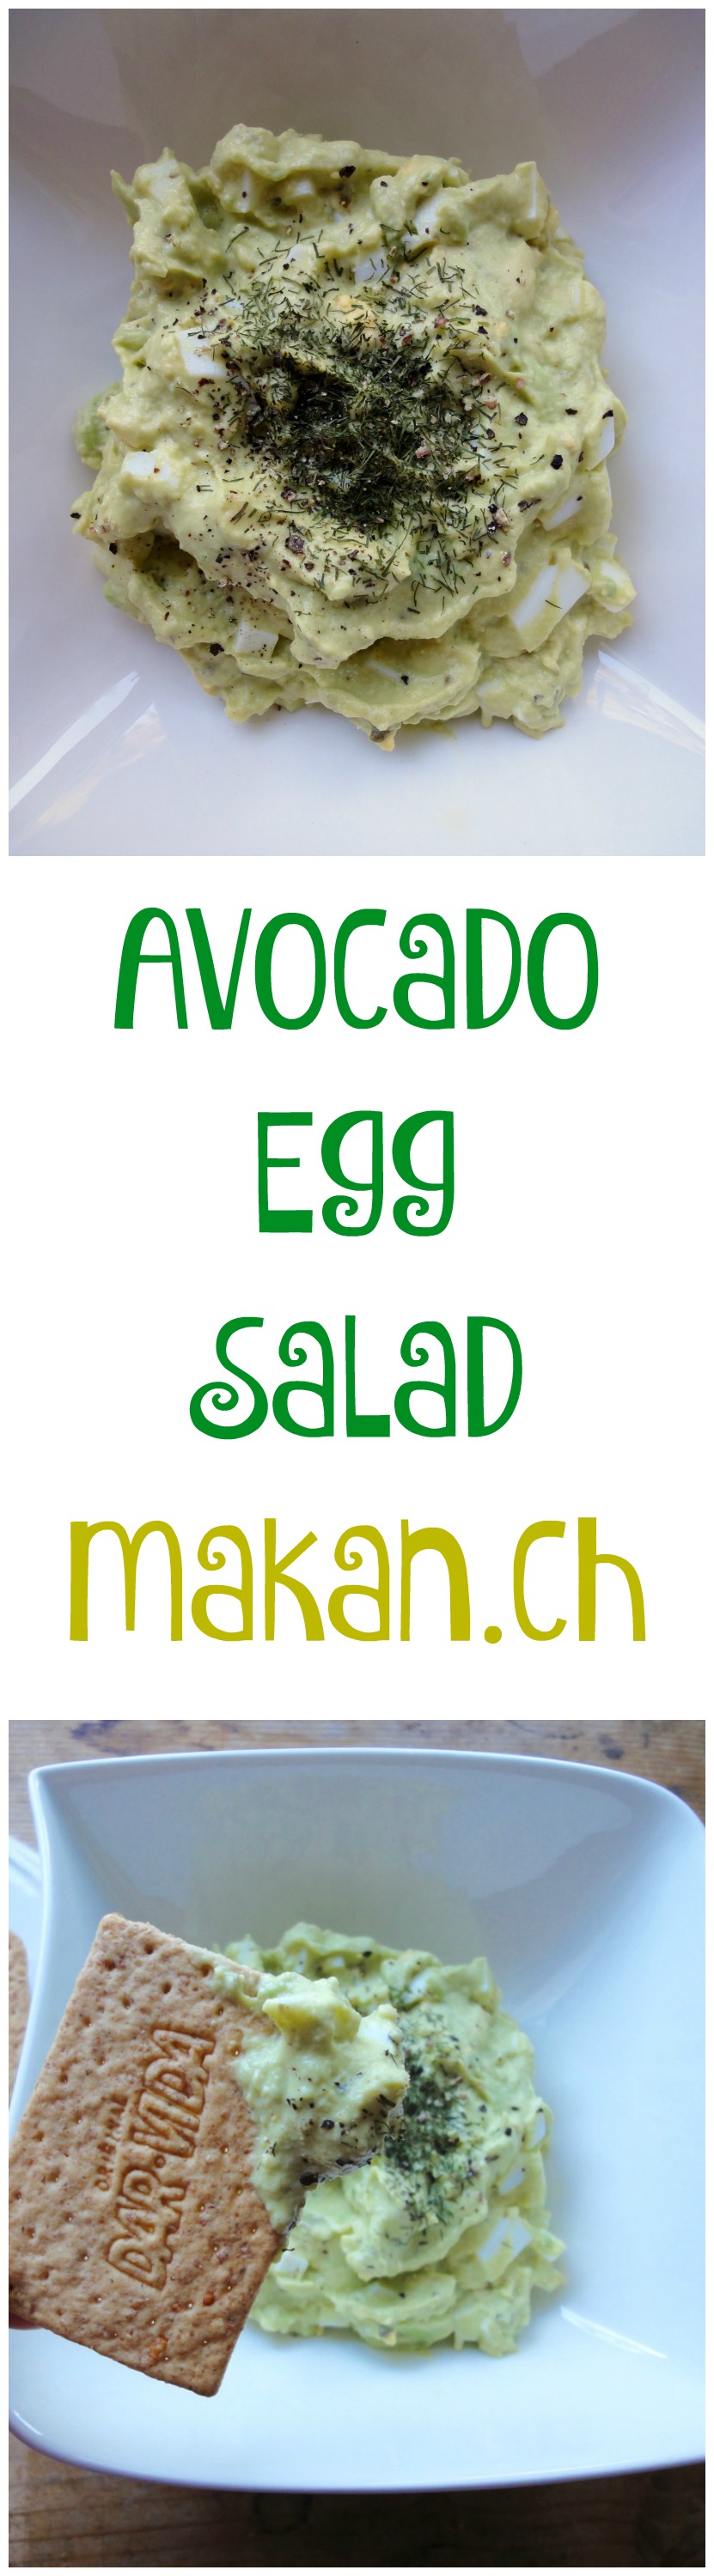
Avocado Egg Salad
A month has flown by so fast. Could 2016 be any faster? I’m just hoping February and March would past even faster cause by the end of March I would be done with my weekly allergy shots to prepare for spring. For the past 2 springs I had up to 3 months of suffering from my allergies. The first year I thought I was just having a very long cold. But last year it happened again and this time it got worse. I could barely breathe throughout the night causing me sleepless nights and finishing up 3 boxes of tissue a month was annoying. I was jumping from one antihistamine to another until I finally found one that reduces half the blocked nose and so on. By the time I started taking it, the amount of pollen subsided and it got better. So, I decided to take a test to see what was I allergic to exactly. Turns out I’m allergic to cats and grass! I find it a little ironic how I, from a tropical country is allergic to grass out of all things. Don’t mind being allergic to cats cause I’m more of a dog person.
Anyways, this recipe is a twist on the regular mayonnaise based egg salad. It’s also a basic so you can freely add whatever condiment you like such as onions, pickles and so on. If you do not like mayonnaise and butter this is a good solution. Plus, avocados are very nutritious. Also a good way to get vitamins, healthy fats and other nutrients for kids who do not like veggies.
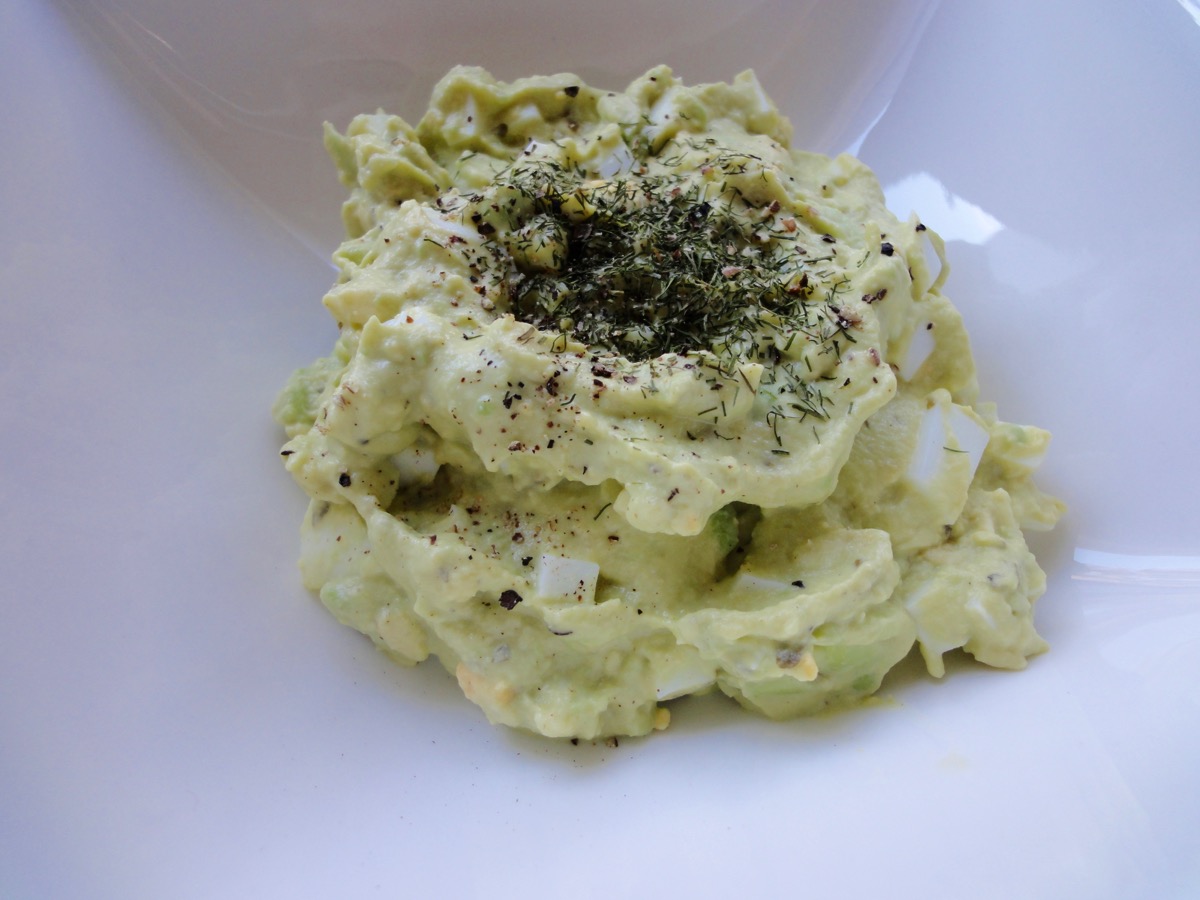
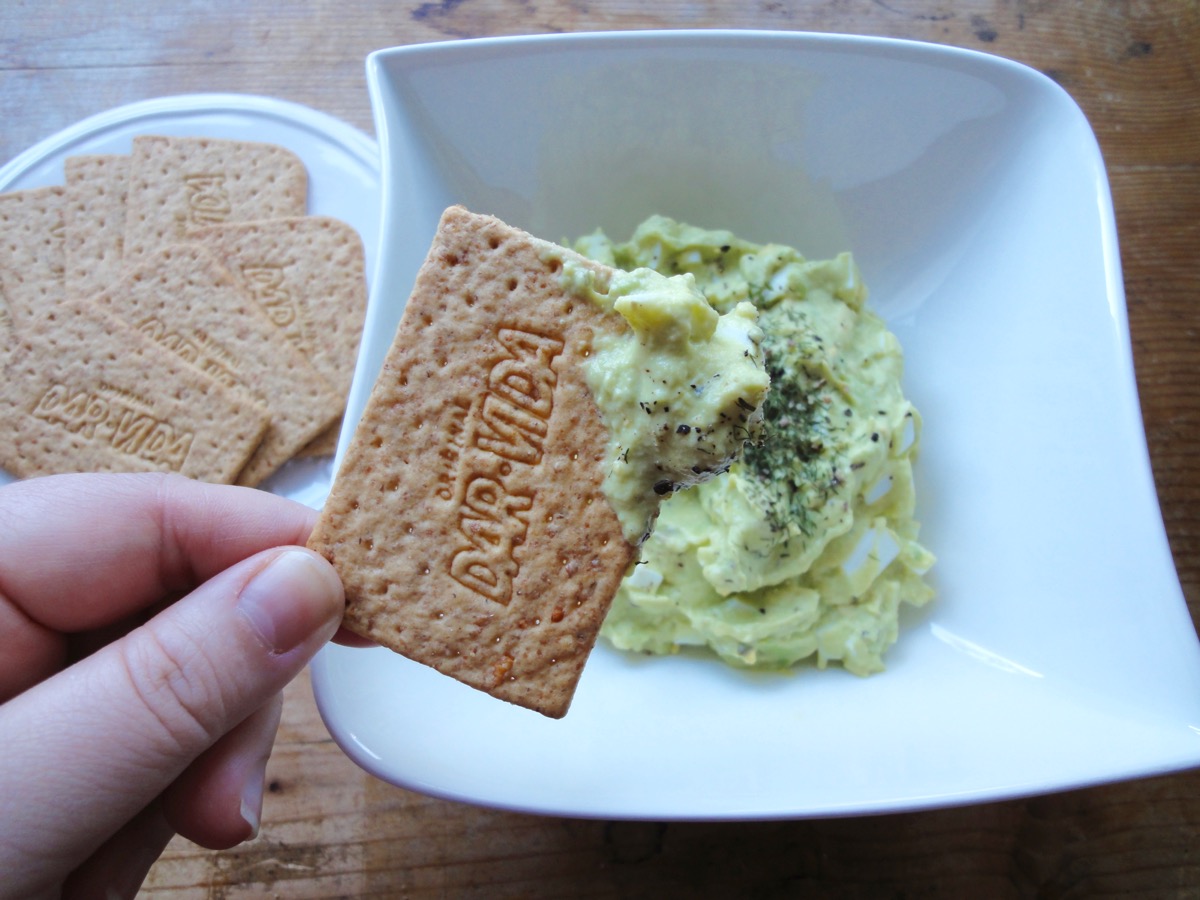
You can of course add mayonnaise into the mixture but it’s simply not necessary. Goes perfectly with toast, oopsie rolls, cucumbers, celery or crackers. I dipped mine in whole wheat crackers but from now on I would go the vegetable route instead.
Ingredients
- 3 Hard Boiled Eggs, peeled
- 1 large Avocado, roughly chopped
- To Taste Salt
- To Taste Black Pepper
- ½ teaspoon Lemon Juice*
- 1 Tablespoon Crème fraîche (optional)
- For Garnish Dill
Directions:
- In a bowl, mash eggs till small chunks.
- Add avocado, crème fraîche – if using, salt and pepper. (Add lemon juice if you are not eating the salad right away. This is to prevent the avocado’s from going dark/black – oxidation)
- Mix ingredients together.
- Cover bowl with cling wrap and refrigerate for an hour or serve immediately. I like cold egg salad.
Tips:
- Conversion Table
- Per serving : 161 calories, 12 grams total fat, 4 grams total carbohydrate, 10 grams protein.
- For nutritional information, please visit my Yummly page and scroll to the bottom of the recipe.If you are using MyFitnessPal app to count calories, first copy the recipe URL then go to MyFitnessPal app to Recipes, select Create a New Recipe, then Add from the Web. Paste the URL, match ingredients and that’s it!
- Always match ingredients to the ones you use. Ingredient nutritional facts differ depending on brand.
Enjoy!
Soft Chocolate Chip Cookies

Cookies have always been a favourite of mine and have been baking homemade cookies since 14 years old. At that time, I used to just bake them free style. No measurements and ingredients got mixed in not at it’s proper order. There was even once a few years ago, where I baked a batch of cookies just before a flight back to college where I totally forgot to add sugar until the chocolate chips were mixed in. To my surprise, it created a wonderful crunch and flavour to it that my roommate at that time gobbled up the whole jar of cookies before I could even get all my bags back into the room. Sadly, till today I have not been able to recreate those cookies. I guess, my free spirited baking has been overthrown by preciseness in baking recipes.

The product of this recipe has made me not want to eat anymore manufactured cookies again! I just love everything about it and the aroma it releases…is heavenly. A special ingredient I add is a butter-vanilla flavouring vial from Dr. Oetker which I can get in my local grocery store. Of course, if you do not have this with you, it can be substituted with 2 teaspoons of vanilla extract. I also make my own brown sugar at home since it’s not easily available in here. Best part about this recipe is that you can just use a wooden spoon to mix the ingredients.
The chocolate chips are square morsels!
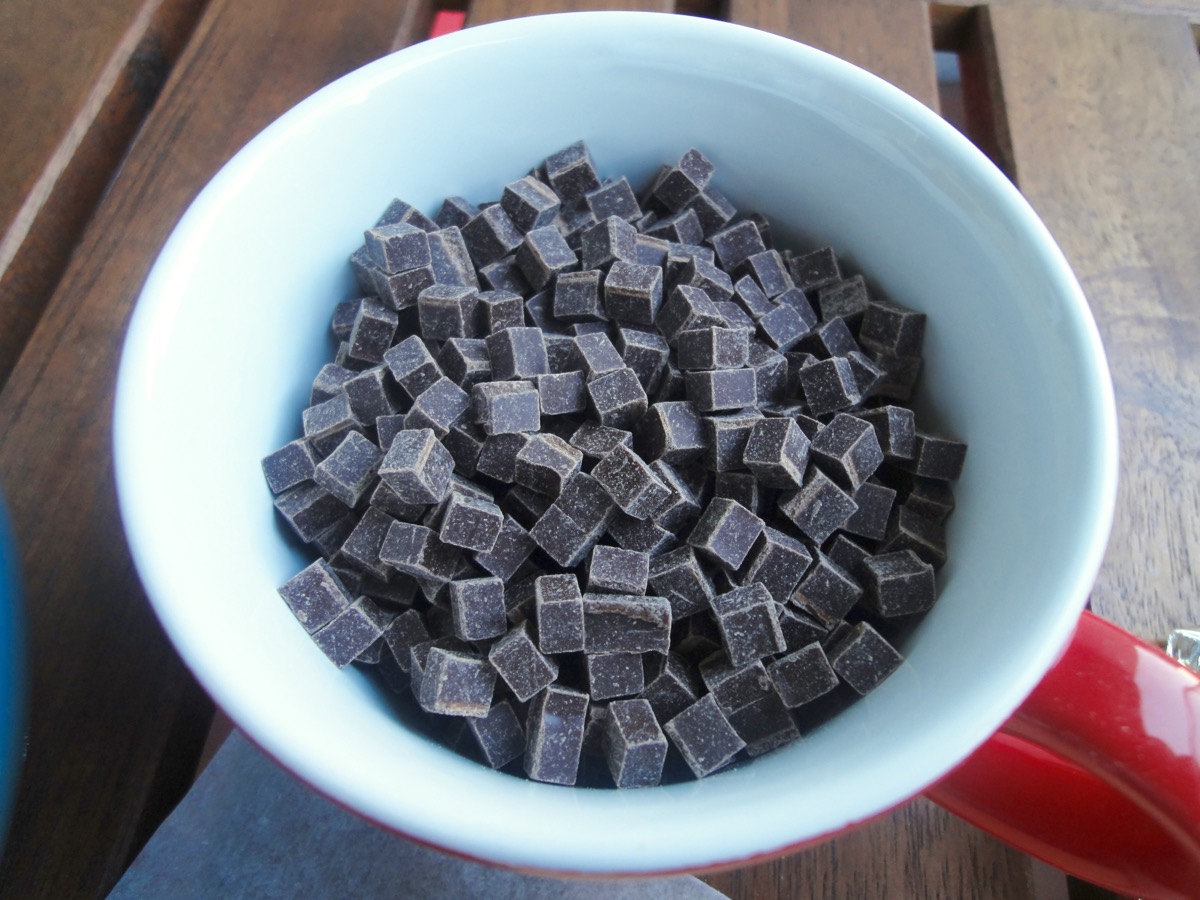
I’m guessing ‘Only in Switzerland’, chocolate chips are square!
Ingredients
- 2 cups All-Purpose Flour
- ½ teaspoon Baking Soda
- ½ teaspoon Salt
- ¾ cup Butter, unsalted
- ½ cup Packed Light Brown Sugar
- ½ cup Sugar
- 1 nos Egg
- 1 nos Egg Yolk
- 2 teaspoons Vanilla Extract
- 1 cup Chocolate Chips
Directions:
- Sift flour and baking soda and keep aside.
- Melt butter in a pot (do not boil)- big enough to mix in all the other ingredients.
- Mix in sugars and salt. Set aside to cool down.
- Once cooled, add vanilla extract and eggs one by one while mixing.
- Add in the flour and baking soda mixture and mix to slightly combine.
- Lastly, add the chocolate chips.
- Scoop ¼ cup of dough and roll it into a ball. Repeat till dough is finished.
- Place dough on a plate and cover it with cling wrap.
- Chill the dough for 30 minutes.
- Preheat the oven to 165°C and prepare baking trays with parchment paper.
- Place dough balls onto prepared baking trays. Do not place the dough too close to each other, ideally it should be about 3 inches apart.
- Bake for 16 – 18 minutes.
- Allow cookies to cool for 10 minutes on trays before transferring to cooling racks.
Tips:
- If you wish to have crunchy cookies instead of soft, simply bake it 5 minutes longer and use regular white sugar instead of brown sugar.
- Cups to Grams conversions
Guten Appetit !