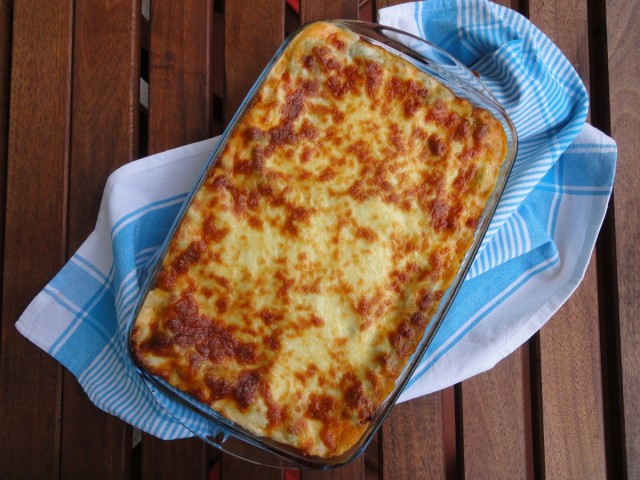
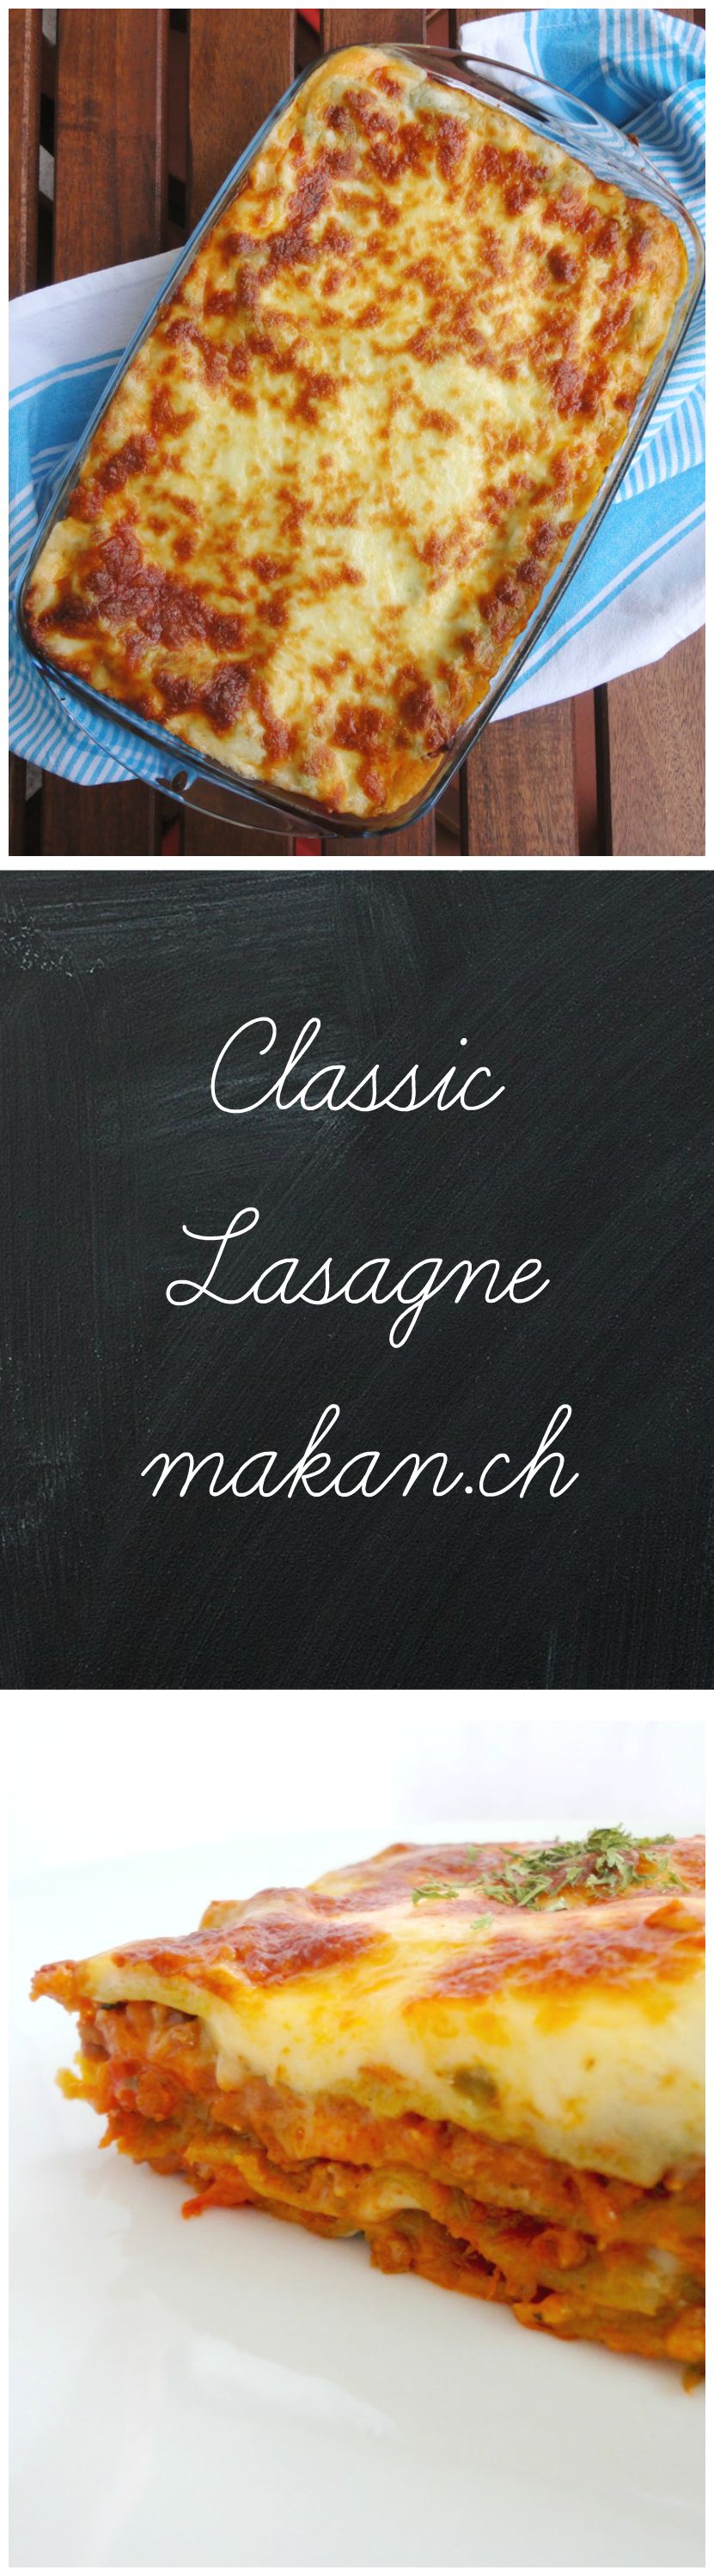
Classic Lasagne
There’s no doubt that my pictures are still horrible. If someone wants to offer me a free photography crash course I will delightfully accept, or perhaps we can trade? Let’s say a dish of lasagne and some cookies? Please? But anyways, my goal here is to not make Pinterest perfect pictures, but ones that actually are realistic to make and taste fine. At least, thats what I believe.
As most know, Lasagne is made from layers of ragù alla bolognese (commonly known as bolognese), béchamel (white sauce ; made from roux and milk, and an oignon pique), pasta layers and topped with cheese.
Oignon pique is french for pricked onion – a bay leaf tacked with cloves to a peeled onion.
Lasagne was introduced to me by my mother. She took me to a place called Dave’s Deli when I was around 9 years old, she had the lasagne while I had something else…I asked her what lasagne is and I was stupidly put off by it. What was I thinking!! So, being a pesky youngest child…I got to eat nearly half of her lasagne because it was just so freaking good! Don’t know if they have kept their standards, but that left a good imprint in my life.
Though Lasagne was not a famous pasta dish back then in Malaysia, a close family friend used to make it for birthday parties. I was very excited when she started bringing it to birthday parties and after party No.3, I finally asked her how she made it. She told me to just follow the instructions on the box. That simple! Sadly, she has passed on and I never got to have her lasagne again. So dear Aunty Lorna, I hope you are watching down from heaven and hope I’m doing well with my lasagne!
During my final diploma semester in college, we had this module where the students had to take over the college cafeteria (or food court). My friend Ronnie and I were assigned to the hot kitchen and prepared lasagne in mass. It was quite a hit and we got some good compliments from the lecturers and students. Even a well known Malaysian celebrity chef’s sister bought our lasagne! I remember she once bought 6 pieces of it to take home for her family.
Now, I have this chance to share my lasagne with every one. I even managed to convince my husband, who WAS not big on lasagne…to love it. This is one of the dishes where he does not mind having for the next 2 meals. Though I managed to convince my husband, I don’t think I could ever convince my siblings and parents to have my lasagne. I made it once for them 6 years ago and it was a huge flop! Guess they must be thanking their lucky stars to have survived that huge flop. 😉
Note: For the béchamel recipe, I use the metric weighing system as I get accurate measurements.
So here it is.
Ingredients
- 9-12 Lasagne Sheets, fresh or dried
- 1½ cups Mozzarella Cheese, shredded
- 1 teaspoon Oregano
Ragù
- 500 grams Minced Beef
- 2 Tablespoons Olive Oil
- 1 medium sized Onion, chopped
- 4 pieces Bay Leaf
- 3 cloves Garlic, minced
- ¼ cup Red Wine
- 1 can (400g) Crushed Tomatoes
- ¼ cup Tomato Paste
- 2 Tablespoons Worcestershire Sauce
- 1 Tablespoon Oregano
- 1 Tablespoon (add more if sauce is very sour) Brown Sugar
- 3-4 Carrots, grated (optional)
- To Taste Salt
- To Taste Black Pepper, crushed
Béchamel
- 50 grams All Purpose Flour
- 50 grams Butter
- 600 ml (2½ cups) Milk
- A pinch Nutmeg
- Half Onion
- 2 pieces Cloves
- 1 piece Bay Leaf
- ½ cup Parmesan Cheese, grated
- To Taste Salt
Directions:
- Ragù
- Heat up a pan with olive oil. Brown minced beef.
- Add onions, garlic and bay leaf. Stir until the onions soften.
- Deglaze pan with wine.
- Mix in canned tomatoes, tomato paste, herbs, and Worcestershire sauce. Add carrots if using.
- Cook until slightly reduced, about 15 minutes. Add in brown sugar. You can add more if the sauce if too sour.
- Season with salt and pepper.
- Set aside.
- Béchamel
- Pierce the halved onion with cloves and bay leaf (oignon pique).
- Lightly toast flour in a medium sized pot. Do not brown the flour.
- Once it starts smelling like toasted nuts, add butter. Stir well. (This is now called roux)
- Cook roux till it smells like again, toasted nuts.
- Whisk milk 300ml at a time into the roux, till combined.
- Continue mixing in the rest of the milk, bring to the boil.
- Add parmesan cheese and oignon pique.
- Season with nutmeg and salt.
- Set aside for at least 15 minutes. Discard oignon pique before using.
- Lasagne assembly (go according to instructions on box, I use Barilla Lasagne sheets)
- Pre-heat oven to 220°C (430°F) and grease a deep lasagne glass dish (13 x 9-inch).
- Spread 1 cup ragù or just enough to cover the dish with a thin layer of sauce.
- Lay lasagne sheets on top – I use 3 sheets per layer.
- Spread 1 cup of béchamel over the sheets.
- Repeat till you reach the third layer*
- Finish off with a generous spread of béchamel.
- Top with mozzarella and oregano.
- Bake for 20 minutes.
- Allow to rest for 15 minutes before serving.
Tips:
- * you can add more layers as you see fit.
- use vegetable lasagne sheets ex. spinach lasagna sheets
Enjoy!

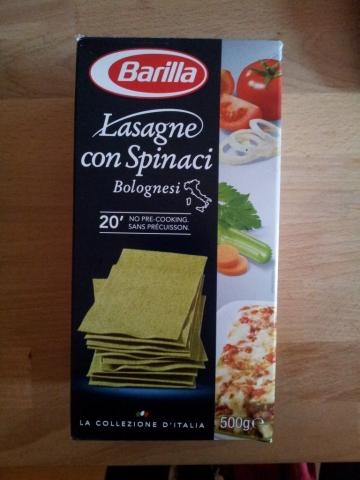
Spinach Lasagne sheets form Barilla
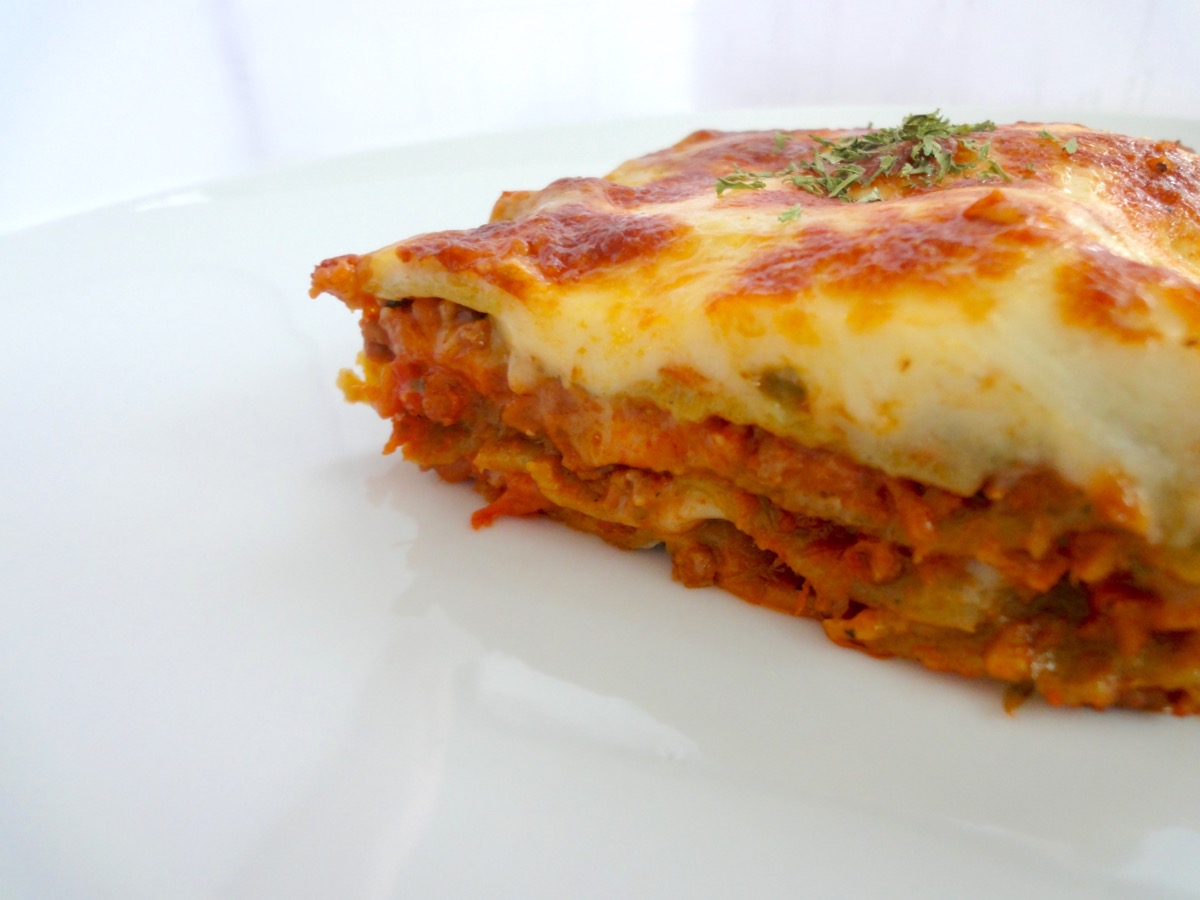
A very poor shot of it. I was too hungry!
Easy Sardine Curry Puffs
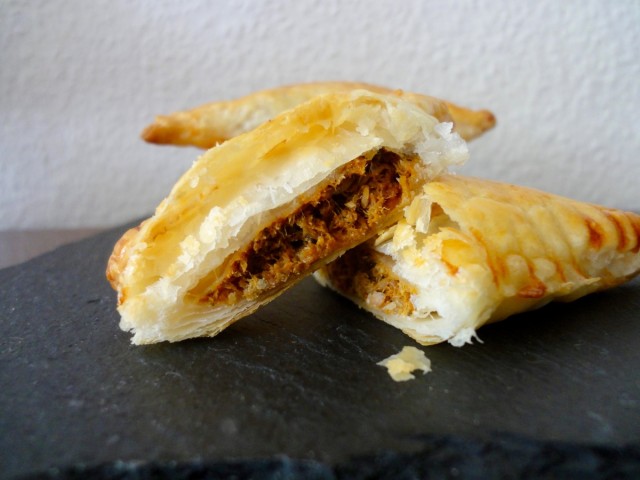
This is an exceptionally fast and easy snack to make…yet another reason to have puff pastry around! The filling is very similar to sardine cutlets (recipe will come eventually).
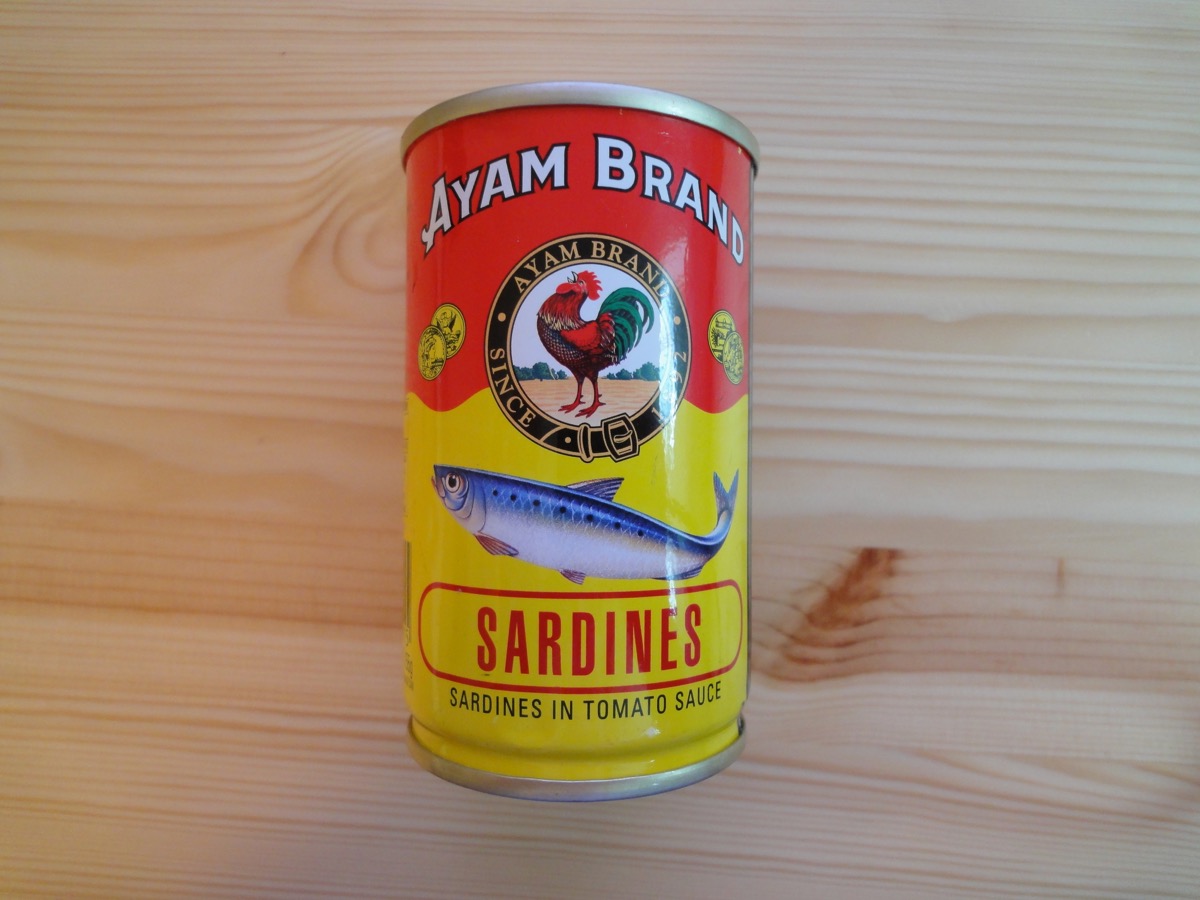
Sardine packaging in Malaysia
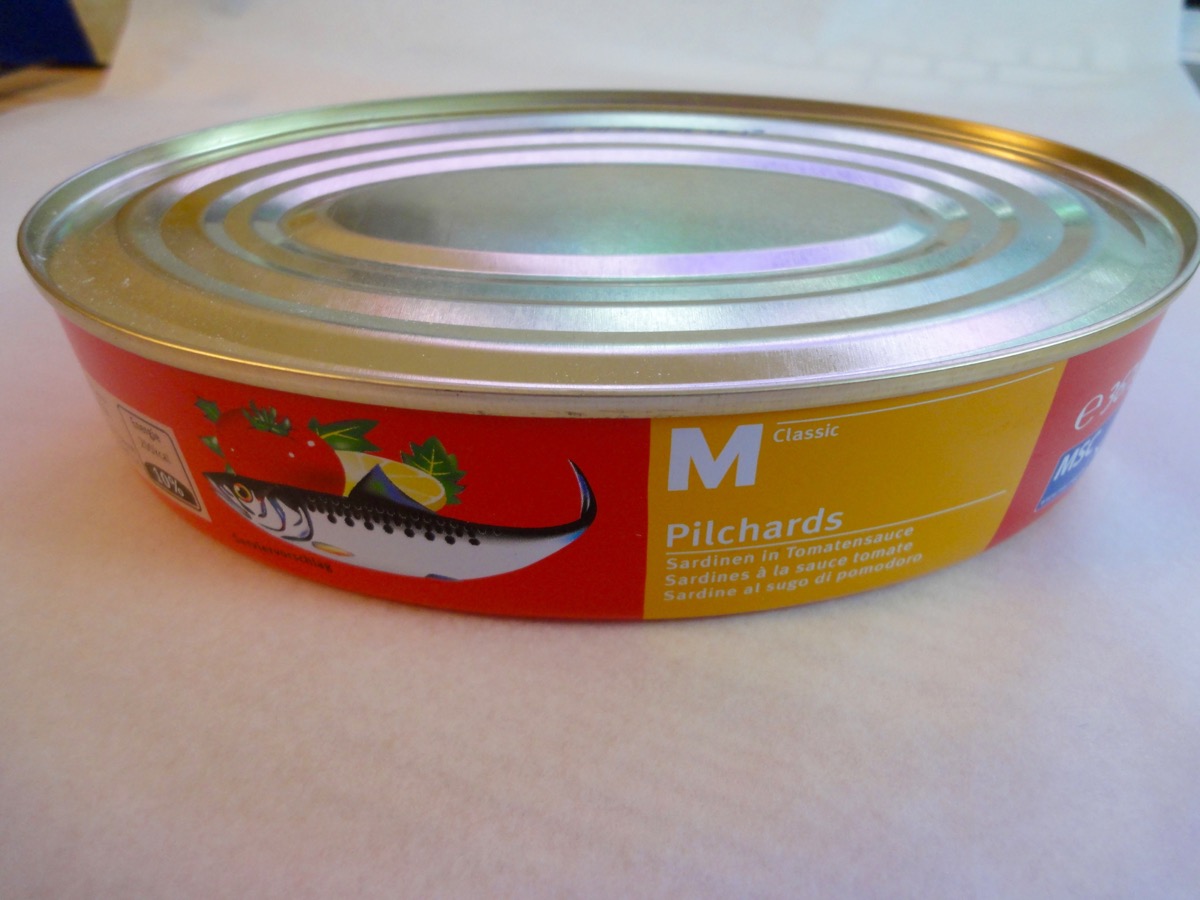
Sardine packaging in Switzerland
Ingredients
- 1 rectangle/square package (320g) Puff Pastry
Egg Wash
- 1 nos Egg
- 1 Tablespoon Water
Sardine Filling
- 1 small can (155g) Sardines in tomato sauce, drained and mash
- 1 sprig Curry Leaves, chopped
- 1 small Onion, chopped
- 1 inch Ginger, grated
- 1 Tablespoon Curry Powder
- 2 tsp Chilli Powder (optional)
- To Taste Salt
- To Taste White Pepper
Directions:
- Sardine Filling
- Drain out half the tomato sauce from the sardines.
- In a medium high heat pan, sauté onions. Add curry leaves and fry till fragrant.
- Add sardines with sauce, grated ginger, curry powder, chilli powder, salt and pepper.
- Fry till the sauce has been reduced to half.
- Set aside to cool.
- Egg Wash
- Beat 1 egg and 1 Tablespoon of water together. Set aside.
- Assembling Sardine Puffs
- Take out puff pastry 10 minutes before intended use. Thaw if using frozen puff pastry.
- Pre-heat oven to 220°C (430°F). Prepare baking tray and line with parchment paper.
- Unroll puff pastry and cut into equal square’s. Around 3 x 3-inches.
- Place 1½ tablespoons of the sardine filling in the centre of the puff pastry and slightly flatten.
- Brush egg wash around the filling (for extra seal), fold into half and seal by using a fork to press seal it.
- Place sardine puffs on prepared baking tray. Brush with egg wash.
- Bake for 15 – 20 minutes or till golden brown.
- Leave to cool on a wire wrack before enjoying.
Tips:
- Mash the sardines well.
- Balance tomato sauce can be turned into a dip by adding some chilli or tomato sauce and boiling it for a bit ; or to be reserved for plain sardine curry.
- You can use short crust pastry instead of puff pastry. Bake according to instructions on packet.
- It’s very important when baking with puff pastry that the oven is properly pre-heated. This will prevent uncooked pastry inside.
Enjoy!

Evenly baked pastry

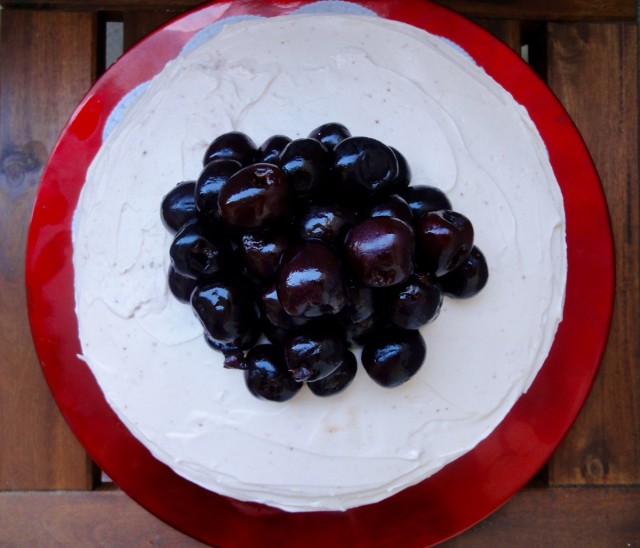
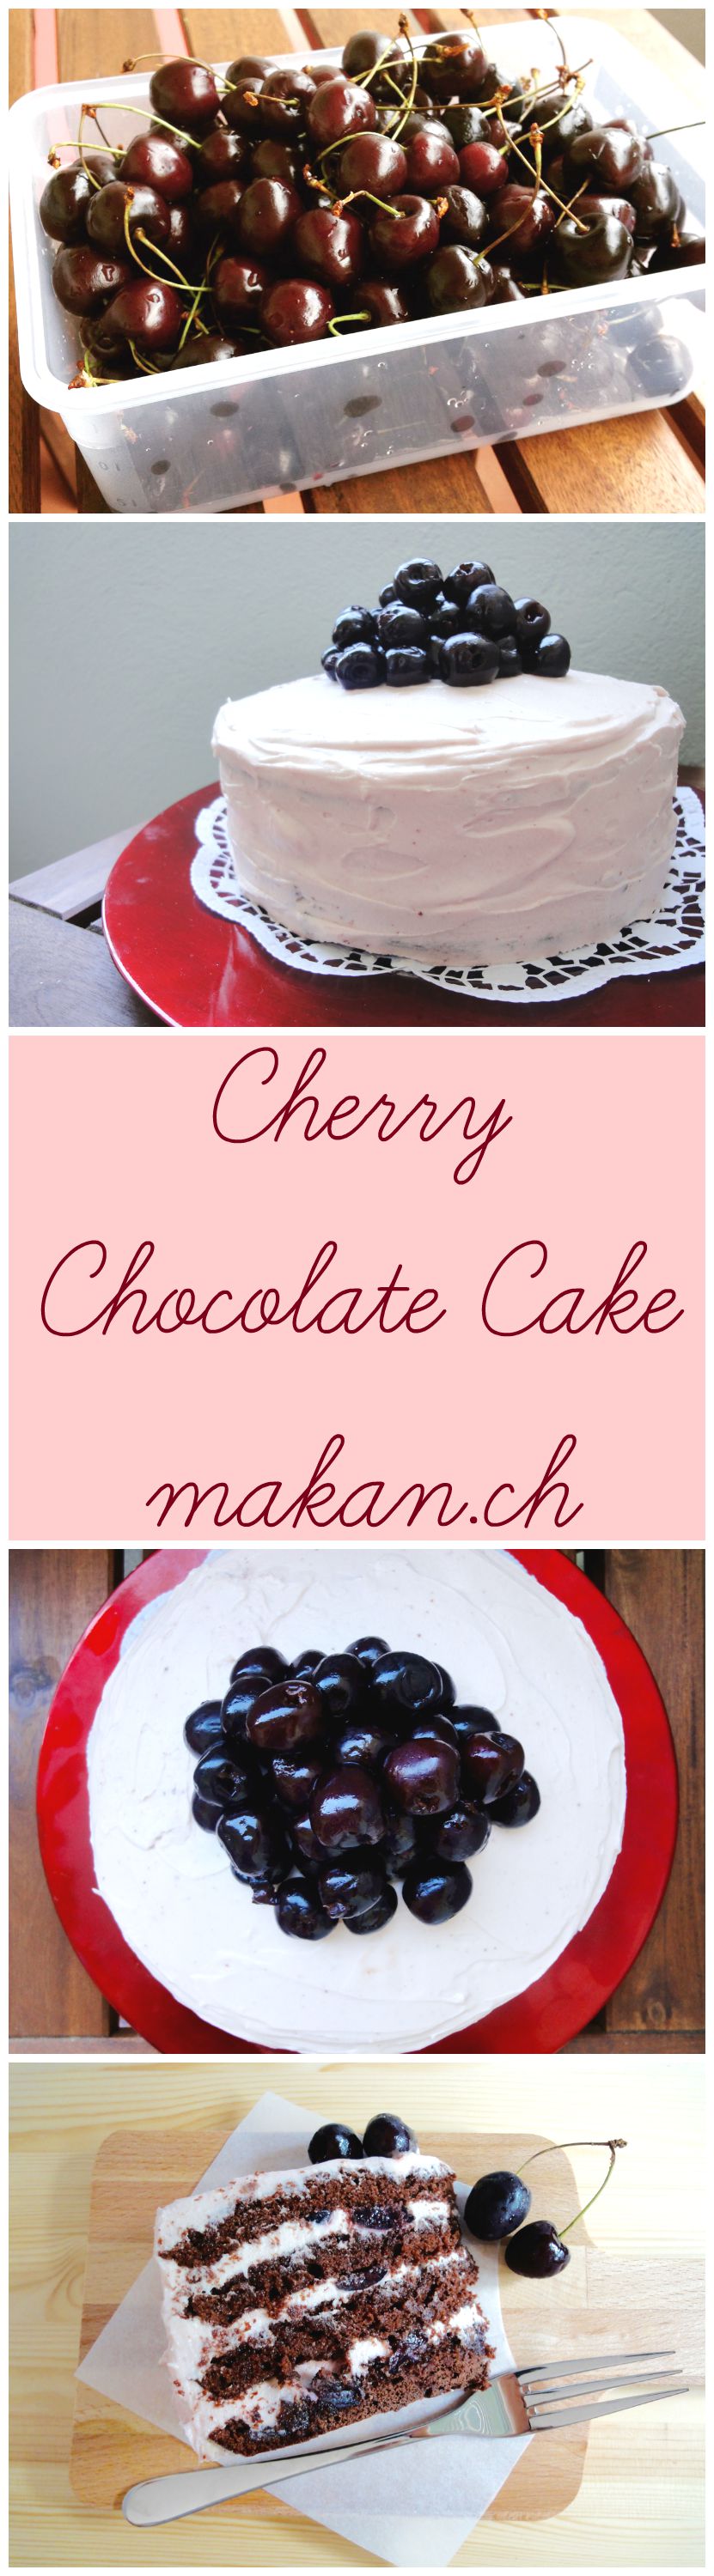
Cherry Chocolate Cake
Finally a recipe with cherries in it. Cherry is the name I go by since birth…almost everyone I know calls me Cherry and sometimes introducing myself by my real name sounds weird, so I do tell people to call me Cherry. Growing up, when my mother calls me by my real name, that would be an indication that I’ve actually done something mischievous …which also means…time to ruuuuuun!!!!
I live in a Canton that’s known for it’s cherries, cherry liquer known as Kirsch, and cherry liquer cake – Kirschtorte. It also has its own cherry day – chriesitag, where there’s a game of cherry stone pitting and a cherry market where the farmers sell their cherries and cherry produce, and as you enter the Canton by car, you can see a big signboard with cherries on it.

So, being called Cherry all my life, I decided this year to finally get some cherries from the cherry market for a cherry chocolate cake. I wanted to even wear my cherry cap to the market but chickened out. The hubby came along with me because I’m a bratty wife. The farmer even let us try out the cherries before purchasing it. Those cherries were the freshest I have ever had in my life and it was really juicy and good. So we got a kilo of it. As soon as we got home, I cleaned it and started pitting it. I also made some cherry juice from it for the cake frosting.
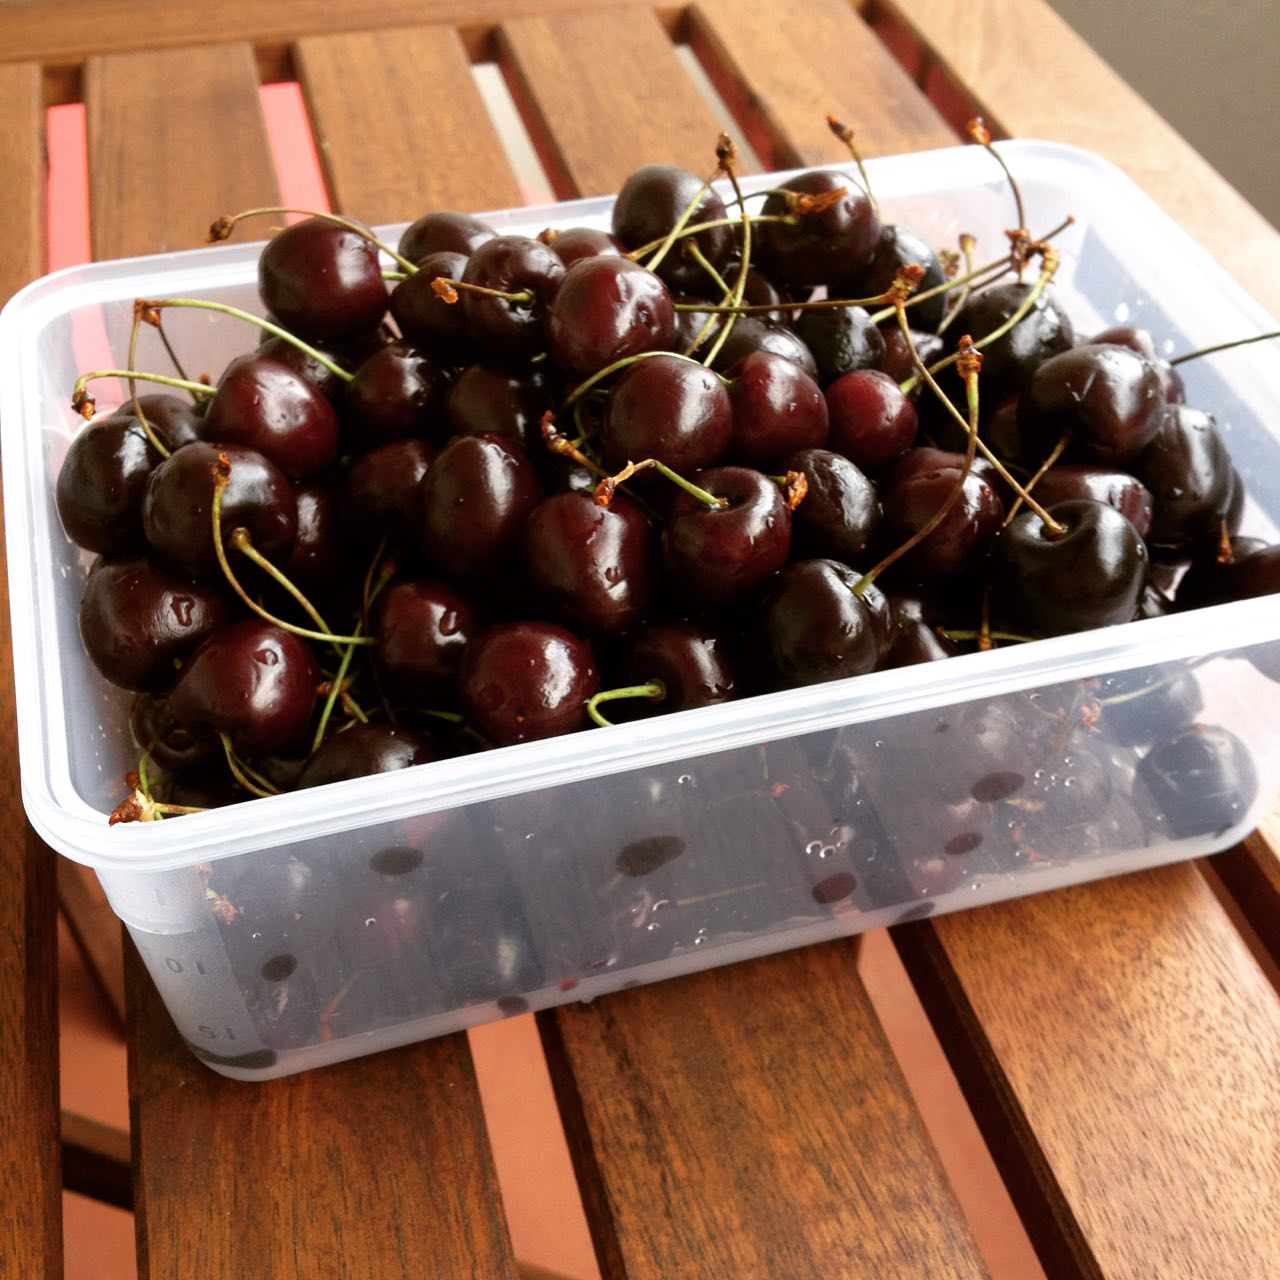
Cherries
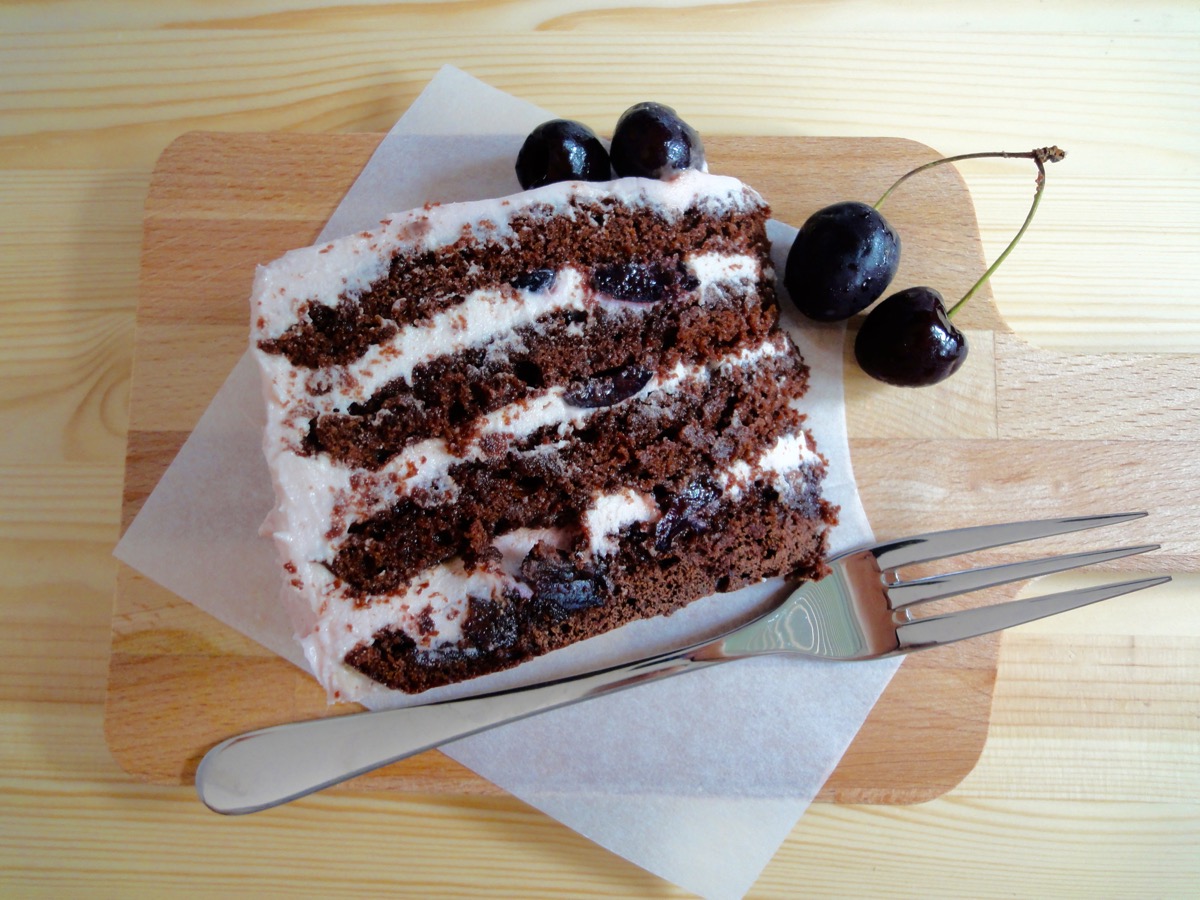
I got the recipe idea from Natasha’s Kitchen’s Drunken Cherry Chocolate Cake. However, mine was a virgin cherry chocolate cake. That was about the only thing I changed from the recipe. It was a delicious cake that I ate half of it over a span of 3 days. But every time I had a slice, there was a tingling feeling in my throat. And one night, I had about 3 slices of it and my tongue swelled up a little. So, sadly…I self diagnosed myself that I am ironically allergic to cherries. That did not stop me from finishing up the cake. 😛 I will go for a test soon though.
Chocolate cake layers taken from Tatyana’s Chocolate Cherry Rum Cake and the frosting from Hungry Rabbit’s Cherry Chocolate Cake.
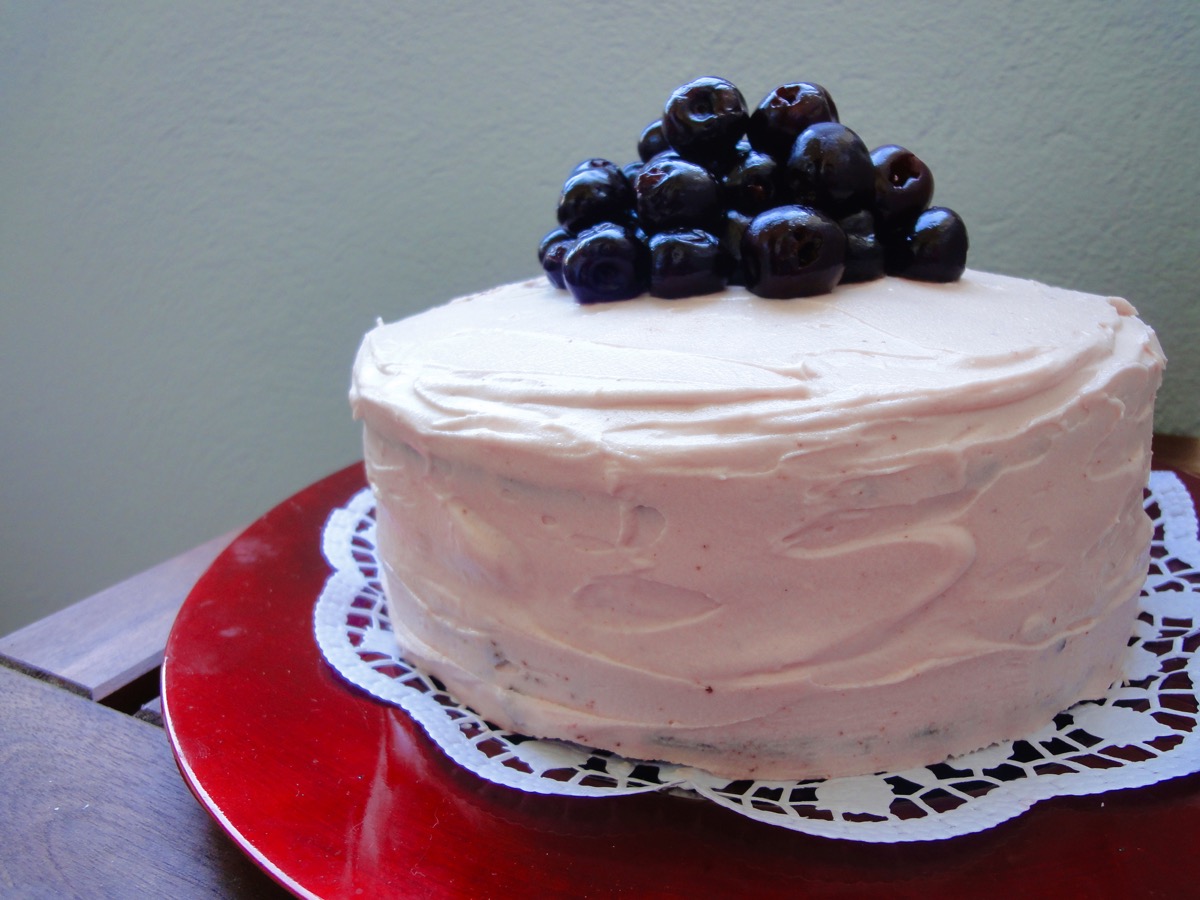
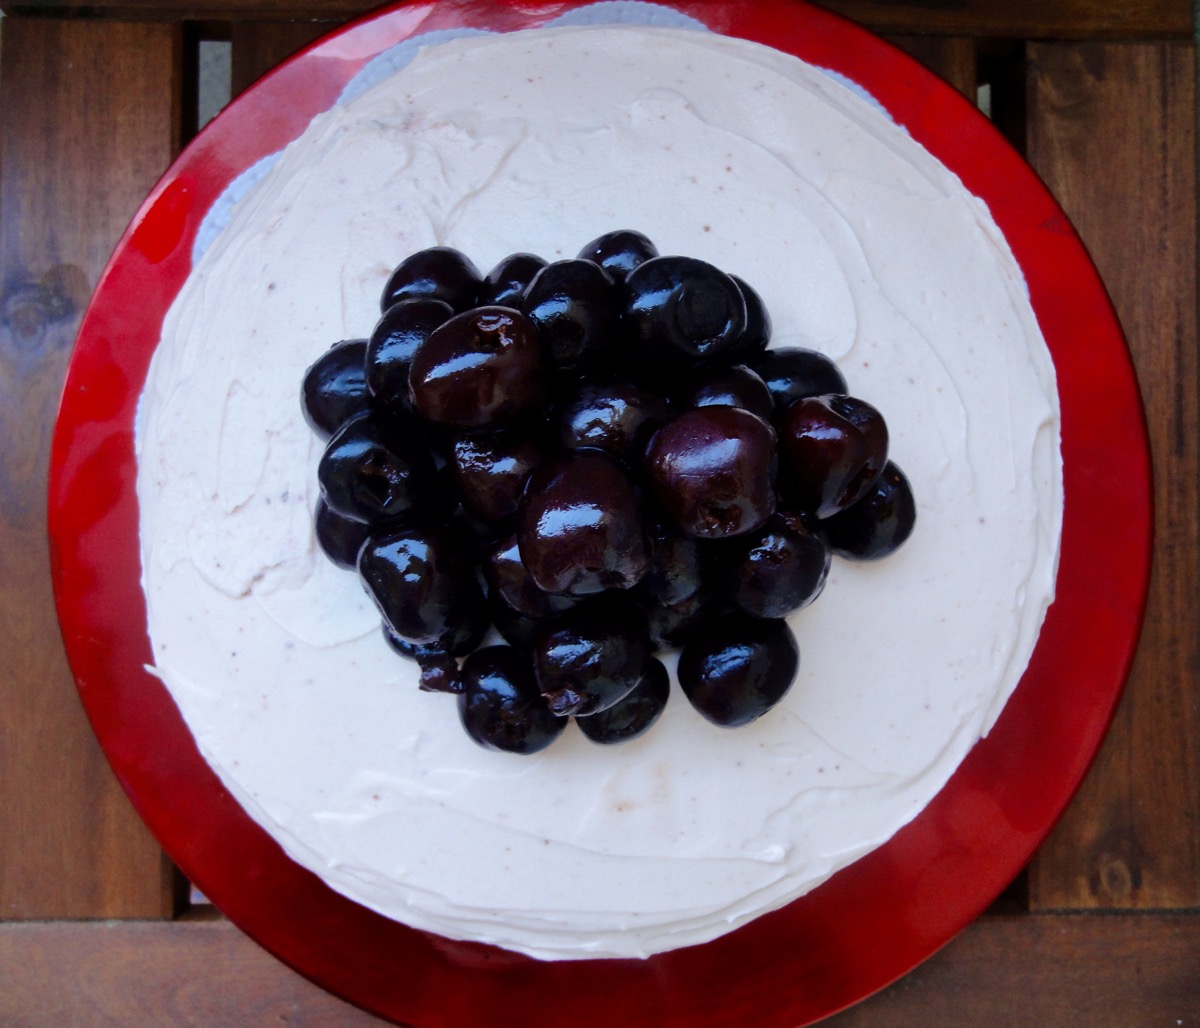
My Final Product
Chocolate Cake Layers
- ¼ cup (57 grams) Butter, softened
- 1½ cups Sugar
- 2 nos Eggs
- 1 teaspoon Vanilla Extract
- 1 cup Milk
- 1⅓ cups All Purpose Flour
- ¾ cup Cocoa Powder, unsweetened
- 2½ teaspoons Baking Powder
- ⅛ teaspoon Salt (if using unsalted butter)
Cherry Filling
- 4 cups (900 grams) Fresh Pitted Cherries, chopped
- ½ cup Rum (optional - I did not use) soak overnight
Cherry Cream Cheese Frosting
- 1 cup Butter, softened
- 3 cups (+/-) Powdered Sugar
- ¼ teaspoon Salt
- 16oz (2 cups, 450 grams) Cream Cheese
- 4 tablespoons Cherry Juice*
Directions:
- Chocolate Cake Layers
- Preheat oven to 180°C (350°F). Prepare two 8-inch (20 cm) cake pan with cooking spray or butter and dust with flour.
- In a bowl, whisk butter, sugar and salt until light and fluffy.
- Add eggs one by one followed by vanilla extract.
- In a separate bowl, sift flour, cocoa powder and baking powder.
- Add flour to creamed mixture alternating with milk. Mix until just combined.
- Divide batter equally between the two prepared cake pans.
- Bake for 30 to 35 minutes or until your cake tester comes out clean.
- Cool cakes in cake pan. Once cool enough, transfer onto cooling racks.
- Cherry Filling
- Take 2½ cup of chopped cherries.
- Soak cherries in rum overnight (optional)
- Reserve 4 tablespoons of the juice and rum mixture for frosting. (When not using rum, see Cherry Puree for frosting.)
- *Cherry Juice
- Take 1½ cup of cherries from cherry filling and blend till smooth. Set aside.
- Cherry Cream Cheese Frosting
- Mix butter, powdered sugar and salt on low speed until combined. Then increase to medium speed and mix till fluffy.
- Add cream cheese and mix till incorporated. I prefer to keep the cream cheese cold. It does take a little longer to mix it together after that but it resists me from adding too much powdered sugar to thicken the frosting.
- Add 4 tablespoons of cherry juice, mix well. Keep the balance of the cherry puree/juice for layering.
- Refrigerate frosting before using.
- Assembly of cake
- Slice each cake into half horizontally with a long knife or a cake cutting wire.
- Place one layer on a cake stand.
- Take balance cherry juice and mix in 1/8 – 1/4 cups of water. Brush first cake layer with cherry juice.
- Cover the layer with cherry frosting and top with some cherry filling. Repeat process for the next 2 cake layers.
- Add the final cake layer without cherry juice and frosting.
- Leave to set in refrigerator for an hour.
- Once set, frost the top layer and the sides.
- Decorate with some cherries.
- Leave to set for 2 hours before serving.
Tips:
- Cups to Grams conversions
- 1 cup pitted cherries = 225 grams
- Make a day ahead for best results
- Let cake sit at room temperature at least 30 minutes before serving.
Enjoy and happy baking!
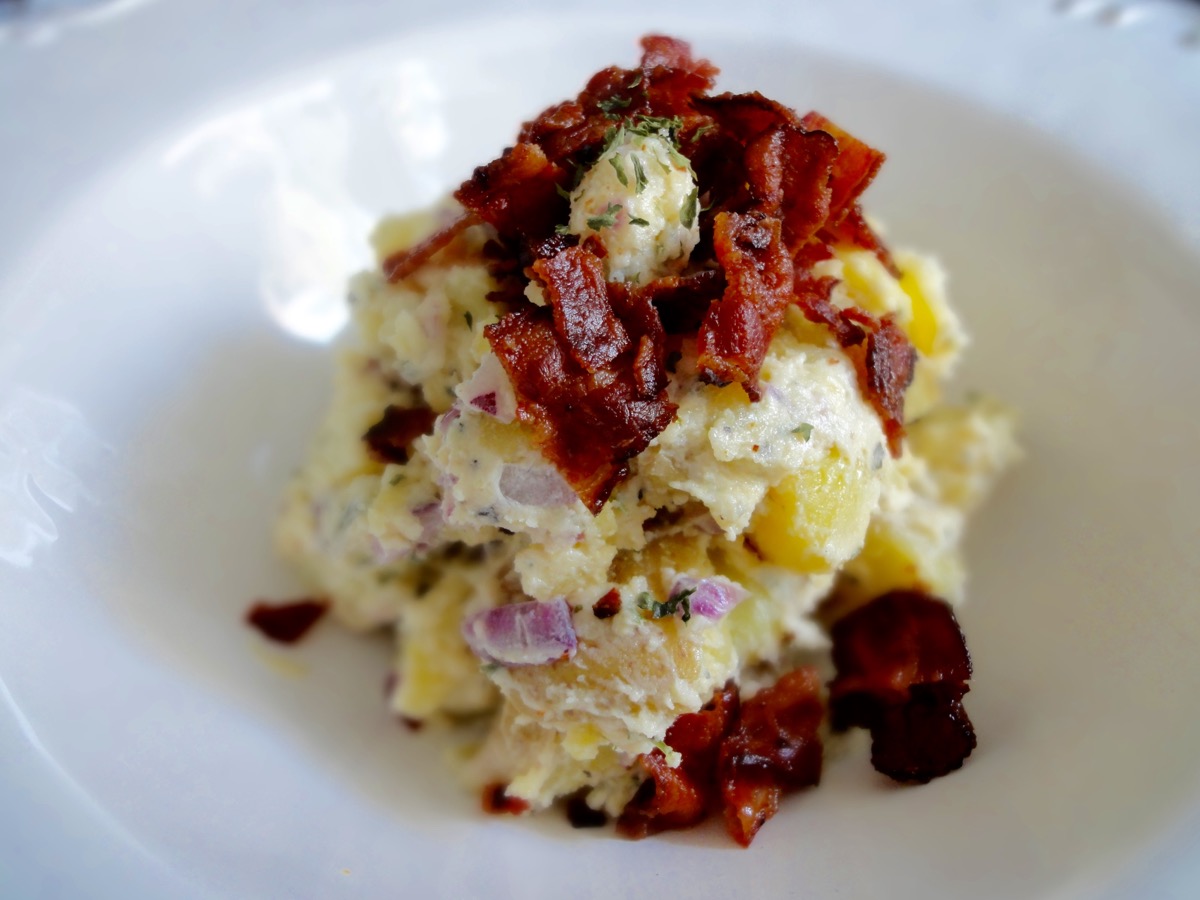
Potato Salad with Bacon
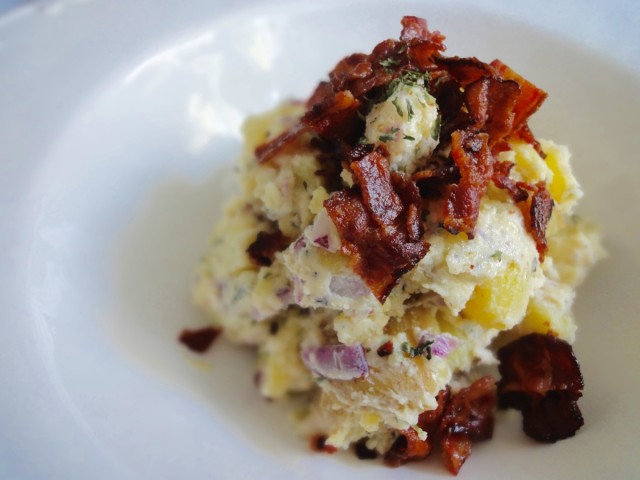

Bacon? Bacon. There’s really nothing more to say about it…just that it’s yummy. So, here it is!
Ingredients
- 1kg New Potatoes, washed and cut into quarters
- 4 Bay Leaves (optional)
- 1 cup Mayonnaise
- 2 medium sized Red Onion, chopped
- 2 teaspoons White Wine Vinegar
- 2 teaspoons Oregano or mixed herbs, fresh or dried
- To taste Salt
- To taste Black Pepper, freshly ground
- 10 strips, or more...the sky's the limit Bacon
Directions:
- Bring a large pot of water to boil.
- Add bay leaves and salt.
- Add potatoes and cook till tender but still firm. About 20 minutes.
- Drain and cool.
- In a bowl, mix in mayonnaise, salt, pepper, white wine vinegar, oregano or mixed herbs, red onions and potatoes.
- Allow potato salad to cool down before refrigerating it.
- Refrigerate for at least 3 hours.
- Need instructions to cook bacon? Place bacon on a baking tray, bake at 200°C for 15-20 minutes or till crispy. Chop it up and sprinkle over potato salad.
- Serve with bacon, topped with bacon, and a side of bacon. 😀
Tips:
Enjoy!
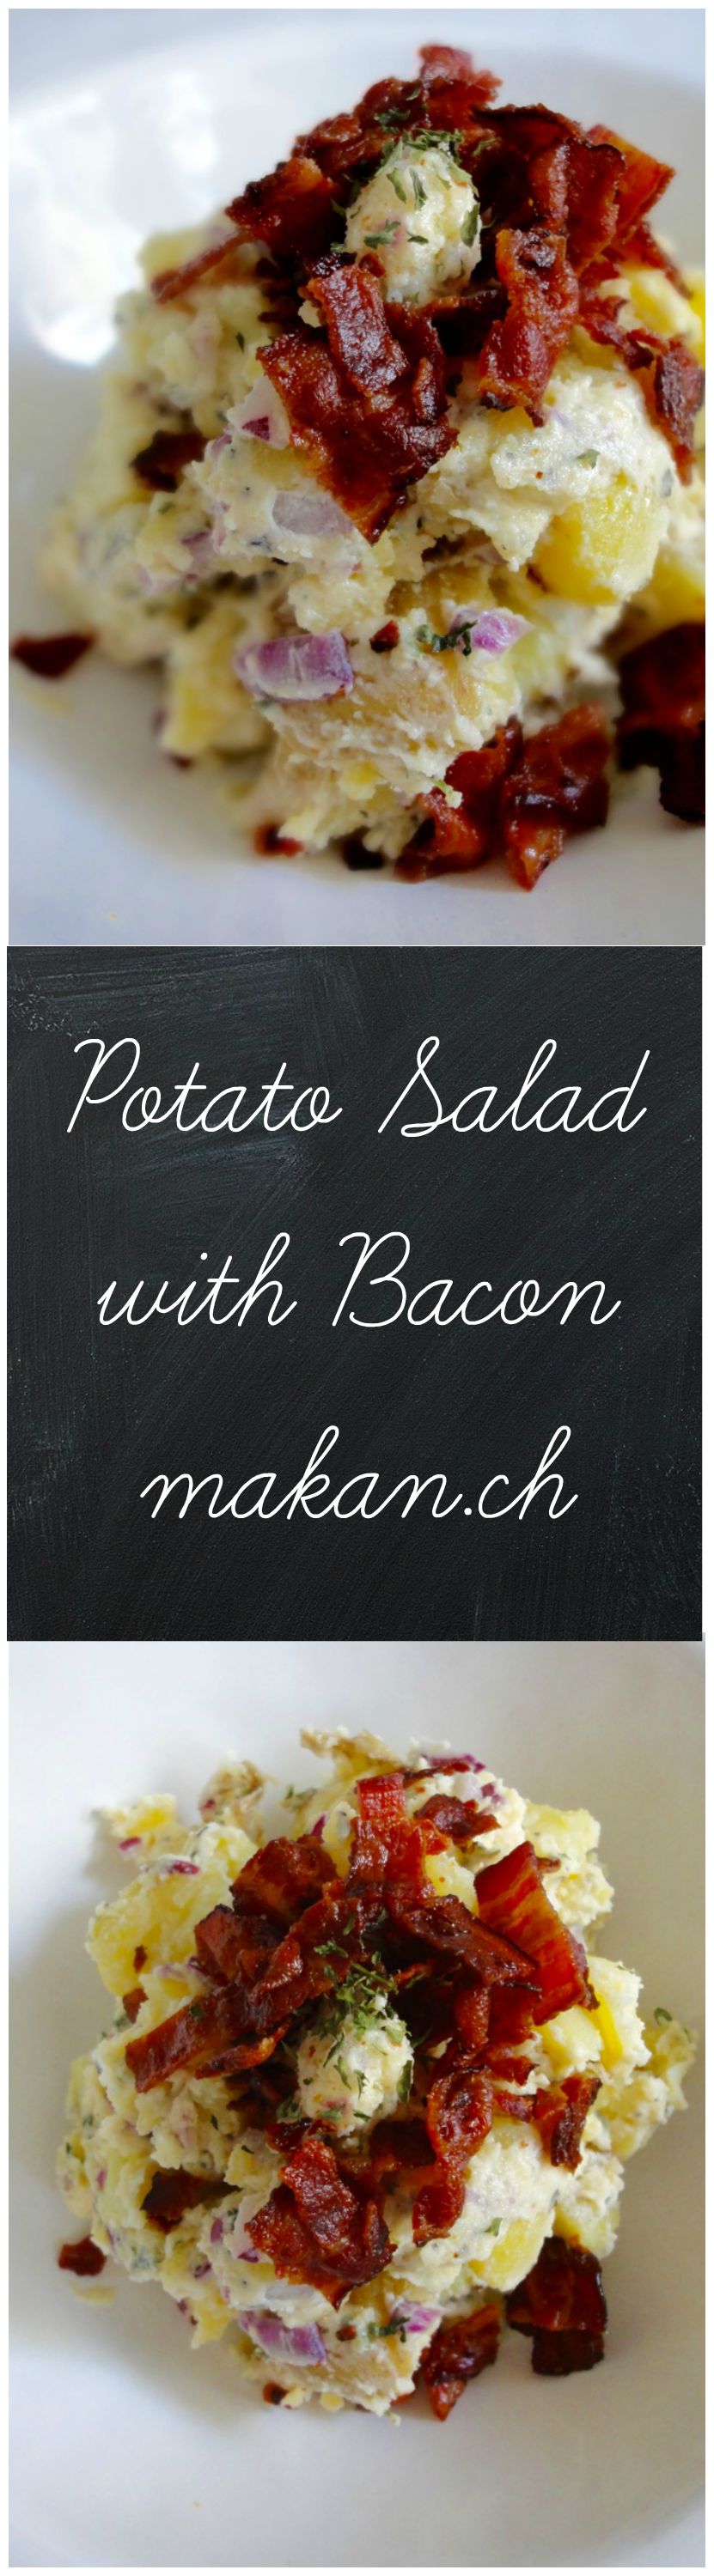
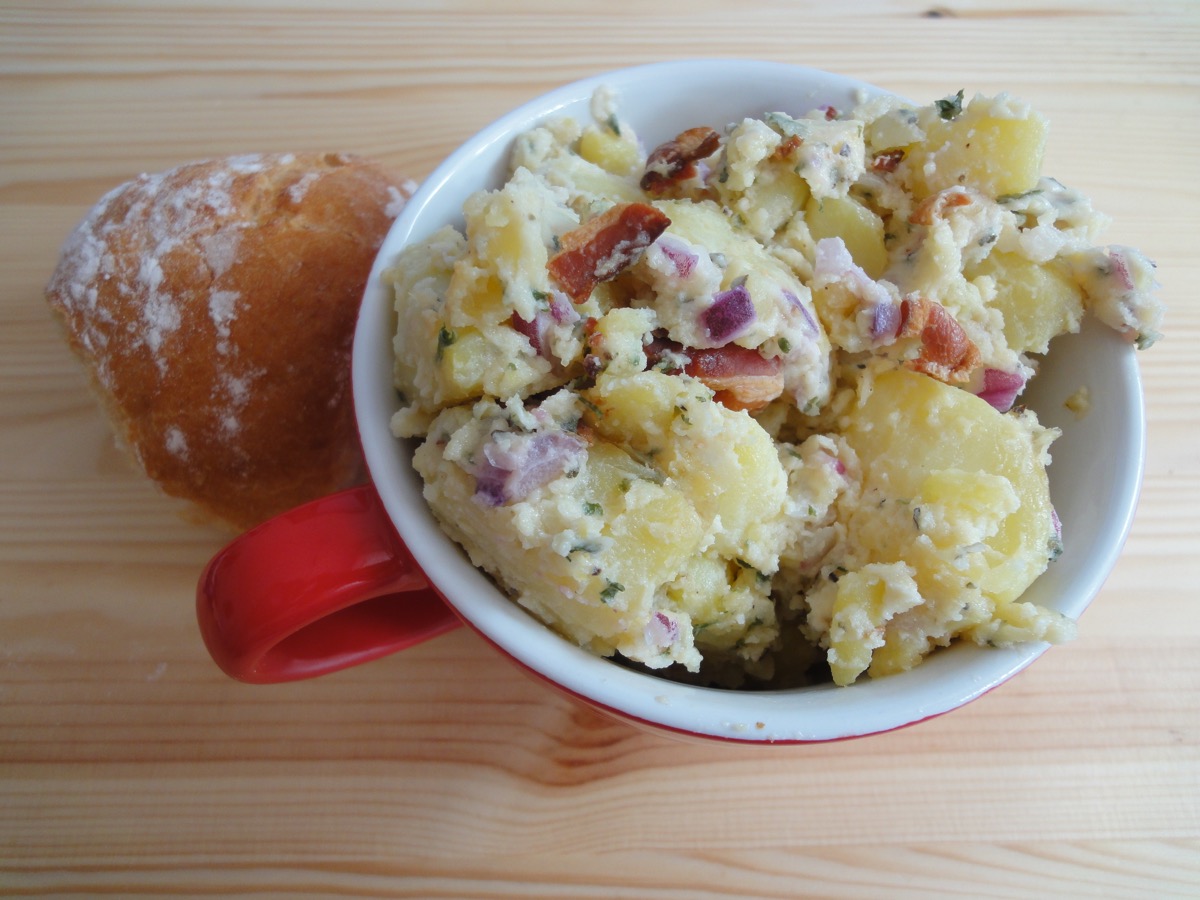
Still good the day after
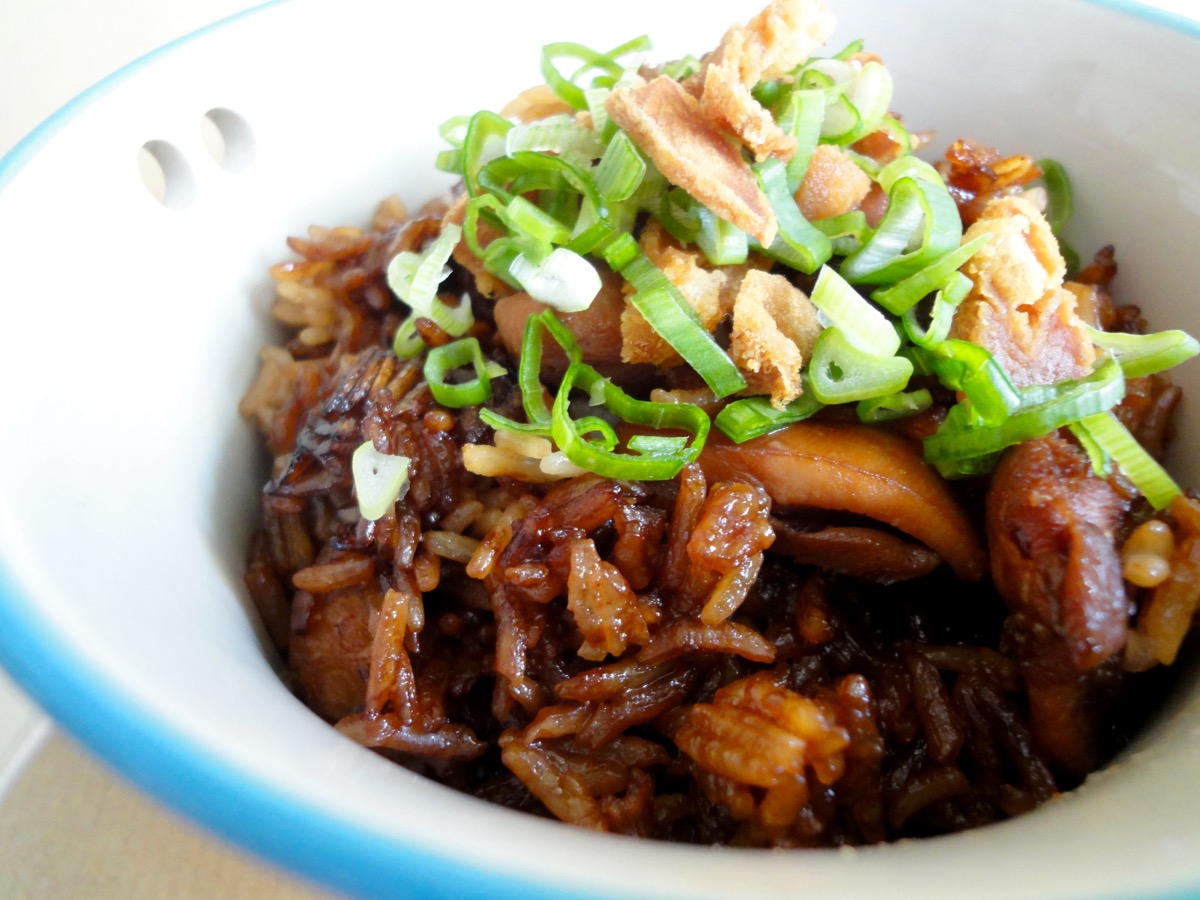
Claypot Chicken Rice, without claypot
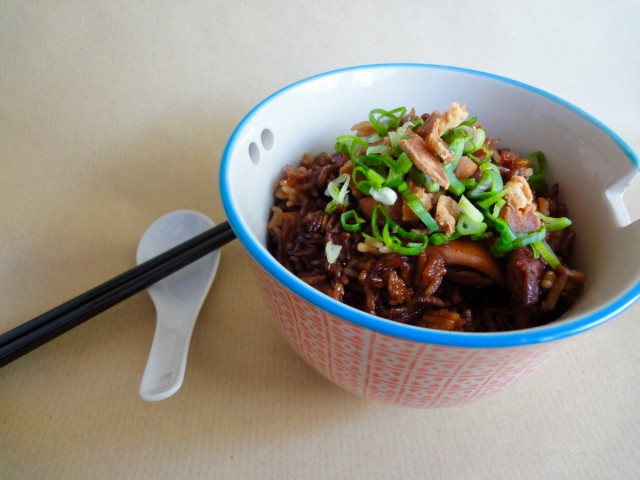
Confusing title? Originally, claypot chicken rice is cooked using a claypot. But since I do not own one and it does not seem useful if I do own one because I do not have a gas stove at home. So in order to make this dish, I use my rice cooker. What’s missing is just the lovely, crunchy rice crust at the bottom but with some tricks, I am able to pull it off. This dish is popular in food courts. Growing up, I remember my sister eating this most of the time while I had fried noodles.
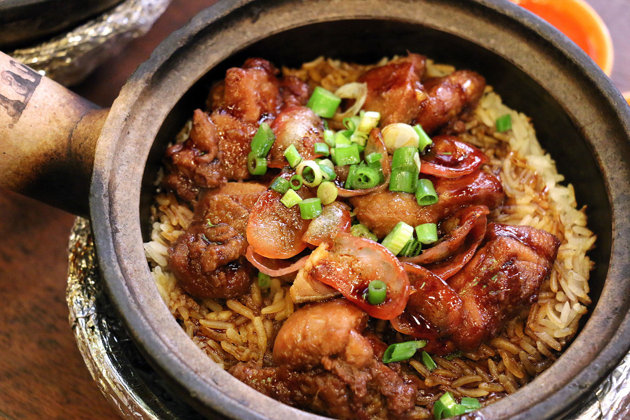
This is how an original claypot chicken rice dish looks like – Photo from makansutra
I have been cooking this at home for a few years now, and the last time I was back in Malaysia, the hubby and I had the real claypot chicken rice at a food court. Sadly, I’ve gotten to accustom to the one I make at home and the food court’s one did not taste nice. Even the hubby said mine was better (probably buttering me up, so I still cook for him). It also could be because I add a massive amount of dark soy sauce and sesame oil that it really makes the dish tastier and the colour is fabulous. The colour part is mostly because of my mother, because she loves her food to be really dark/black (especially when it comes to soy sauce being the main ingredient). For example if she orders KL Hokkien Mee, she wants it reaaaaaalllyyyy black. If not, she looses her appetite. So when it came to me cooking claypot chicken rice, I got put off when it first turned out very pale…so I added more dark soy sauce after it was cooked and it turned out perfect.
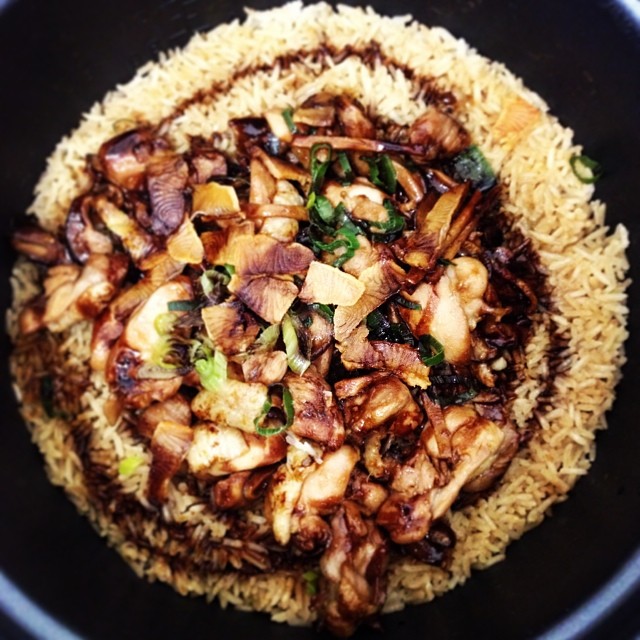
This was the first claypot chicken rice I cooked, see how pale it is!
Another thing that’s missing in my dish is, Lap Cheong or dried Chinese sausage. It always slips my mind to search for it at the Asian shop, though I’m not too sure if they even have it – to the ones I go to. The most important part of the dish to have is the fried salted fish. The taste of the salted fish is just so perfect with the dish. My salted fish comes from my hometown, Sabah and that’s probably the only salted fish I will ever buy. Folks from Sabah take pride in their seafood 😀
Recipe adapted from Rasa Malaysia .
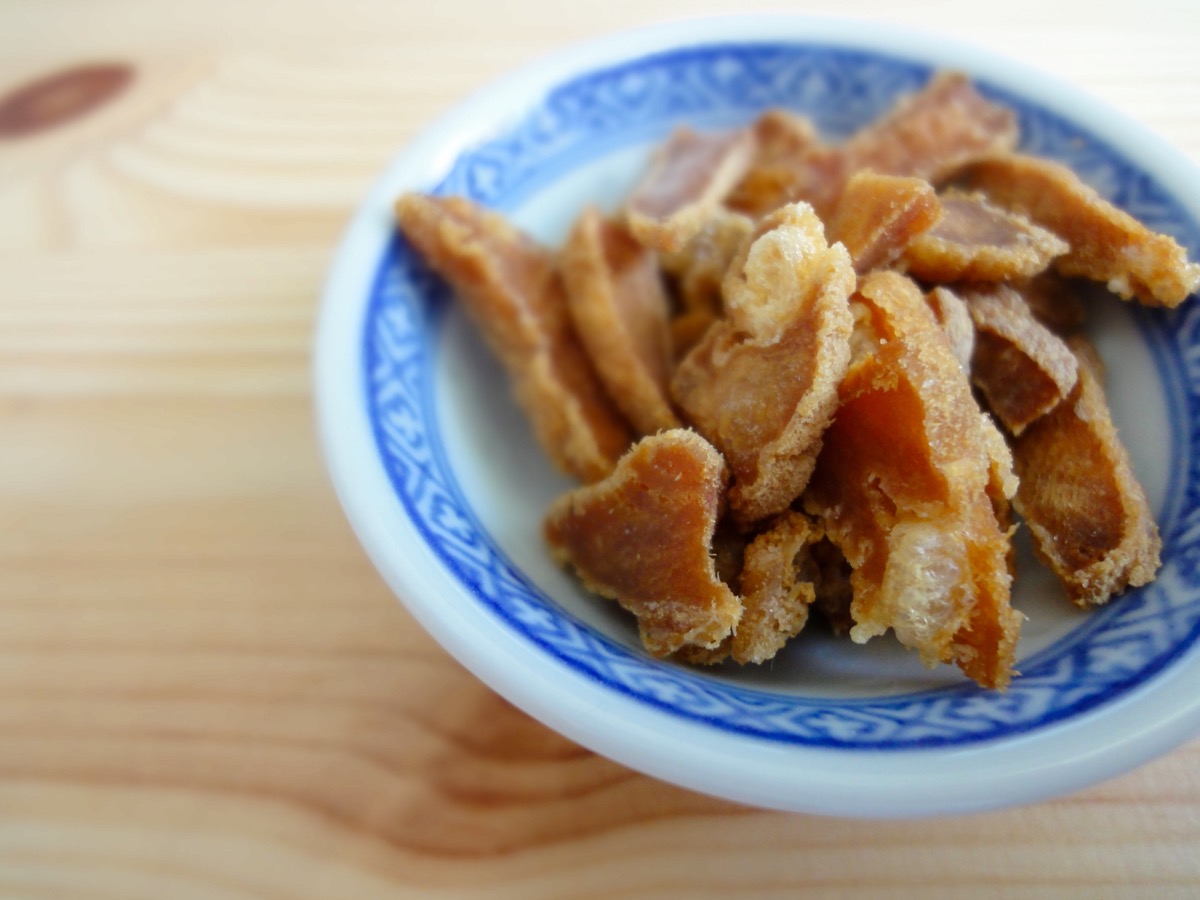
Fried salted fish pieces
Ingredients
- 2 Chicken Thighs, deboned and cut into pieces
- 3 inch piece, julienned Ginger
- 4 big pieces Shiitake Mushrooms (optional)
- 1 pair Lap Cheong / Dried Chinese Sausage, sliced (optional)
- 1 bunch Spring Onions
- 1 - 2 inches Salted Fish, sliced
Chicken Marinade
- 2 tablespoons Oyster Sauce
- 2 tablespoons Shaoxing Cooking Wine
- 1½ tablespoons Light Soy Sauce
- 1½ tablespoons Dark Soy Sauce
- 1 teaspoon Sesame Oil
- 4 dashes White Pepper, powder
- To taste Salt
Rice
- 1½ cups Rice, uncooked
- 1½ cups Water
- 2 tablespoons Light Soy Sauce
- 1½ tablespoon + 1½ tablespoons (for after cooking) Dark Soy Sauce
- 2 teaspoons + 1 teaspoon (for after cooking) Sesame Oil
- To Taste Salt
Directions:
- Salted Fish
- Wash salted fish and pat dry.
- Thinly slice it.
- Heat up a pan to medium heat with some oil.
- Fry salted fish till crispy.
- Chicken
- Clean chicken and marinade for at least 30 minutes before cooking.
- Once marinated, heat up a pan with some oil. Medium high heat.
- Fry ginger till aromatic.
- Add chicken and the marinade.
- Stir fry till 3/4 cooked. You can also fully cook it, but make sure you still have gravy left.
- Add chicken and gravy into half cooked rice.
- Rice (after chicken has been marinated and just before you begin cooking the chicken)
- Wash rice.
- Add rice, water and all ingredients under rice into rice pot.
- Mix well and press cook to start cooking the rice.
- Add cooked chicken and gravy into half cooked rice.
- Allow to cook until the rice cooker button pops to stay warm.
- Add extra dark soy sauce and sesame oil.
- Press cook again (sometimes it takes a while till you can press cook again – cooking it again will enable it to form a nice piece of rice crust, this should take a couple of minutes)
- Let the rice cooker be on stay warm for 15 minutes before serving.
- To serve : top with fried salted fish and spring onions.
- Dig in!!!!!!
Tips:
Enjoy!
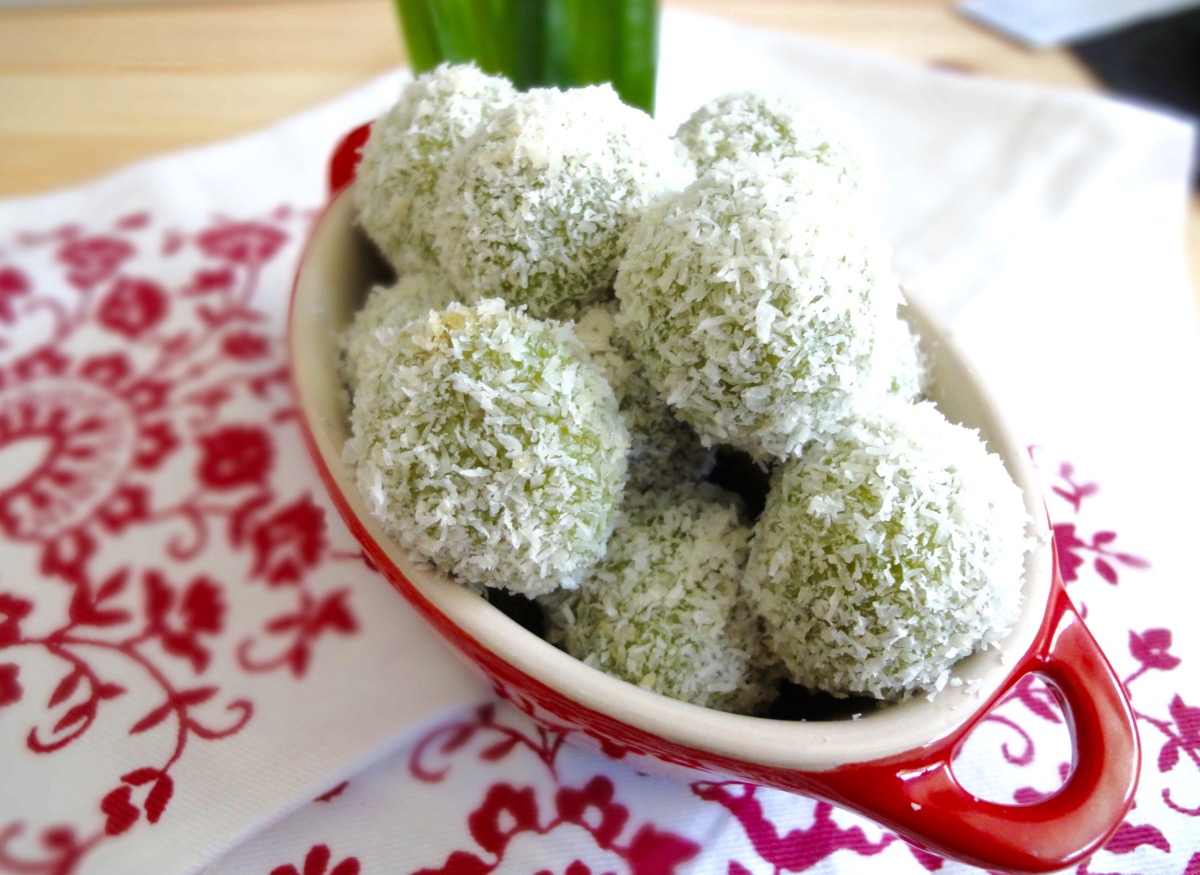
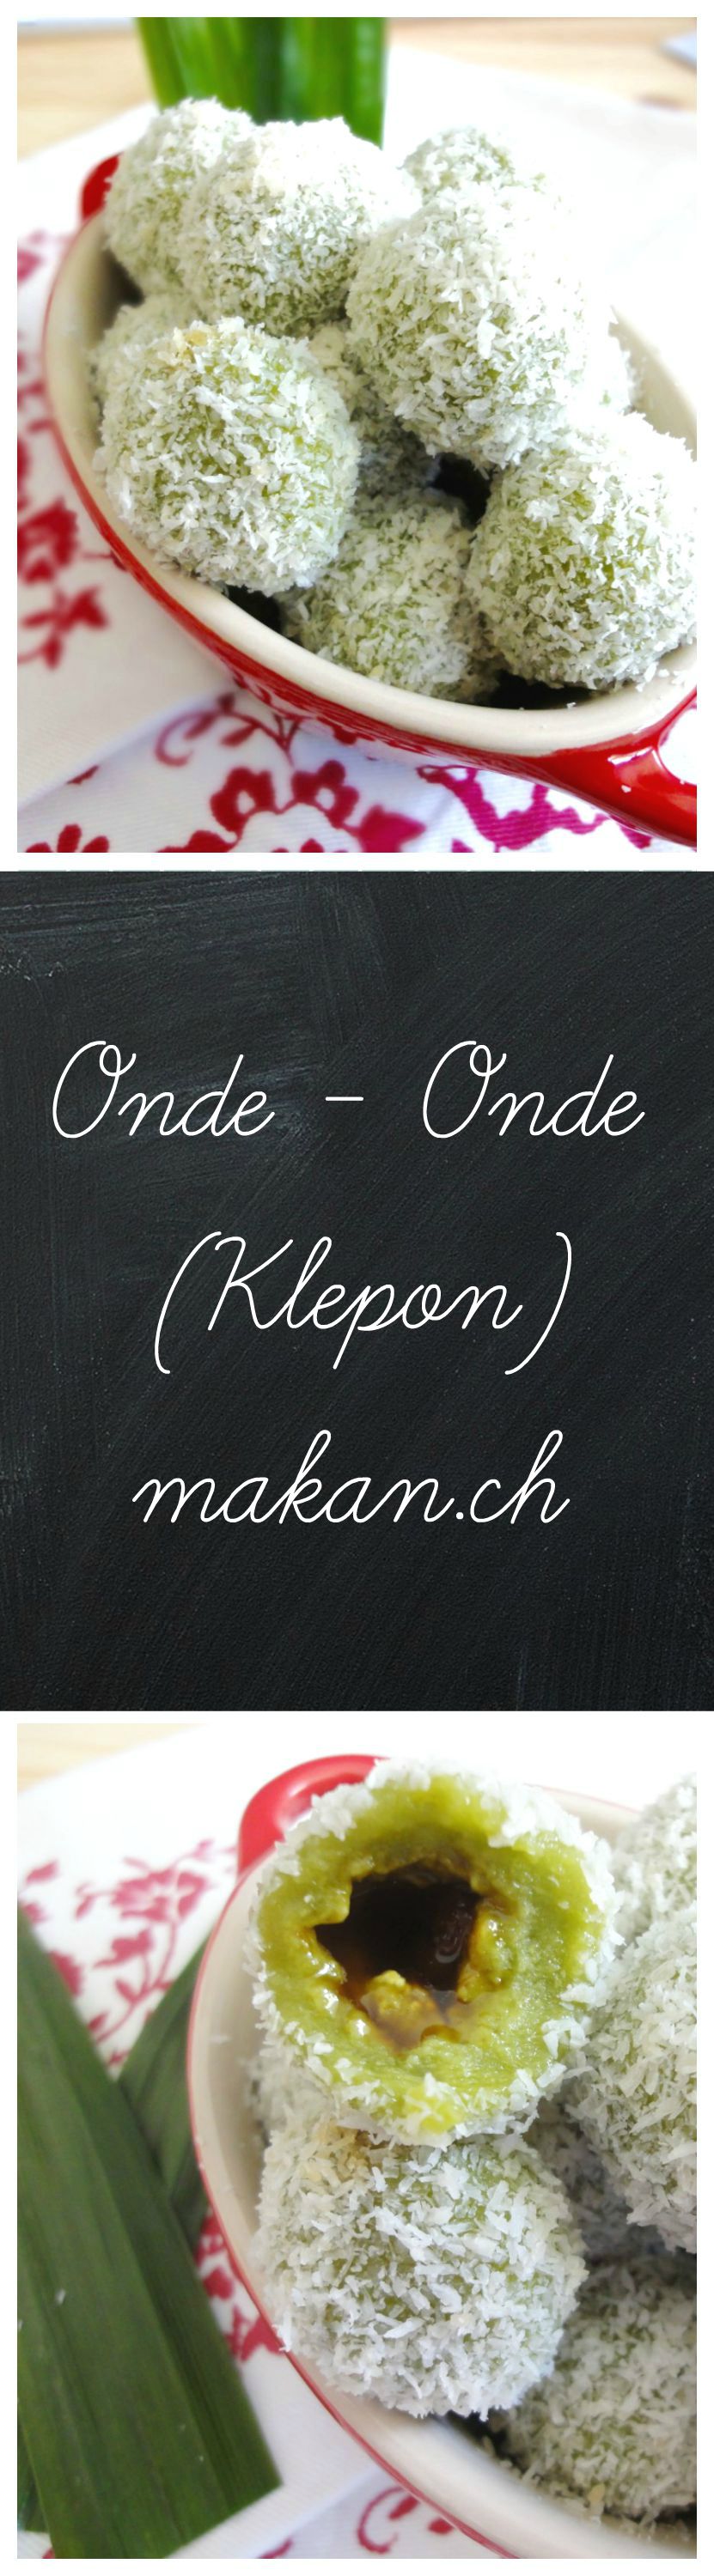
Onde – Onde (Klepon)

Onde-onde, ondeh-ondeh or in Indonesia – klepon is a dessert or tea-time snack made out of glutinous rice flour or sweet potato, filled with gula melaka (coconut palm sugar) and coated with grated coconut. Onde-onde can be found in morning markets, school canteens and sold by Mak Cik’s or Pak Cik’s (aunties or uncles) selling kuih (cakes).
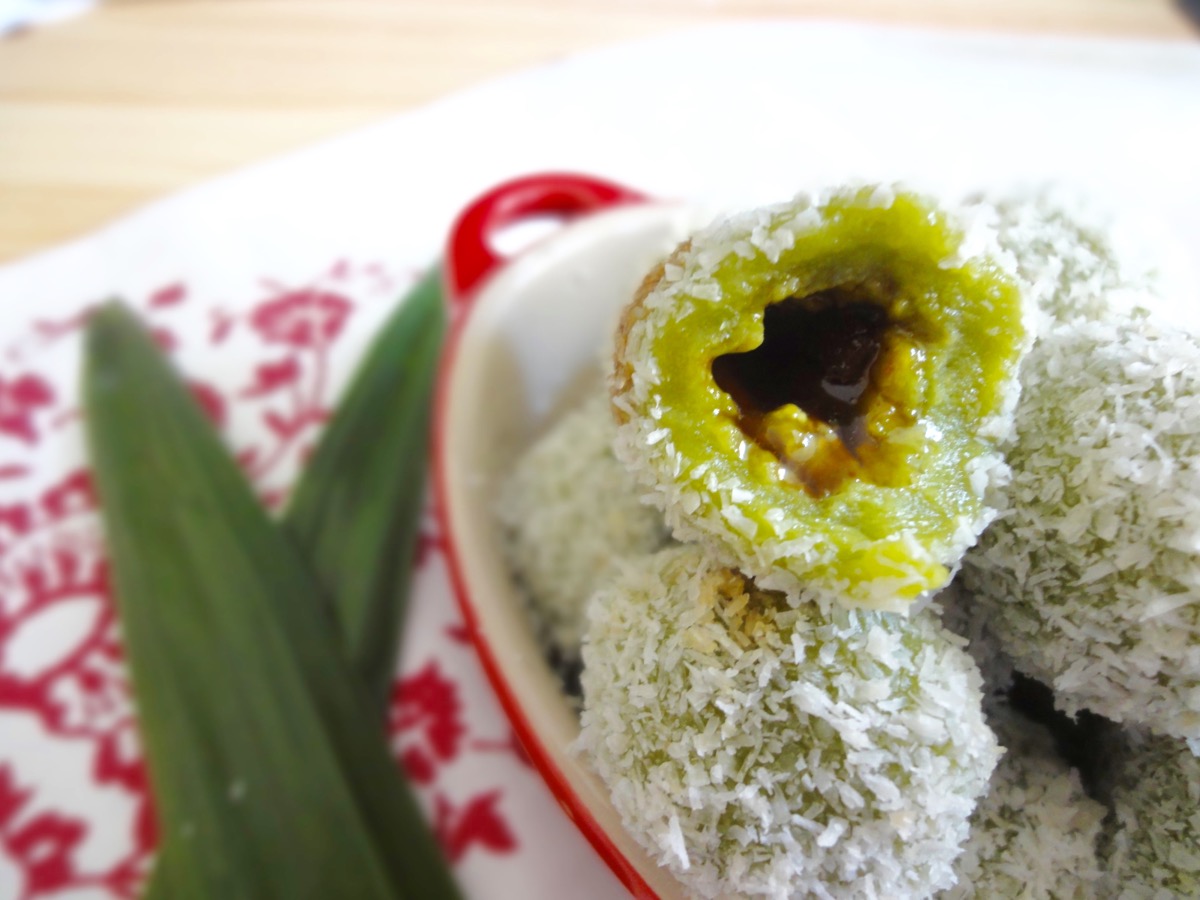
Melted gula melaka inside the onde-onde.
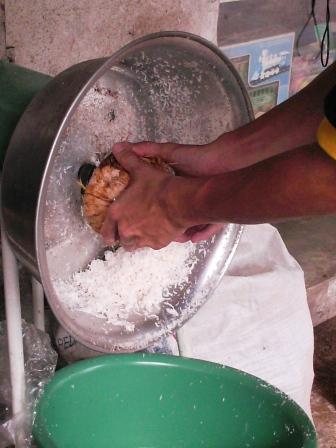
This recipe was requested by my close friend Martin. I can’t remember how the subject came up but he said ‘make onde-onde lah…then put on your website’. So right after I got off the phone with him, I started gathering the ingredients. Lucky for me, I had all of it on hand. The only thing that’s missing is freshly grated coconut. I have yet to find finely grated coconut here, so I used desiccated coconut but steamed it for 30 minutes before using it. This is to rehydrate the desiccated coconut. It does taste and feel different compared to the freshly grated ones, but what to do! Below is a machine used to grate coconut in Malaysia. Here’s a video on how it’s used.
Though I am able to make it at home, I still prefer the ones sold in Malaysian markets. Perhaps I’m a little stingy when it comes to using my gula melaka since I only have limited stock from Malaysia. Of course you do not need to use the ones from Malaysia as most Asian shops sell palm sugar from Thailand or Vietnam.
Recipe adapted from Sea Salt with Food
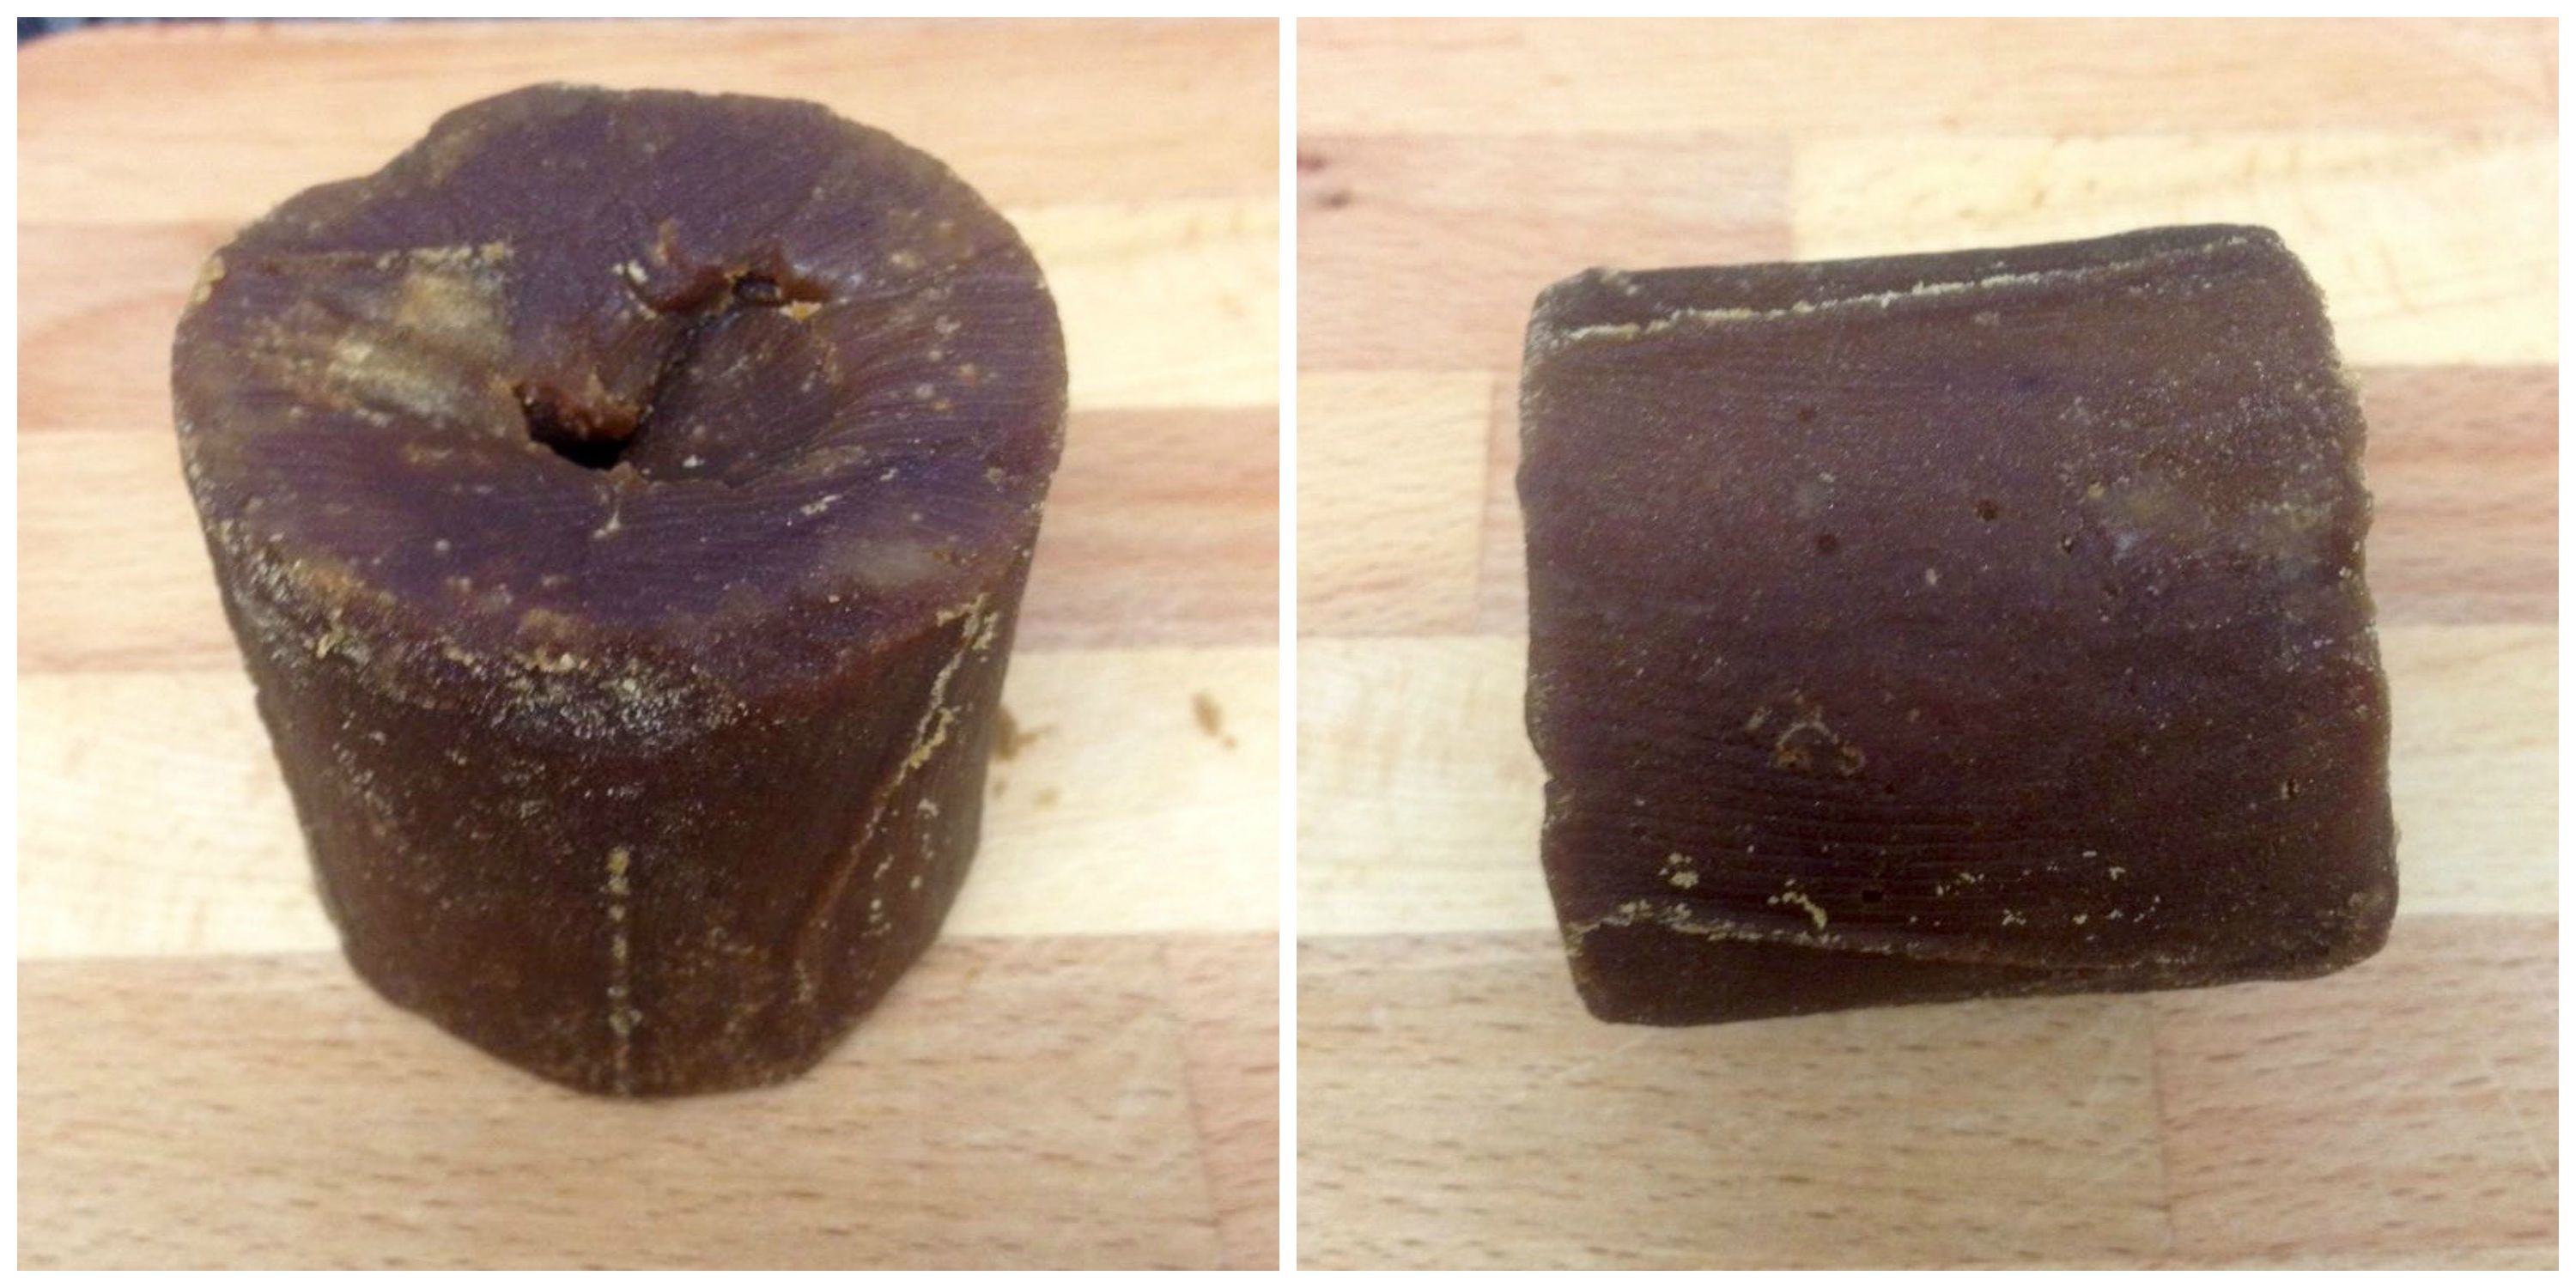
My block of Gula Melaka, about 3 inches high and 2 inches in diameter.
Pandan Extract
- 12 Pandan Leaves
- 1 cup Water
Coconut Topping
- 1 cup Desiccated Coconut / Freshly Grated Coconut
- To taste Salt
Onde - Onde
- 2 cups (204 grams) Glutinous Rice Flour
- 1 cup Pandan Extract
- 1 tablespoon Sugar
- 1 small block Gula Melaka (Coconut Palm Sugar), chopped into small pieces
Directions:
- Pandan Extract
- Wash pandan leaves. Cut pandan into 2 cm strips. (This helps to blend faster)
- Add cut pandan leaves and water into blender or food processor.
- Blend till juices have been extracted. About 3-4 minutes.
- Strain pandan extract with a cheesecloth.
- Coconut Topping*
- Mix desiccated coconut and salt in a heat proof bowl.
- Steam for 30 minutes.
- Onde – Onde
- Mix glutinous rice flour with pandan extract (you may not need all) and sugar until it forms into a dough.
- Roll dough into small balls (about 1 tablespoon each).
- Flatten dough and fill the centre of dough with gula melaka (about 1/4 – 1/2 teaspoon).
- Seal the gula melaka with the dough and gently roll it to form a ball.
- Bring a medium sized pot of water to boil.
- Boil the onde-onde in batches. Do not overcrowd the pot.
- When the onde-onde floats to the surface, use a slotted spoon to remove.
- Coat the onde-onde in steamed grated coconut immediately.
- Allow onde-onde to cool before serving.
Tips:
- You can get palm sugar from any Asian shop.
- If you do not have fresh pandan leaves, you can use pandan extract or flavouring.
- Store onde – onde in a container and enjoy within 2 days.
- Do not refrigerate, it will become very hard.
- 1 cup glutinous rice flour = 104 grams
- Cups to Grams conversions
* If using freshly grated coconut, you can skip this step.
Enjoy!
Cream Puffs (Profiteroles)
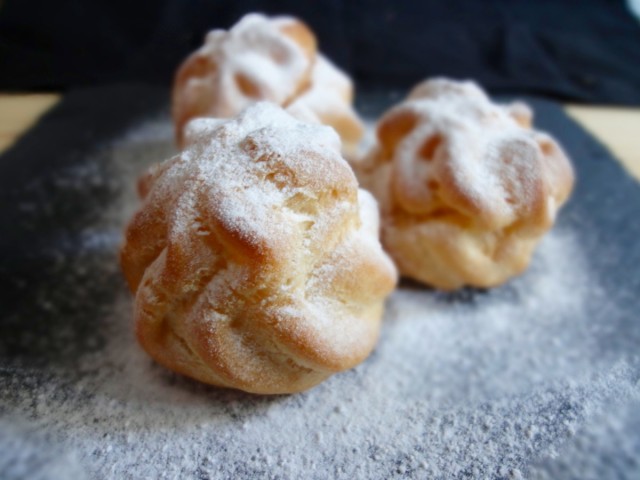

Cream puffs are also known as profiteroles. The pastry shell or bun is known as choux pastry or pâte à choux (pata shoe). These little pastries drove me crazy back in May. I was obsessed trying to get the perfect choux pastry. One day I even made five different choux pastries from three different recipes using various methods and baking temperatures. It all tasted good, but I could not achieve a puffy pastry that didn’t taste bland, held it’s shape and didn’t go all soft the next day.
All in all, I’ve tried at least 10 times before I found the perfect combination. It might not work for all, but it has certainly worked for me…though not all the time. The eggs in this recipe are very very important. Not all eggs weigh the same, unless you use boxed eggs (as I call it). I’ve not tried using boxed eggs because it’s not available in grocery stores here. The only time I used it was when I worked in a restaurant. I normally use two medium sized eggs that weigh approximately 53g. But what I do is, I whisk the two eggs into a measuring cup and use as I need. Most of the time I use the whole mixture, but when the eggs are slightly bigger then I do not use all of it. The paste can’t have too much liquid, otherwise the shape would not hold. That, for me is the best way to go about with this.
The temperature is also very very important, as you want nice and puffy choux pastries and not ones that are flat, undercooked or overcooked. I learnt from Baker Bettie’s classic cream puff recipe where she preheated the oven to 220°C (425°F) but increased it to 230°C (450°F) when she put the pastries in the oven and baked it for 10 minutes then reduced the heat to 170°C (350°F) for 15 minutes. This worked perfectly for me and the results were perfect. The only thing I did a little different was, after the pastries were baked, I poked a hole at the bottom of it to release the steam in it. Then I returned it to the oven 100°C (210°F) for another 15 minutes to ‘dry’ it out. This step is totally optional as I just wanted my pastries a little drier.
Getting the recipe together was another thing. In some recipes, like this one…I use both imperial and metric system.
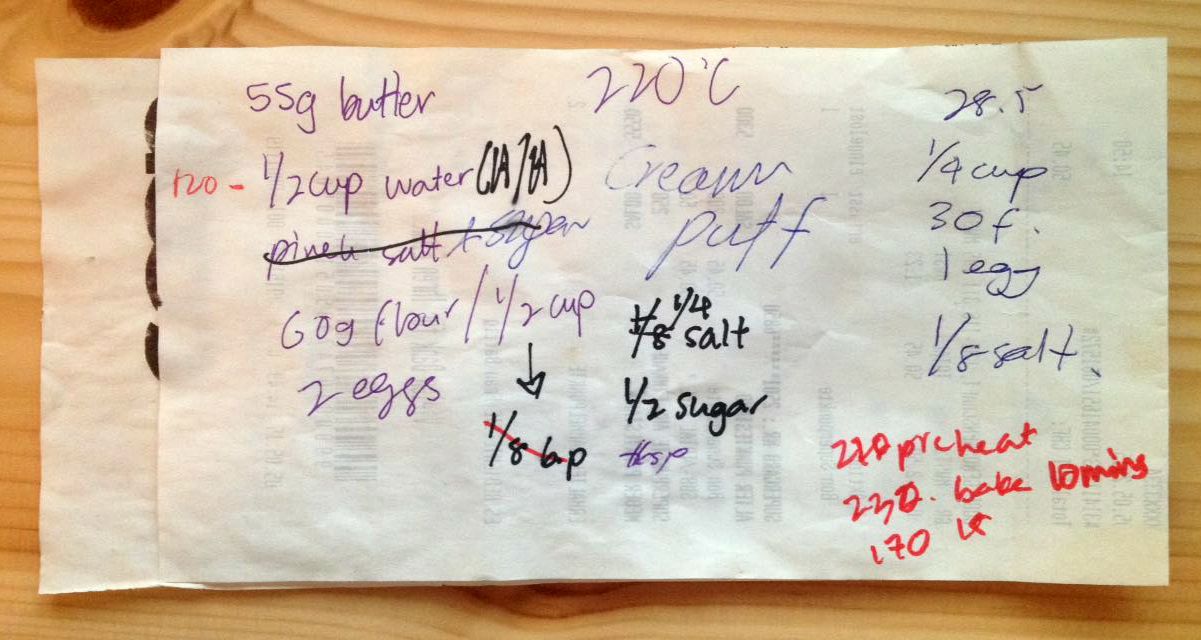
My horrible writing on a grocery receipt. This was my recipe that I have been using for 3 months.
Most recipes either call for water or milk. I find that using water keeps the pastry hard while milk makes it soft after a few hours, but water makes the pastry taste super bland while milk give it a very nice taste. So, I use both! Half milk, half water. The milk I use is pasteurised full fat (3.5 %) milk. Sometimes I do use pasteurised skimmed milk (2.5 %) and got the same results.
The pastry cream or crème pâtissière is adapted from Martha Steward. Sometimes when I’m lazy I just use Bird’s custard and add some vanilla beans to it.
Choux Pastry
- ½ cup (55g) Butter
- ¼ cup (60ml) Water
- ¼ cup (60ml) Milk
- ½ cup (60g) All Purpose Flour
- 1 teaspoon Sugar
- ¼ teaspoon Salt
- 2 nos Eggs
Crème Pâtissière
- 1 cup Milk
- 3 nos Egg Yolks
- 3 tablespoons Sugar
- 3 tablespoons All Purpose Flour
- 1 pod Vanilla Pod
Directions:
- Choux Pastry
- Pre-heat oven to 220°C (425°F). Prepare a baking try and line with parchment paper.
- In a medium sized pot, add butter, milk, water, sugar and salt and boil over medium high until butter has melted.
- Reduce heat to medium and quickly stir in the flour. Keep on stirring and cook off the moisture in the dough until it starts to pull away from sides and forms into a ball. Should take around a minute or two.
- Take the dough off heat and let it cool down for 5 minutes.
- Whisk eggs.
- Once dough has cooled off, slowly pour in the eggs into the pot and stir continuously. The batter should look smooth, glossy and thick. (You can also use a hand mixer to stir in the eggs, it does take a little longer and requires more energy if you mix it by hand.)
- Place batter into a piping bag with star tip or round nozzle and pipe onto prepared baking tray. Around 1.5-inch diameter. Starting in the middle, going once around, then up 3/4 around.
- Wet finger to flatten the tip of the pipped batter. This is to prevent the tip from burning.
- Place the tray into oven (middle rack) and increase the heat to 230°C (450°F) and bake for 10 minutes.
- After 10 minutes, reduce the heat to 170°C (350°F) and bake for another 15 minutes.
- Take the pastries out and let it cool for a minute or two. Then using a small pairing knife, make a hole at the bottom of the pastry.
- In the meantime, reduce the heat to 100°C (210°F).
- Put the pastries back into the oven on the wire rack. Bake for another 15 minutes to dry it out.
- Take out dried pastries and let it cool on a wire rack.
- Pipe cooled pastries with crème pâtissière or chantilly cream.
- Dust with icing sugar or coat with melted chocolate.
- Crème Pâtissière
- Split vanilla pod into half and scrape out the seeds.
- In a saucepan, bring the milk to a boil over medium heat.
- In a small bowl, whisk egg yolks, vanilla seeds and sugar.
- Add flour and mix until smooth and free of lumps.
- Take 1/4 cup of the warm milk and pour slowly while mixing into the egg mixture.
- When the remaining milk begins to boil, add it slowly into the egg mixture. Mix well.
- Pour egg and milk mixture back into the saucepan and cook over high heat and whisk continuously until pastry cream thickens and boils, about 1 minute.
- Reduce heat to medium and cook while whisking continuously until cream becomes shiny and easier to stir, about 4 minutes.
- Once done, remove from heat and pour into a bowl. Wrap with plastic wrap and leave to cool.
- Once cooled, refrigerate until it has set (3 hours or overnight).
Tips:
- You can make the crème pâtissière a night before intended use.
- Do not use aluminium foil in place of parchment paper. This will cause the choux pastry to burn at the bottom.
- For humid countries, the choux pastry maybe a little “runnier” resulting in difficulty of holding shape while being pipped. What might help is if you chill the choux pastry for 10 minutes before piping.
- It’s best to fill the pastries before being served, otherwise the pastry will get soggy. I once filled it 5 hours prior to serving and it was not too soggy.
- Store pastry in an uncovered or loosely covered container.
- Read the text above for more tips
- Cups to Grams conversions
All the best and enjoy baking!


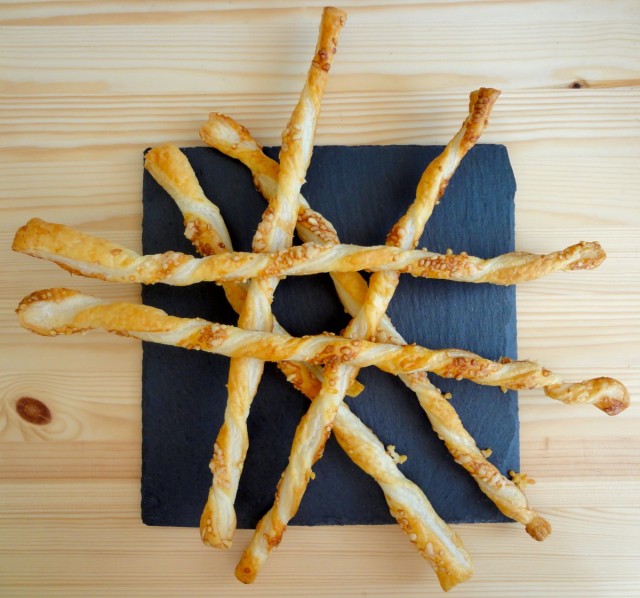
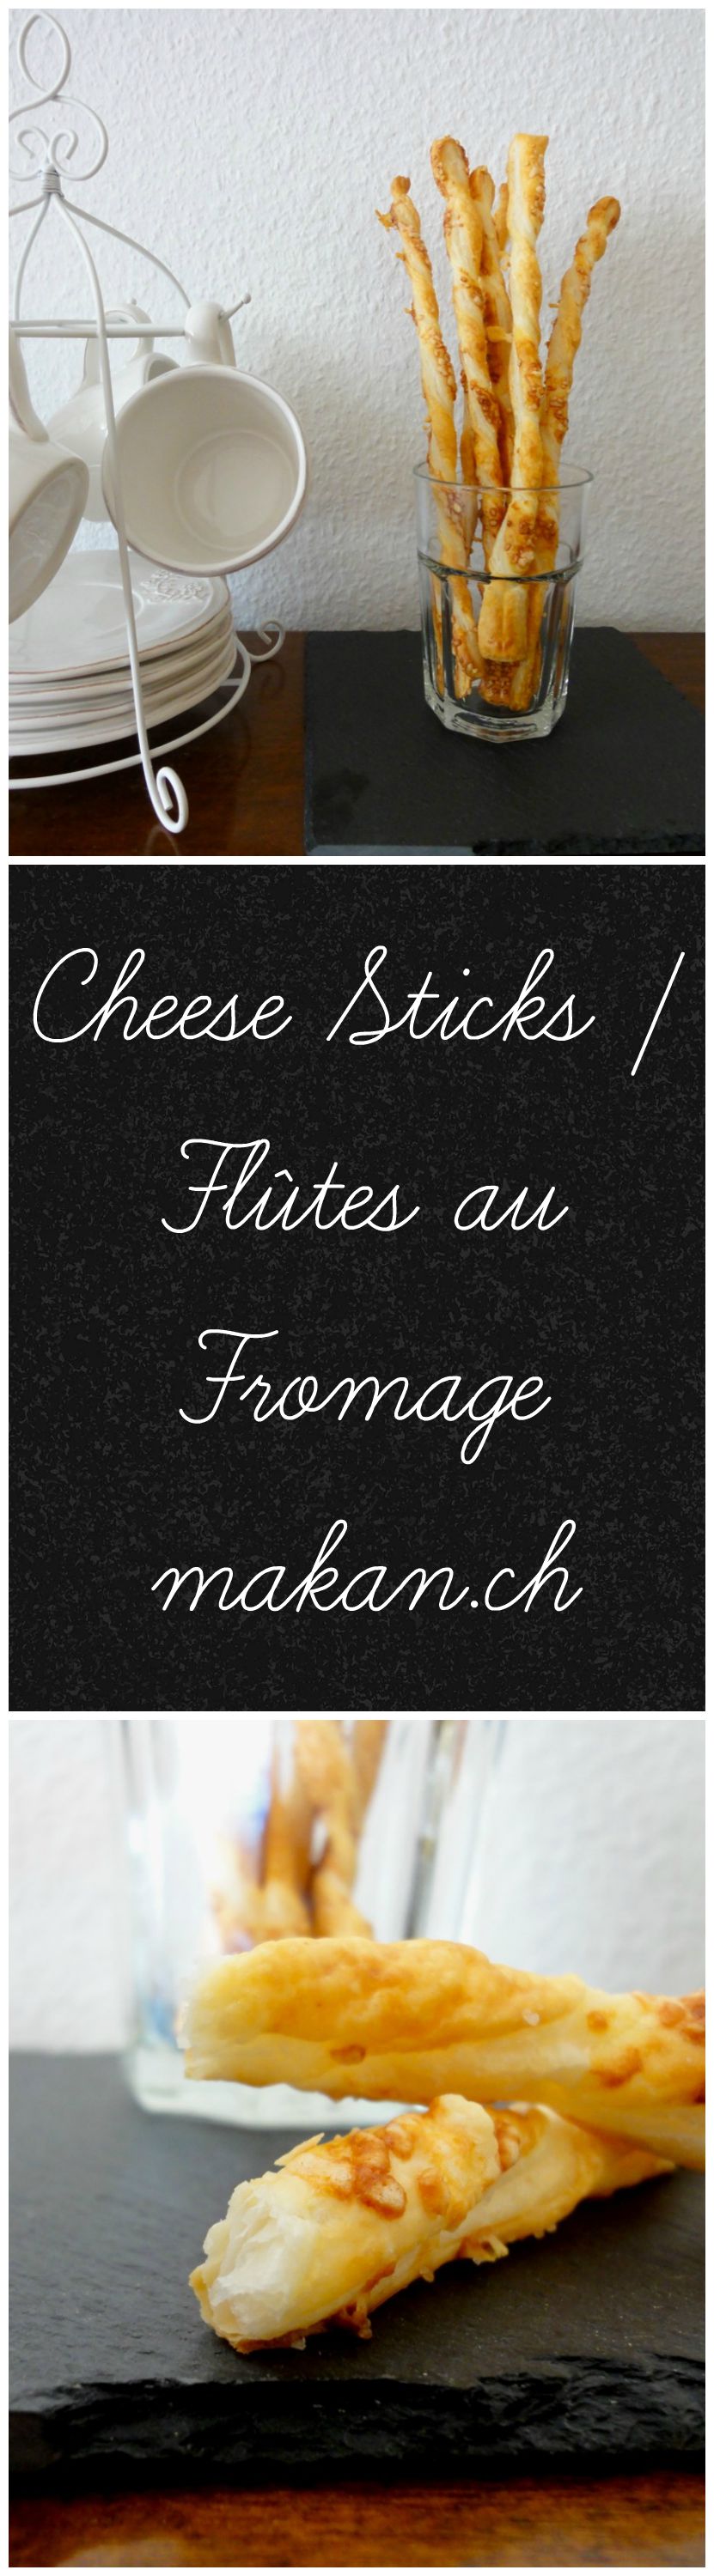
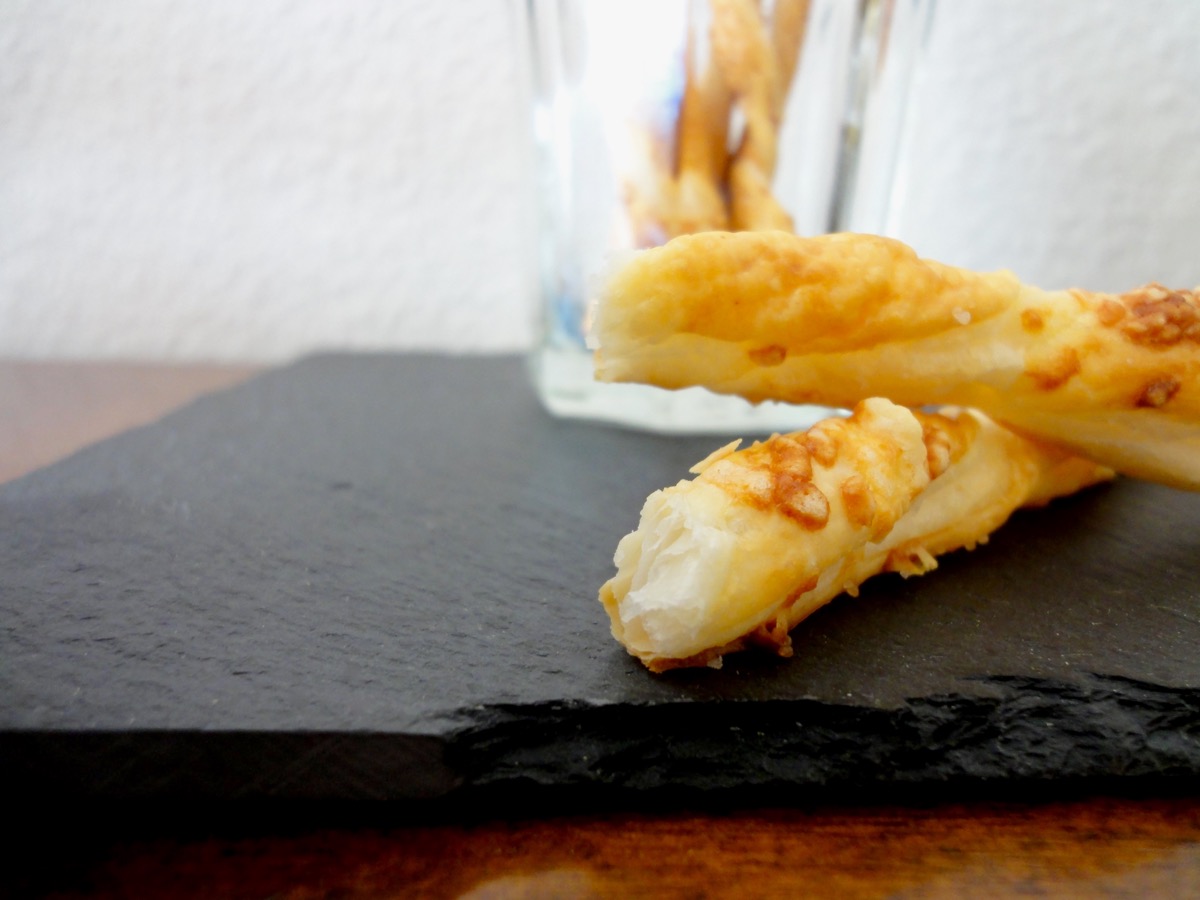
Cheese Sticks / Flûtes au Fromage
Back in 2007, I “learnt” some basic French in college. It was a compulsory subject and one of the best classes because the language teacher just went on and on with his French while the whole class just played. By the end of that class, 3/4 of us could not even count 1-10. Our pronunciation was so bad, I wonder how the kind Sir kept a straight face. We mainly had to learn French because we had to get accustom with culinary terms. That wasn’t too much of a problem, the rest were. To this day, I only know three phrases/questions : je m’appelle Cherry, comment allez-vous? (I had to look up the spelling), and voulez-vous coucher avec moi? which, sadly I learnt from Christina Aguilera in Lady Marmalade. The hubby says, please never speak French. 😀
What does French have to do with cheese sticks? Well, in the title there’s also the French word for it and I use it because that’s what it says on the package of this snack from the grocery store. The one’s from the store have a heavier and denser feel compared to this recipe. It is also so quick and easy to prepare and makes a great Hors d’oeuvre. You can also use various toppings such as poppy seeds, sesame seeds, cumin seeds, bacon, ham, grated parmesan, grated cheddar, grated gruyère, or fleur de sel.
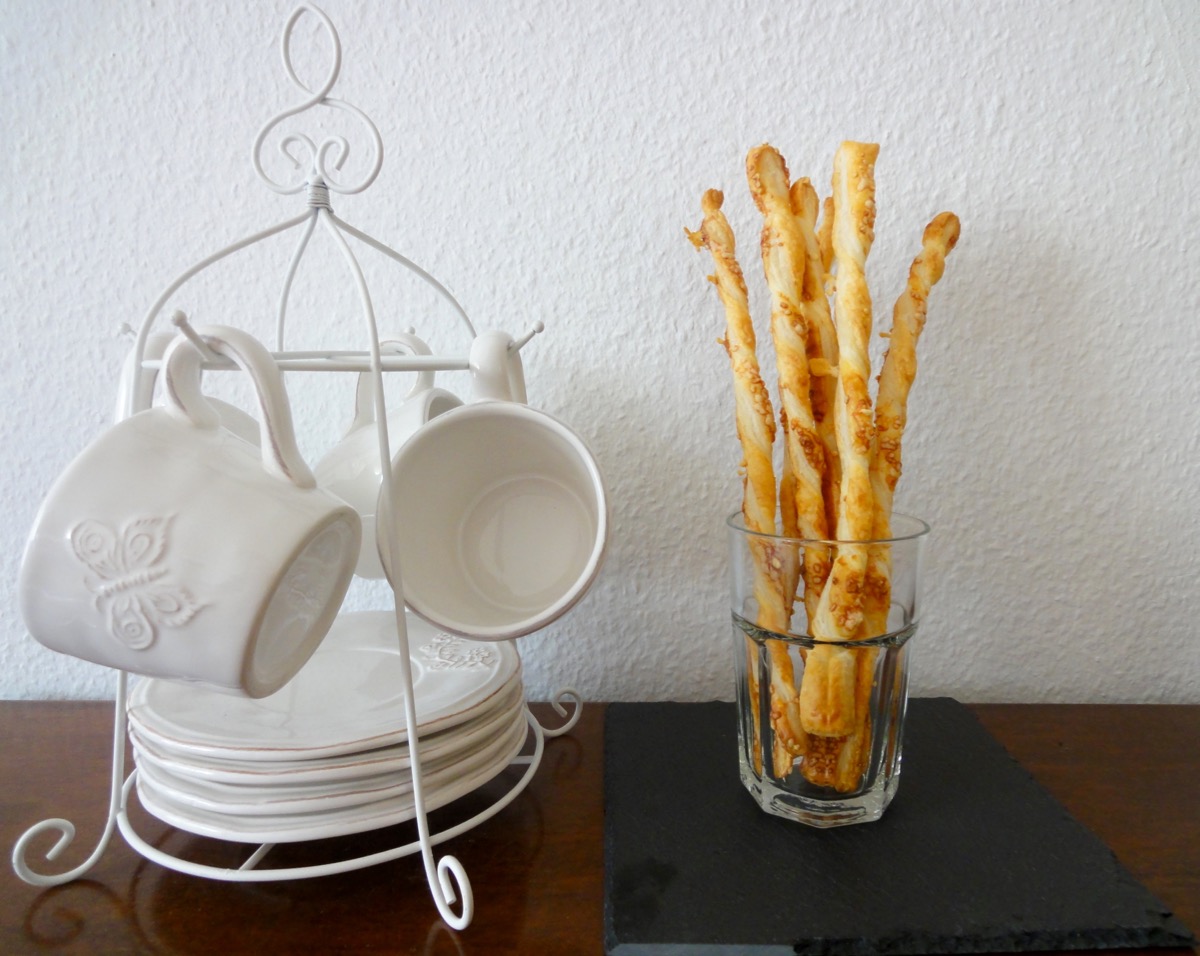
Owh look! I found a new possible spot to take photo’s plus the tea set’s actually handmade in France!
Ingredients
- 1 rectangle/square package (320g) Puff Pastry
Topping
- 1 nos Egg
- 1 tablespoon Water
- To spinkle Salt
- ¼ cup Grated Parmesan Cheese
Directions:
- Take out puff pastry 10 minutes before intended use.
- Pre-heat oven to 220°C (430°F). Prepare baking tray and line with parchment paper.
- Unroll puff pastry and using a pizza cutter (you can use a knife of course) and cut into strips, around 2cm width. With my puff pastry, I managed to get 20 strips.
- Place strips onto baking tray about 1-2cm apart.
- Whisk egg and water for egg wash. Brush strips with egg wash.
- Sprinkle with salt and grated cheese.
- Gently twist the strips. (optional)
- Bake for 8-10 minutes or till golden brown.
- Leave to cool on a wire wrack before enjoying.
Tips:
Bon appetite!
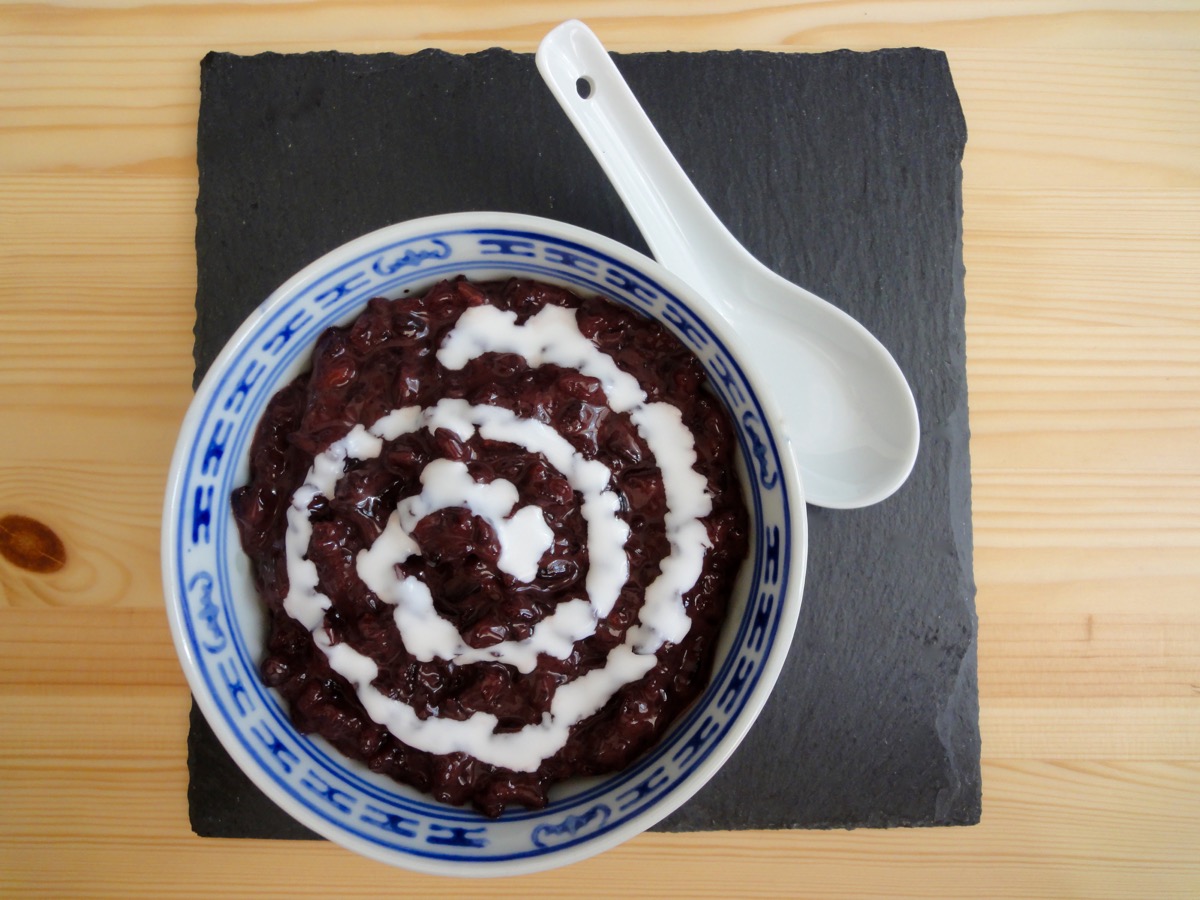
Bubur Pulut Hitam / Black Glutinous Rice Porridge
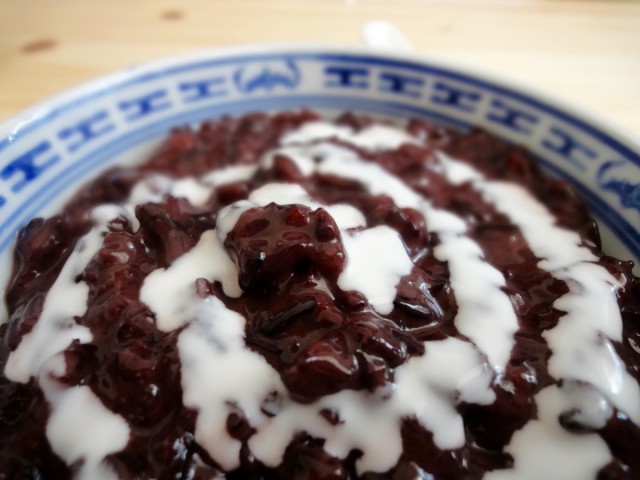
My siblings and I grew up eating this dessert cooked by our mother. It’s one of my favourite local desserts. I can’t find much information on where this dessert originates from, but it’s eaten in many South East Asian countries. There are many variations of this dessert, depending on which country you have it in. But in Malaysia, it’s prepared with just a simple mixture of pulut hitam (black glutinous rice), coconut milk, pandan leaves (screwpine) and gula melaka (coconut palm sugar).
For the longest time, I have been looking for black glutinous rice in Switzerland. Little did I know, it’s more known as black sticky rice here…because it comes from Thailand and there, they call it black sticky rice. Silly of me to not ask or search thoroughly.
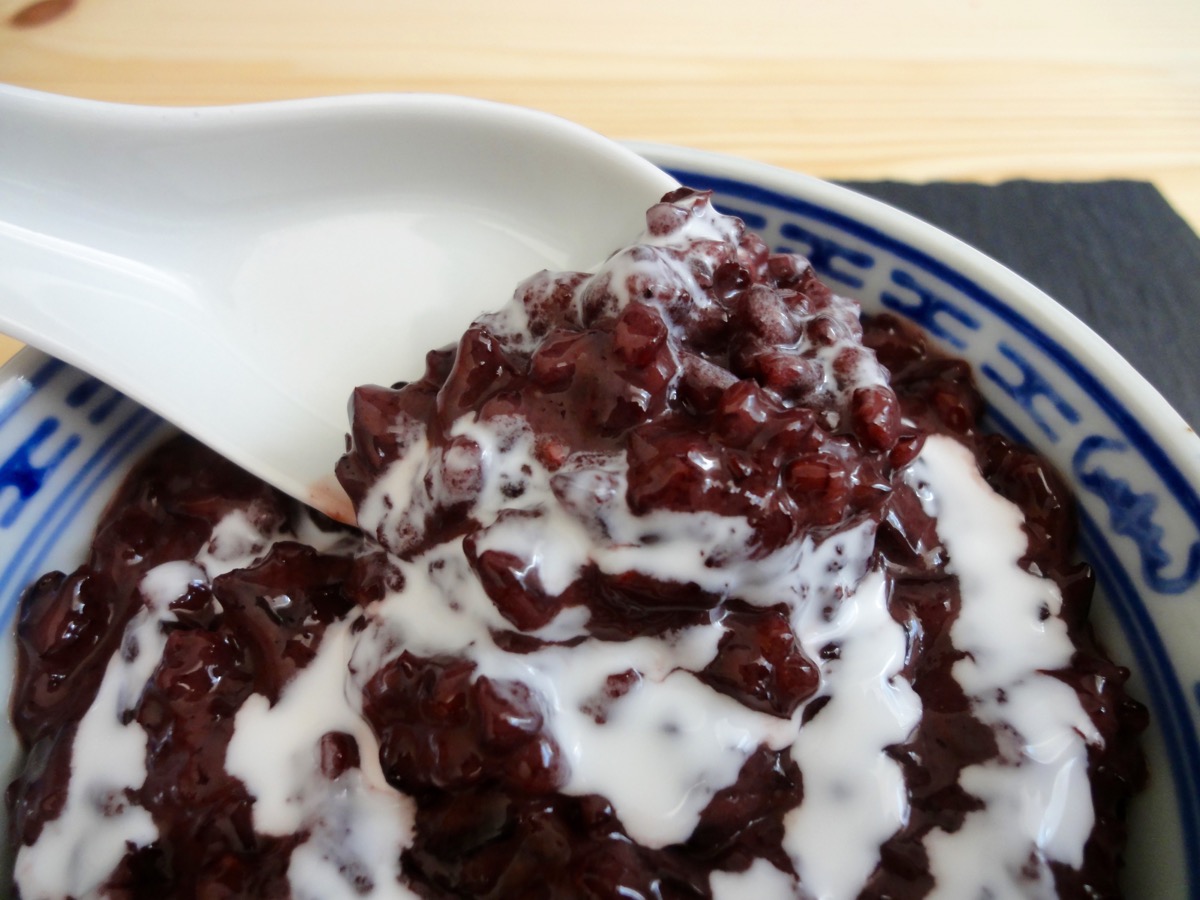
So what is this black glutinous rice? It is an unpolished sticky rice, meaning the bran has not been removed, is purplish black in colour and has a chewy texture. It has a nutty flavour and naturally sweet. This black glutinous rice also contains a lot of fiber and antioxidants. It takes some time to cook compared to regular rice, so some soaking in advance is advised. Otherwise just cook it longer.
Ingredients
- 1 cup (182 grams) Black Glutinous Rice
- 5 cups Water
- 1 small block Gula Melaka (Palm Sugar) *
- 4 Pandan Leaves, tied into knots
- ¾ cup Coconut Milk
- ¼ teaspoon Salt
Directions:
- Spread the rice on a bright surface. Check for any impurities such as small pebbles, wood, and so on. This step is optional if you are confident the rice you have is clean.
- Wash rice thoroughly – till the water runs clear. Water will have a slightly purple tint.
- Add water, rice, pandan leaves, salt and sugar into a pot and bring it to boil for 60 minutes or till the rice splits on medium high heat. Stir occasionally to prevent rice from sticking to the pot. You can add more water if the porridge is dry and the rice has not split yet.
- Once the porridge is done, add coconut milk. You can add more if you want the porridge creamier.
- Serve with some coconut milk. It can be eaten warm or cold.
Tips:
- It’s always tastes better the next day.
- Keep refrigerated
- 1 Cup glutinous rice = 182 grams
- Cups to Grams conversions
* if you can’t find coconut palm sugar, you can substitute with regular sugar. Add according to preferred sweetness.
Enjoy!
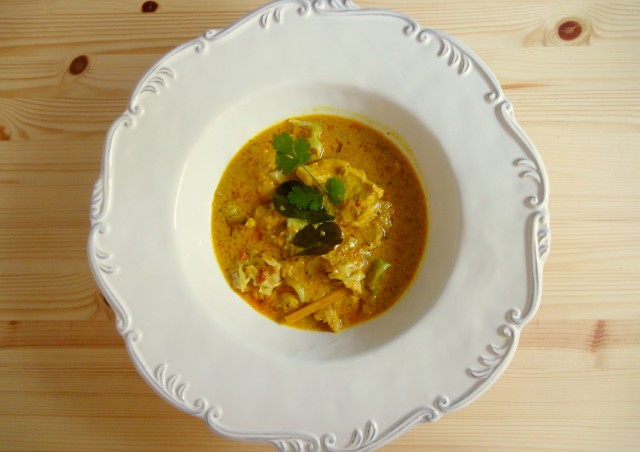
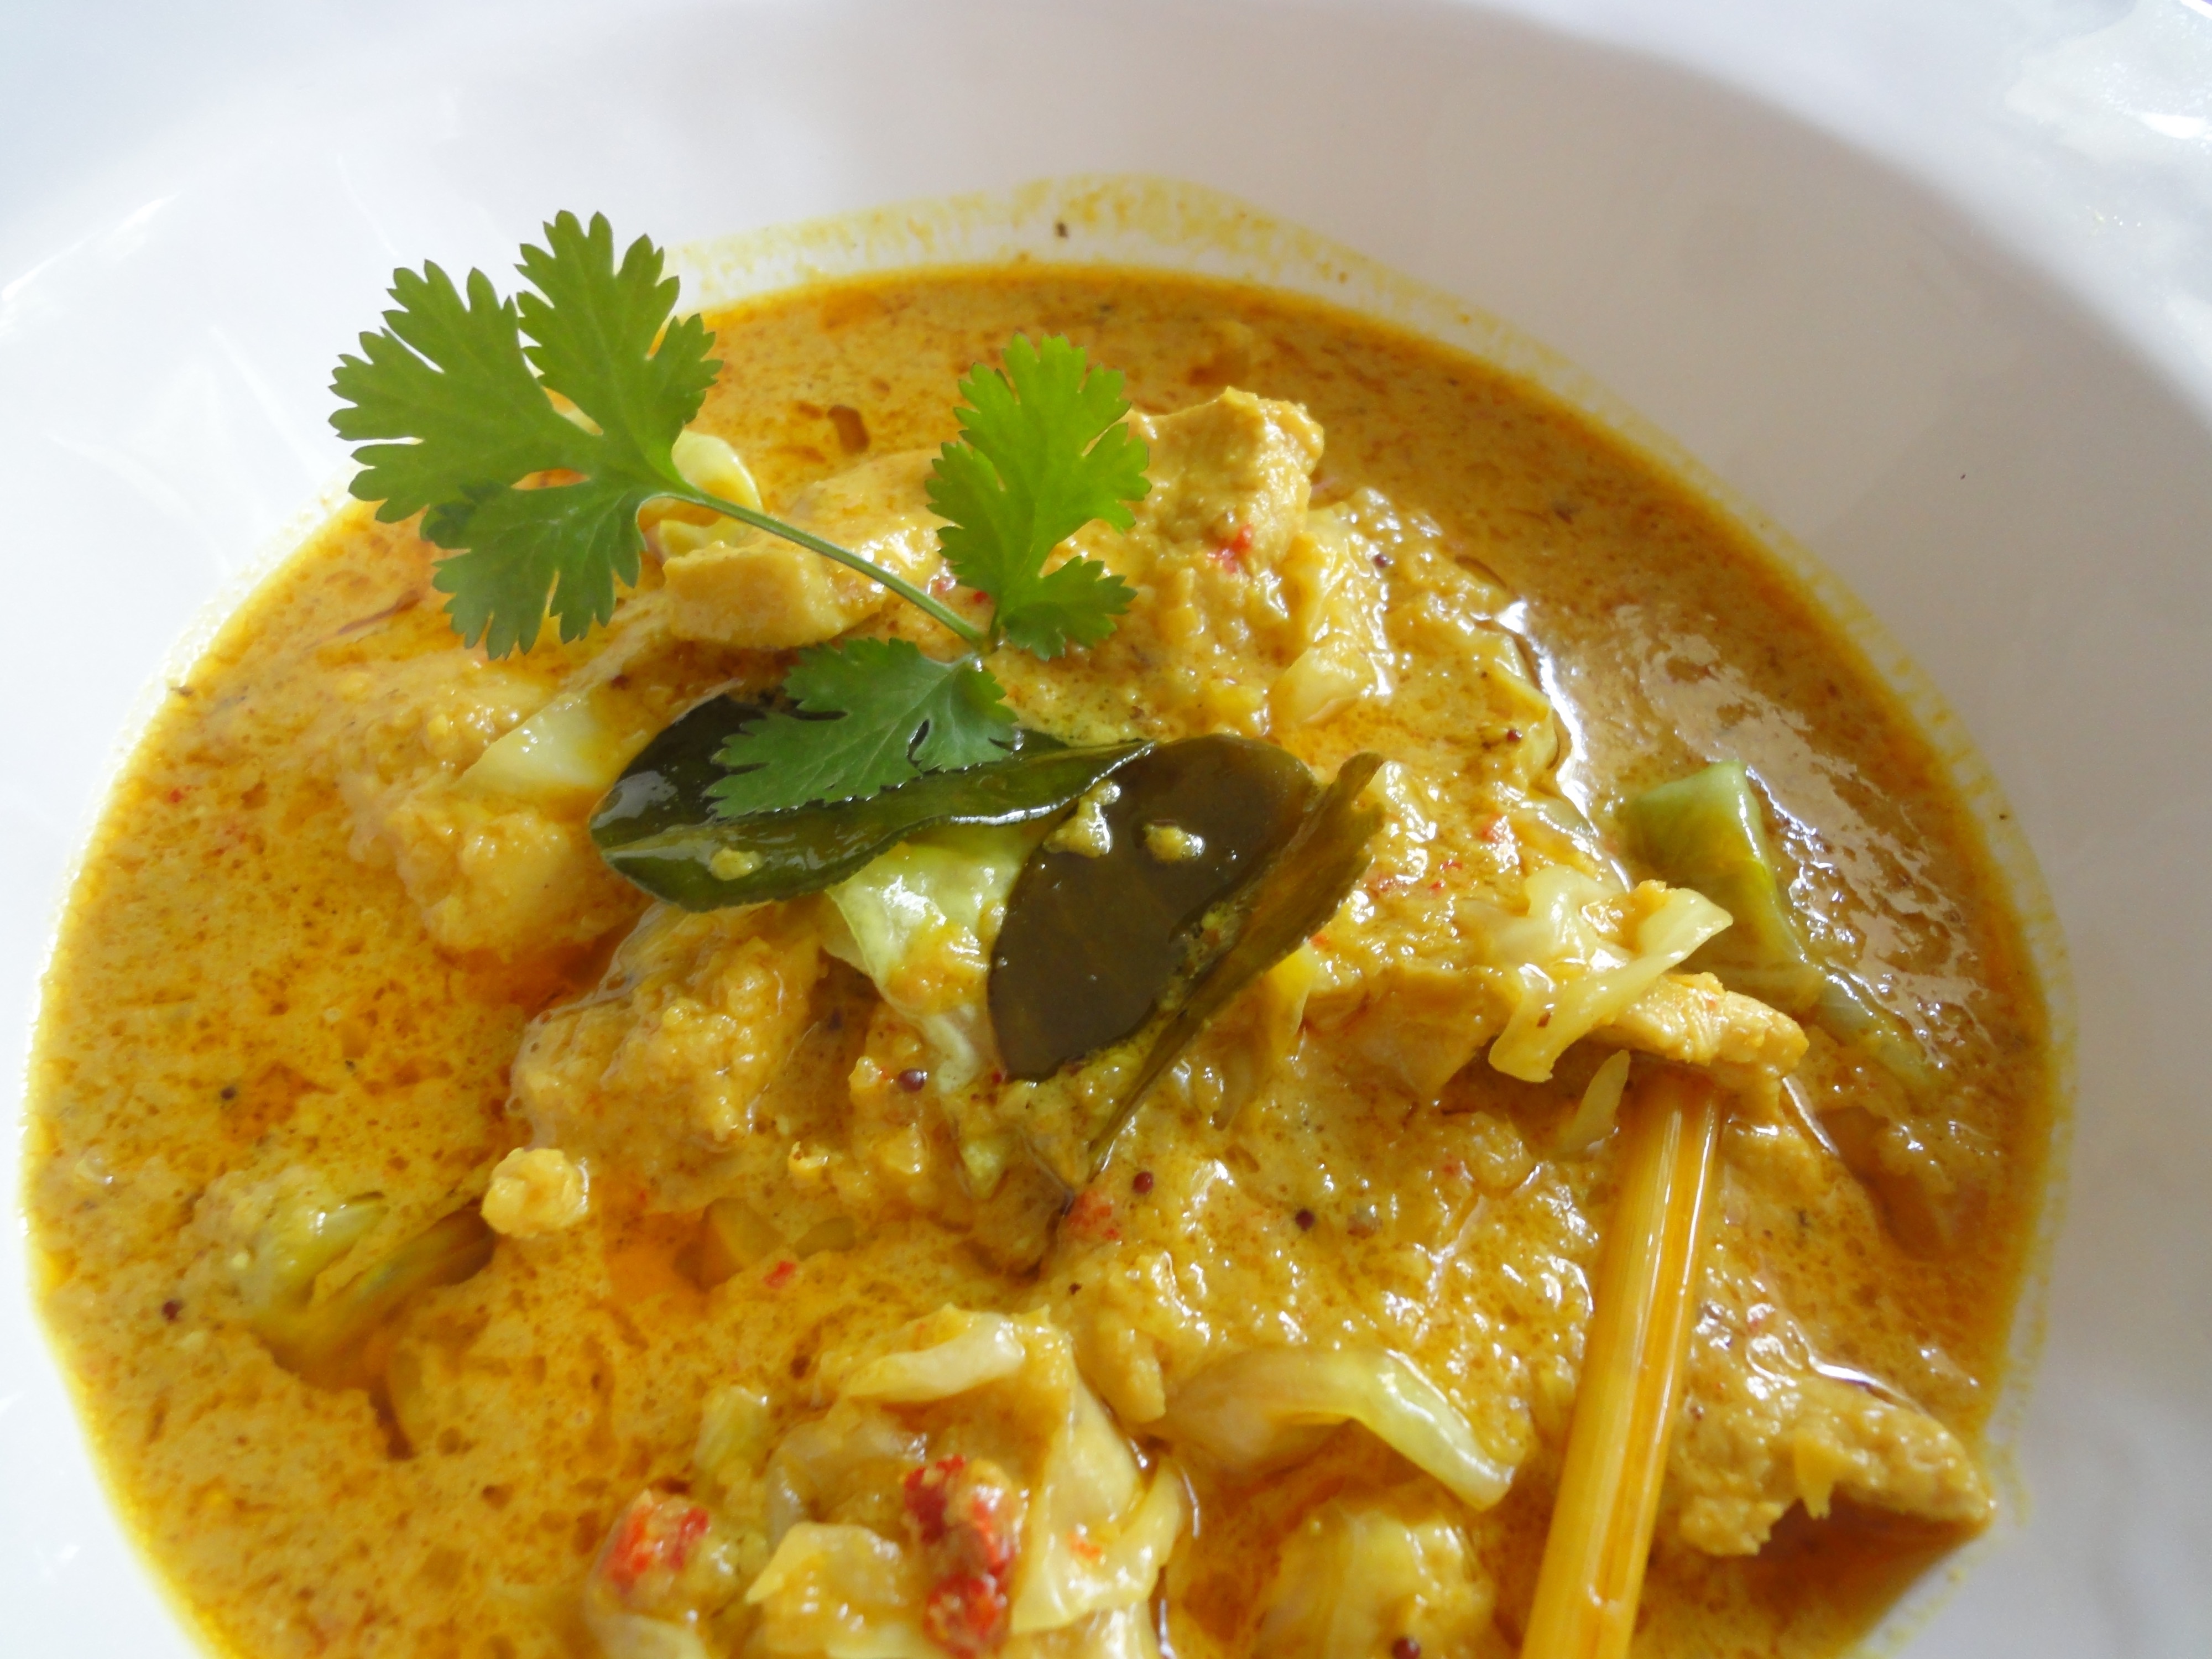
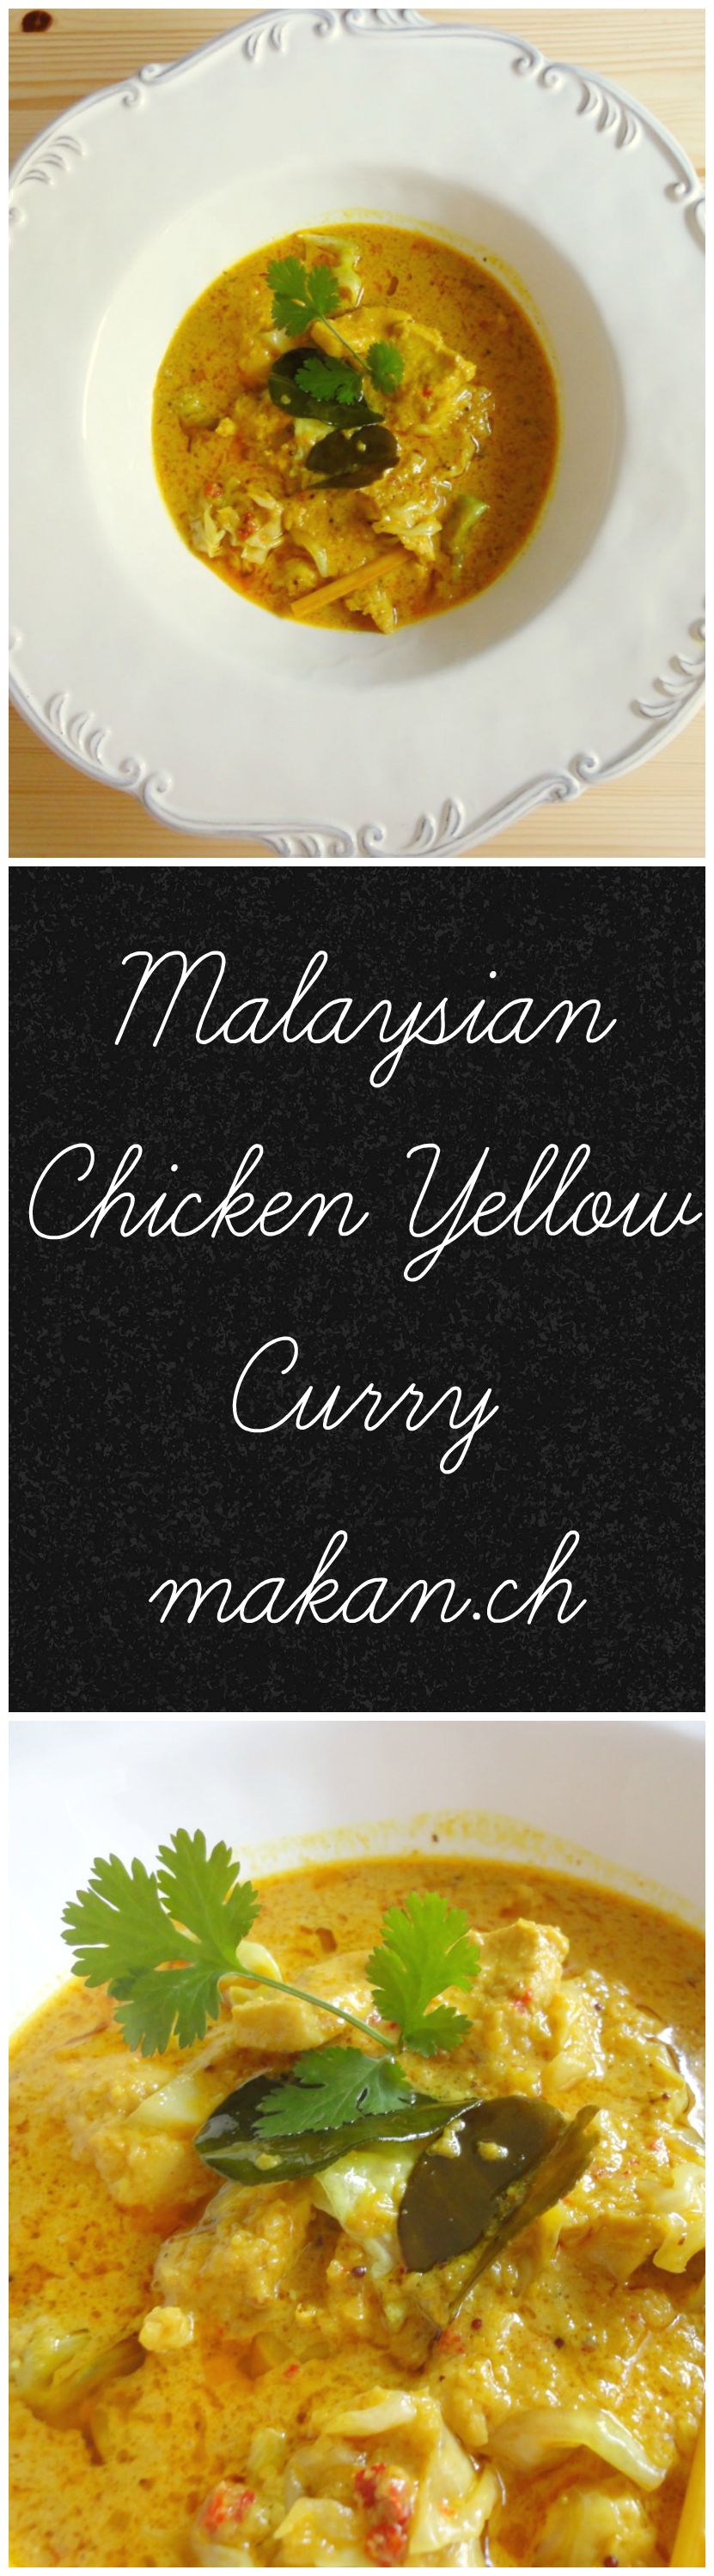
Malaysian Chicken Yellow Curry
Looks like Autumn has begun in Switzerland! Finally some cold days after a very hot summer. But don’t we all just complain about the weather? Whether or not it’s cold or hot, there is always something to complain about. I personally love the cold, that’s because I’m always at home and ready to snuggle up on my sofa with lots of pillows and blankets…and when it get’s colder, I have a great excuse to make some hot chocolate.
As with most Malaysian recipes, there’s no real precise measurement. There’s a word in Bahasa Malaysia which we use for this : agak-agak which means circa, to guess, approximately, more or less, or estimation. For unseasoned cooks, doing it the agak-agak way can turn out either really good, or really bad. I’ve had my fair share of bad dishes (but still edible) due to my bad agak-agakness. Malaysian cooking derives a lot from helping or watching the cooking parent or grandparent in the kitchen. Lucky for me, I use to love standing behind my mother while she cooked (mainly to get the first bite of it) and that has somehow worked out a little for me…I could have done more watching and paying attention.
Anyways, this recipe not an official Malaysian yellow curry. Every family has their own version of a yellow curry. It is also known as masak lemak which means (when directly translated) fattily cooked due to the use of coconut milk. The basics of a masak lemak dish consist of coconut milk, lemongrass and some chilli to spice it up. In this recipe, I also add kaffir lime leaves to give it a nice scent and flavour to the dish. This is totally optional, but you won’t regret it.
For the spice paste, this one is another Malaysian thing you have to learn. Westerners call it, fry till fragrant. But all these spices are already so fragrant before cooking, you might under cook it – resulting in less tasty dishes or just less in every aspect of it. We call it fry till the minyak pecah which means fry till the oil breaks. If that makes sense to you without any explanation then, thumbs up! It’s also quite hard to describe this minyak pecah thing. But I will try! It’s fry till the oil starts separating from the paste and the paste does not look emulsified. It has to look like a Hollandaise sauce that has split. This can take between 15-20 minutes, sometimes even more – depending on how much paste you are frying. If someone else has a better was of explaining this method, do send me an e-mail!
I wish you all the best of luck and hope you cooking this dish.
Ingredients
- 400g / 14oz Chicken
- Half White Cabbage
- 2 cups Thick Coconut Milk
Spice Paste (grounded or blended )
- 3 stalks (while part only ; reserve rest to fry) Lemongrass
- 1 medium sized Yellow Onion
- 2 medium sized Red Onion
- 4 cloves Garlic
- 2-inch Ginger
- 2-inch / 2 teaspoons Turmeric Root / Powder
- 8 pieces Candlenut
To fry
- 1 cup Peanut or Vegetable Oil
- 1 teaspoon Mustard Seeds
- 3 stalks (green part) Lemongrass
- 4 pieces Kaffir Lime Leaves
Directions:
- Cut chicken into small pieces. You can use any part of chicken.
- Shred cabbage into bite sized pieces and clean.
- Set aside
- Spice Paste
- Cut onions into quarters.
- Slice the white part of the lemongrass finely. Reserve the rest of the stalk for frying.
- Peel and slice ginger and turmeric root. You might want to use gloves if using turmeric root as the colour stains nails and fingers for a few days. Alternately, you can use 2 teaspoons of turmeric powder to substitute.
- Add all into food processor or blender together with chillies, and candlenuts.
- Blend till it forms a smooth paste or till you can’t see the fibres from lemongrass.
- Set aside.
- To fry
- In a wok or large pan over medium high heat, add spice paste and green part of the lemongrass.
- Stir fry for 15 minutes or till the paste starts breaking up. *see above text for some explanations*
- Once paste is ready, add mustard seeds and fry for a minute.
- Add chicken and fry in the paste for 2 minutes.
- Add kaffir lime leaves.
- Stir in coconut milk and 1/2 cup water (optional).
- Let it simmer till chicken cooks and the gravy thickens.
- Add in cabbage and simmer till soften.
- Season with salt.
- Serve immediately with steamed white rice or let the curry sit for a few hours before serving. This improves the flavour.
Tips:
- Curry will taste better the next day
- Take out lemongrass stalk and kaffir leaf before serving
- Cups to Grams conversions
Enjoy!

Yellow Curry served with freshly steamed white rice.